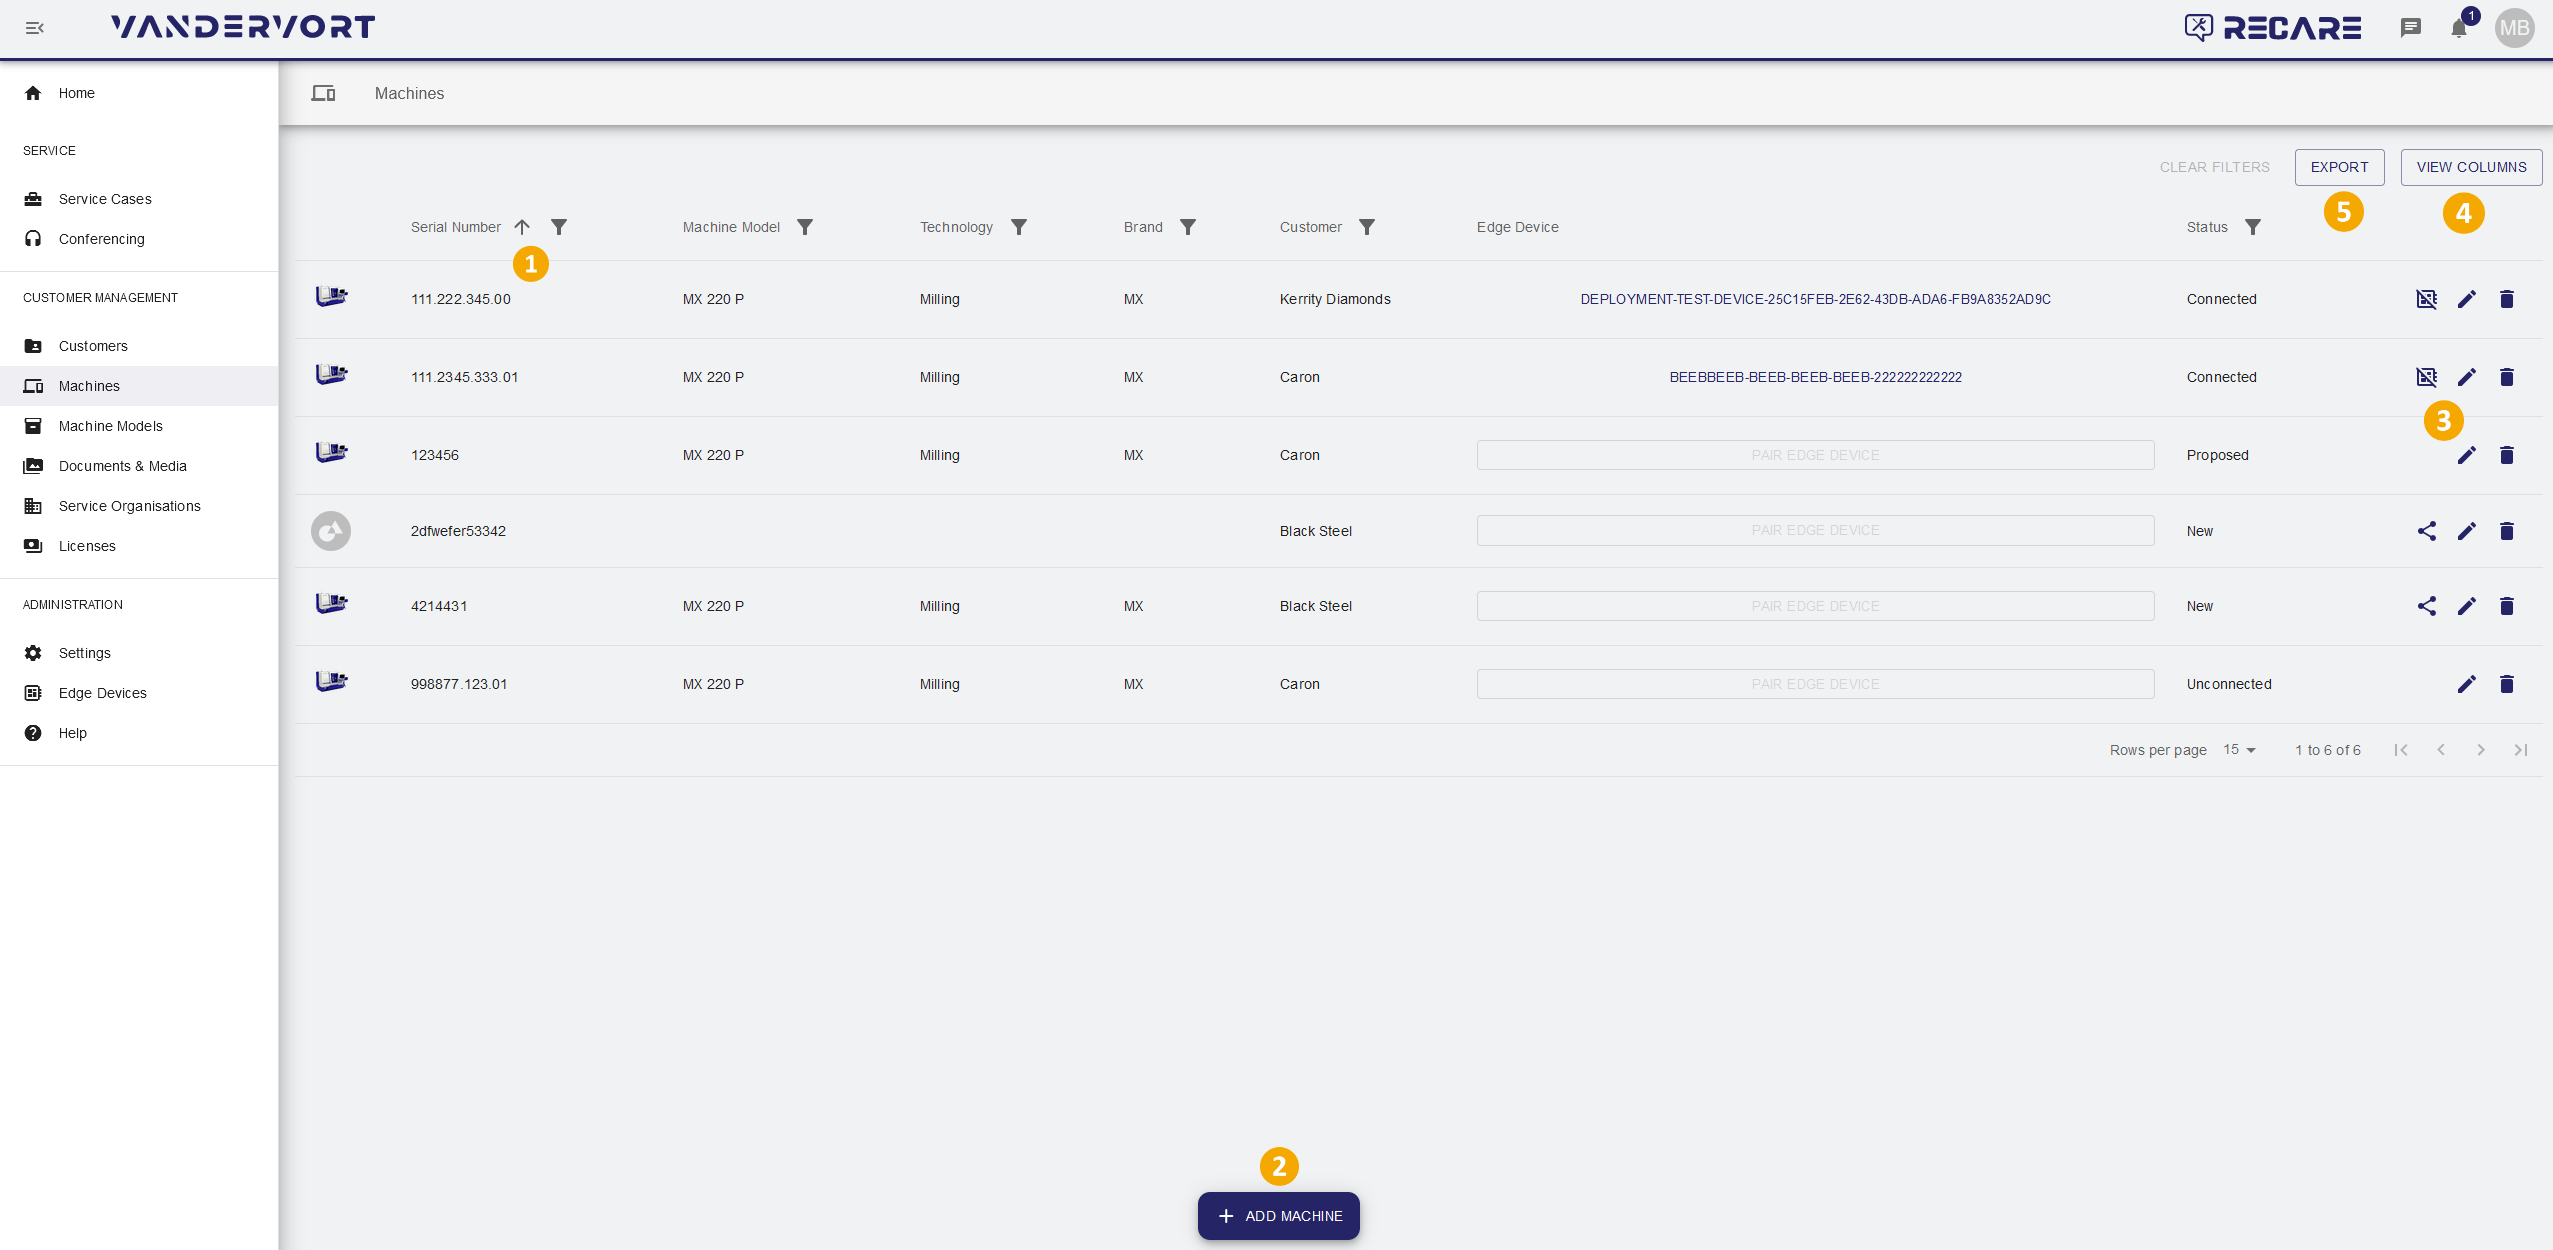
The Machines module shows a list of all customer machines of your tenant where the user has access to, along with the following infos:
- Serial number
- Serial number of the machine.
- This information is shared between customer machine of the service provider and the linked asset of the operator.
- Machine model
- Shows the selected machine model of the machine. Some configurations (e.g. tunnel configurations) and categories (e.g. brand or technology), are inherited from the machine model.
- Technology
- Is inherited from the machine model.
- Customer
- The customer the machine has been produced for and/or sold to.
- Warranty
- Shows the entered warranty of the machine.
- In the default mode, an expired warranty has no effect on the functions of the linked asset on customer side.
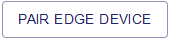
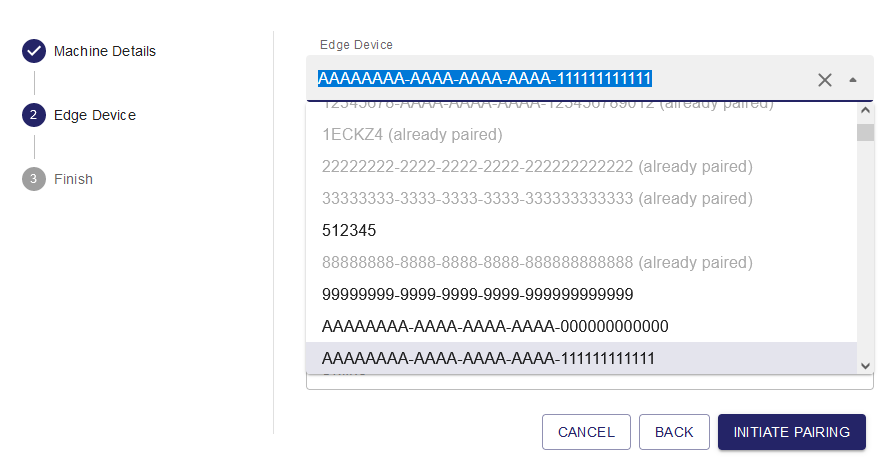
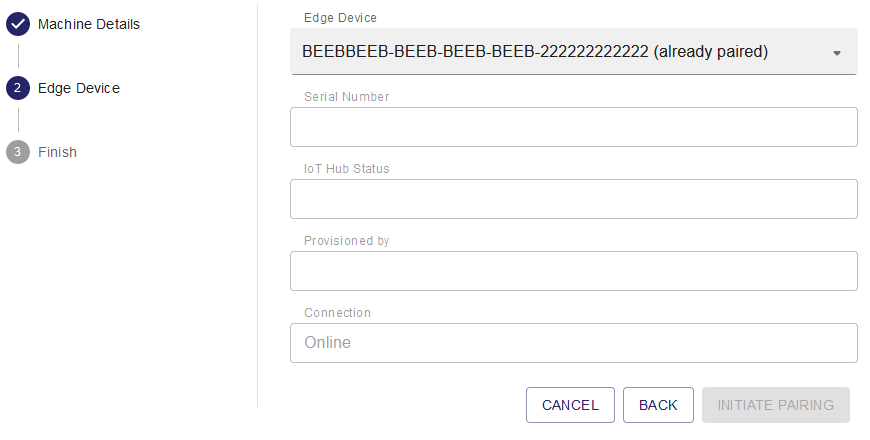
- Pair edge device
- If no edge device is paired, a button is displayed that opens the PAIR EDGE DEVICE function. This button only works with an onboarded customer.
- If an edge device is paired to the customer machine, the edge device serial number is displayed.
- Connection status
- The connection status of the customer machine shows if this machine is linked to an asset on the customer side.
- New
- The customer machine is NOT linked to an asset of the customer
- It has no influence on the status NEW if an edge device is paired or not.
- This customer machine is licensed as an unconnected machine on the platform
- Proposed
- The customer machine has been proposed to the customer to provide service, but this proposal has not been accepted so far
- It has no influence on the status NEW if an edge device is paired or not.
- This customer machine is licensed as an unconnected machine on the platform
- Unconnected
- The customer machine is linked to an asset on the customer side, but NO edge device is paired.
- This customer machine is licensed as an unconnected machine on the platform.
- Connected
- The customer machine is linked to an asset and as well an edge device is paired
- This customer machine is licensed as a connected machine on the platform.
| Info |
|---|
| Unconnected and connected machines are usually NOT free of charge and will be licensed and billed by the platform provider. For additional information please read the SaaS agreement. |
New machines can be added to a customer and existing machines can be edited and proposed to customers in this module.
Main View
List of machines assigned to a selected customer.
|
| ||
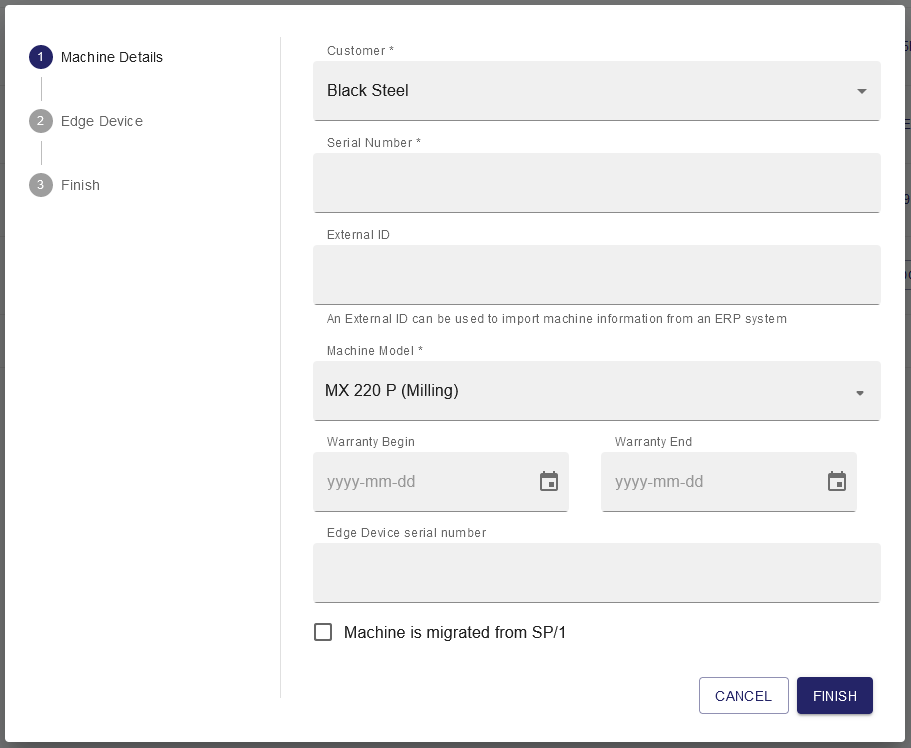
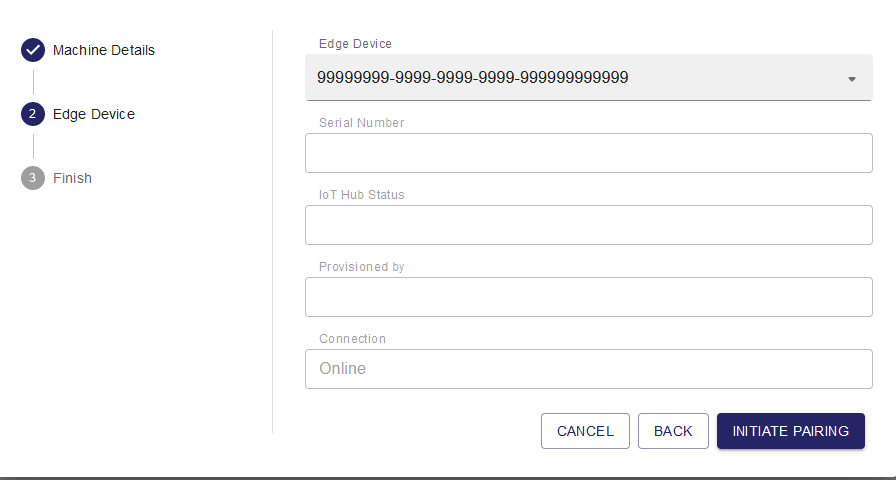
Add a new machine by clicking the  button. button. | A dialog for entering the machine details opens.
or
|  | |
|
| ||
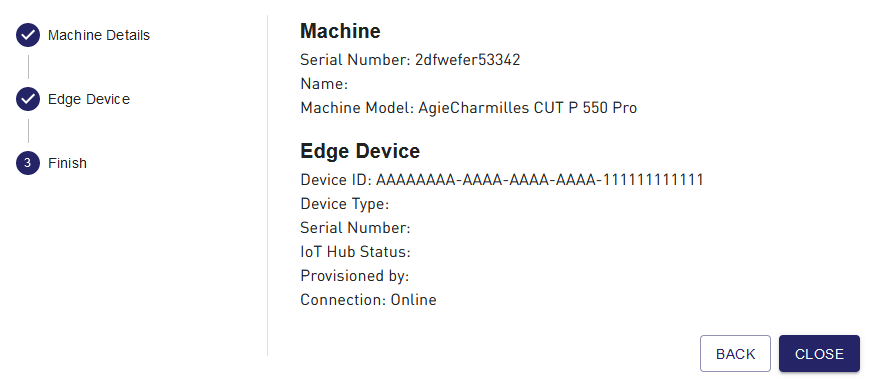
The machine is now paired with an edge device and all info is displayed at a glance.
|  | ||
| |||


 button.
After clicking the
or
|  | |
|
| |
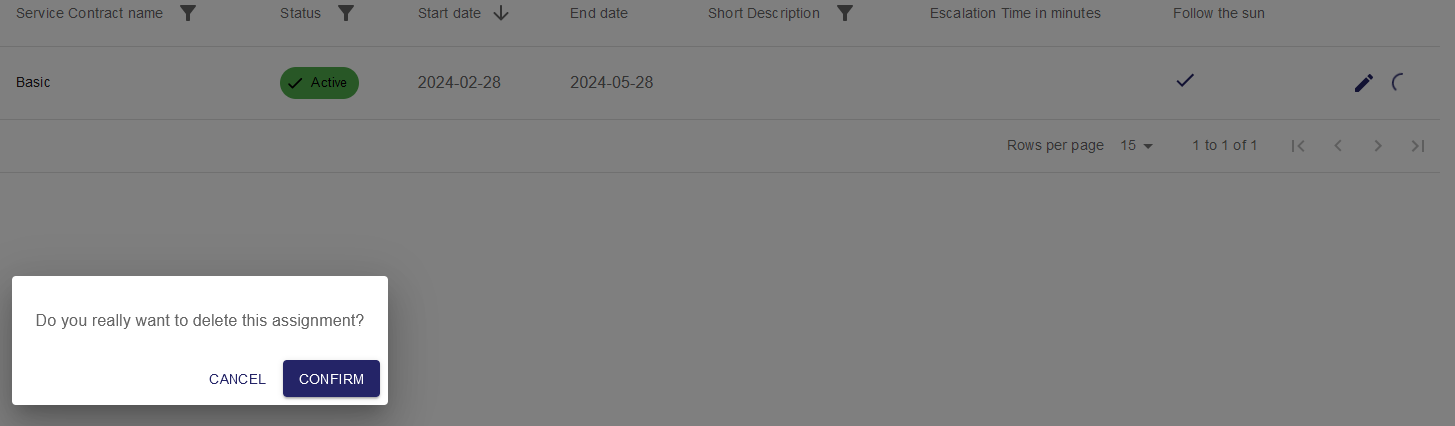
| Customer machines can be deleted from the platform if no longer needed or created as a test. Keep in mind that Service Cases for this machine can no longer be opened once the machine has been deleted. Depending on the state and the linked object, the deletion behavior differs:
|
|
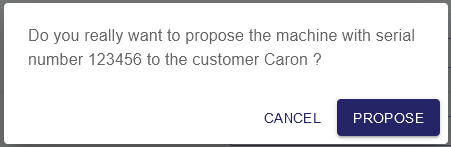
| A dialog opens to confirm the proposal of providing service for the respective machine to the customer.
|  |


| After proposing the customer machine to the customer (machine state = proposed), this proposal can be revoked. The status of the customer machine will be set back to New. Afterwards it is possible to send a new asset proposal to the customer. |
| |||
| A dialog opens to change the status of the machine from Connected to Unconnected and remove the edge device from the machine.
|  | |||
|
The selections will be permanently stored for your user and can be reset to factory setting by clicking |
| |||
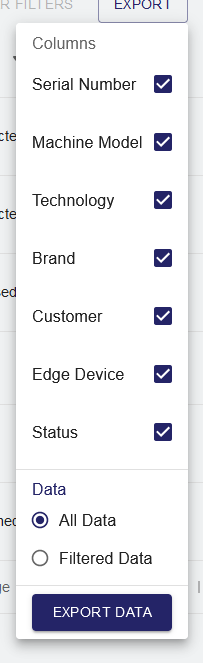
|
|
A CSV file will be generated and saved to your downloads folder:
|
|


| Anchor | ||||
|---|---|---|---|---|
|
- Choose an entry from the list of machines in the main view to display the machine detail view.
Here, your machine details are displayed on left hand side.
Between the two tabs on the right hand side, you can choose to display your Service Contracts and your Service Cases.
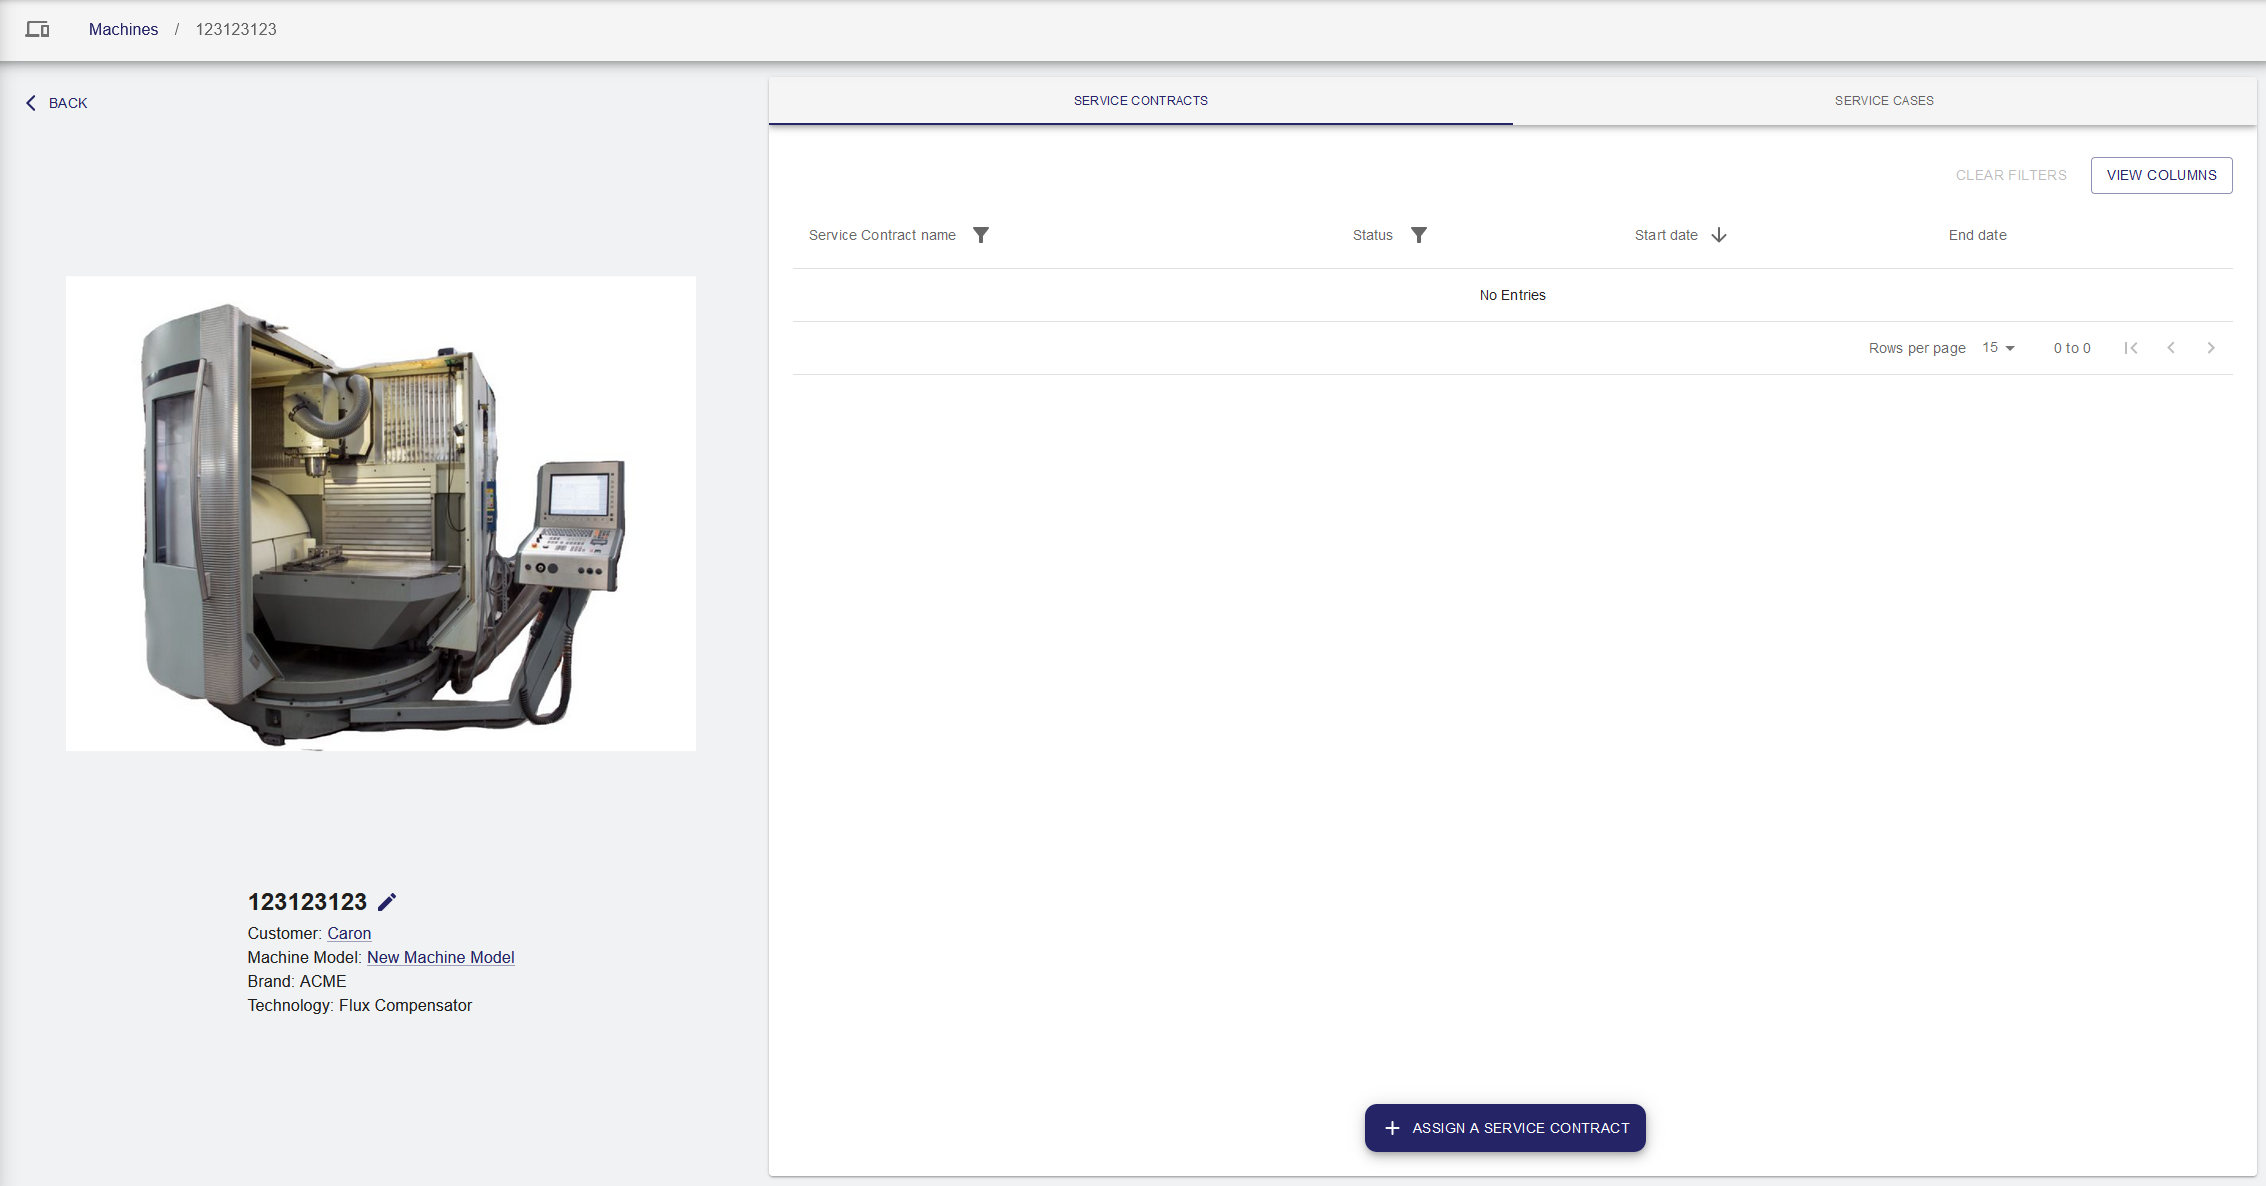
Service Contracts
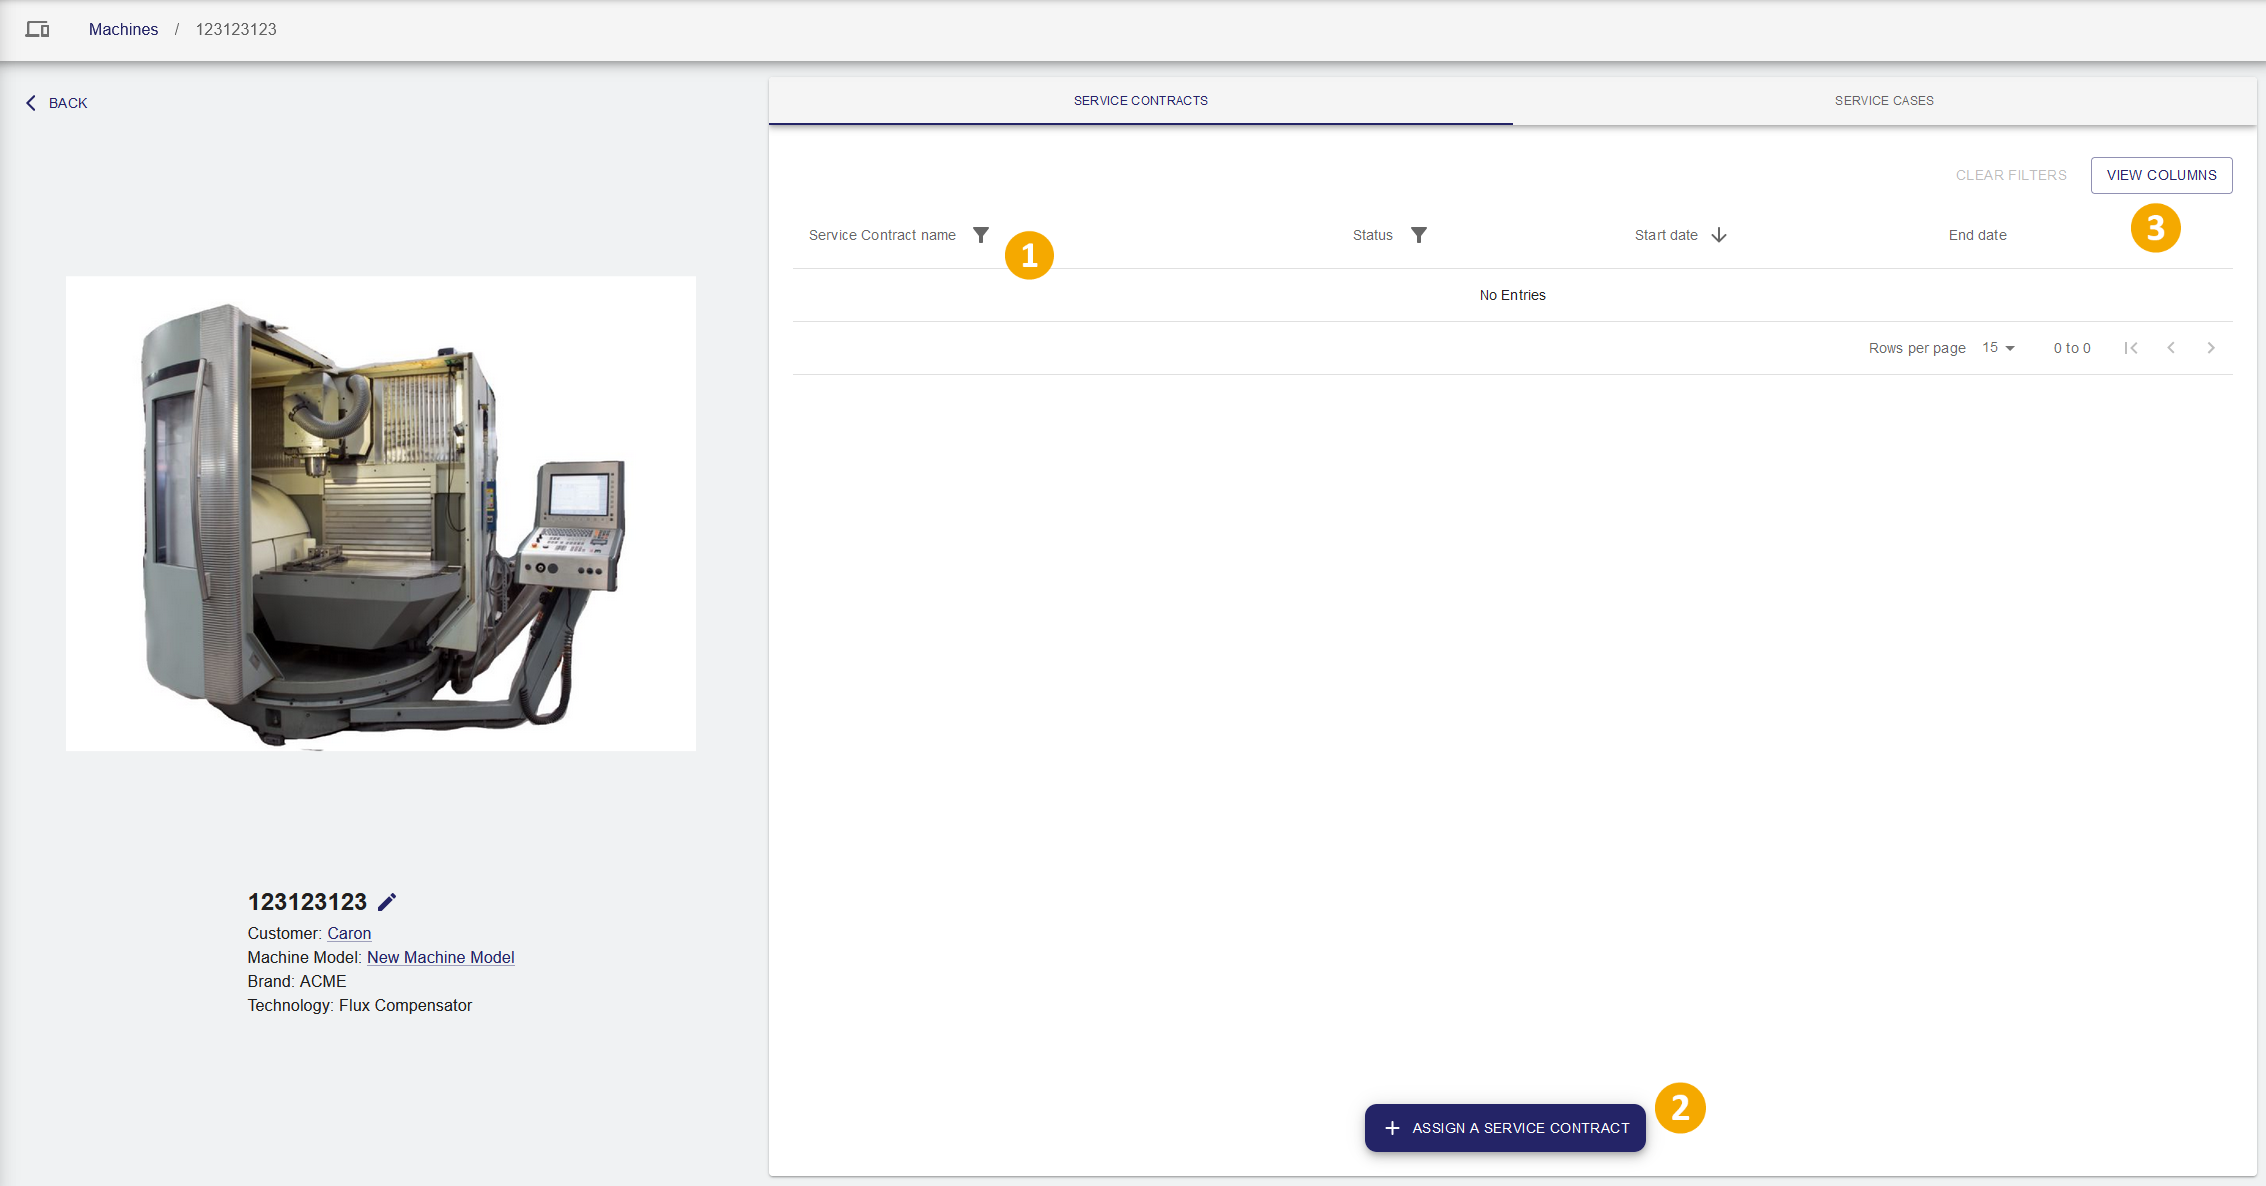
Service contracts can be created by the symmedia Consulting team.
Service Provider users with the role Customer Data Manager can assign a service contract to a customer machine.
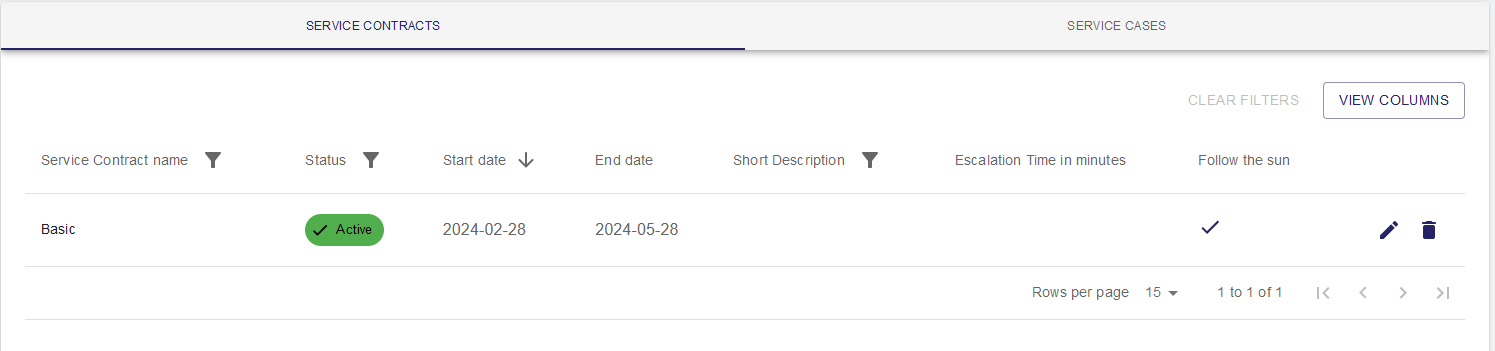
List of Service Contracts.
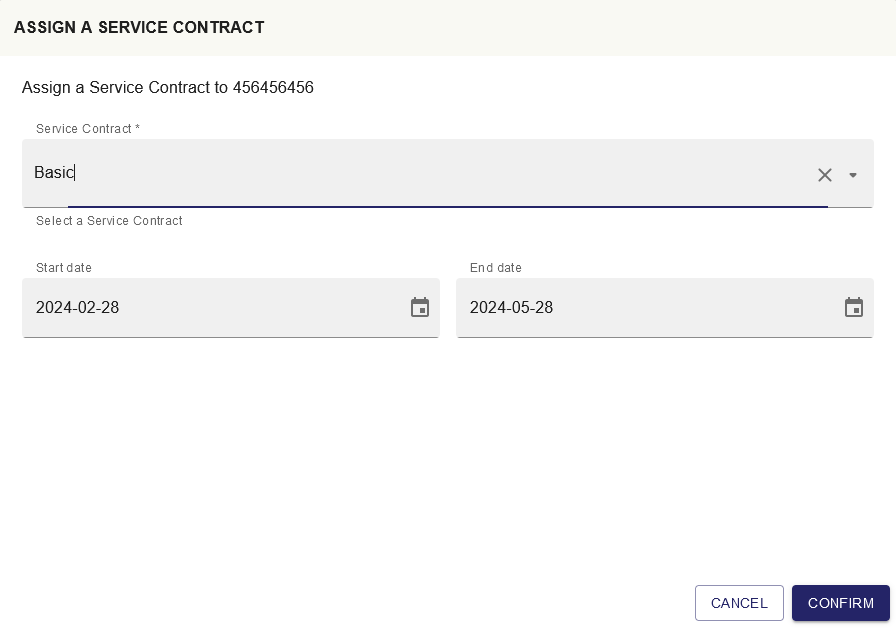
|
| ||
|
|
| |
| The service contract is now assigned to the machine. |
| ||
|
| ||
The selections will be permanently stored for your user and can be reset to factory setting by clicking | 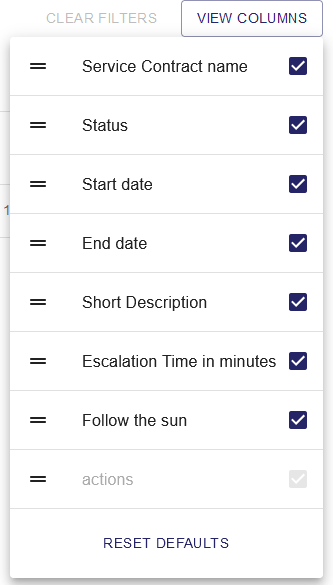 | ||


Service Cases
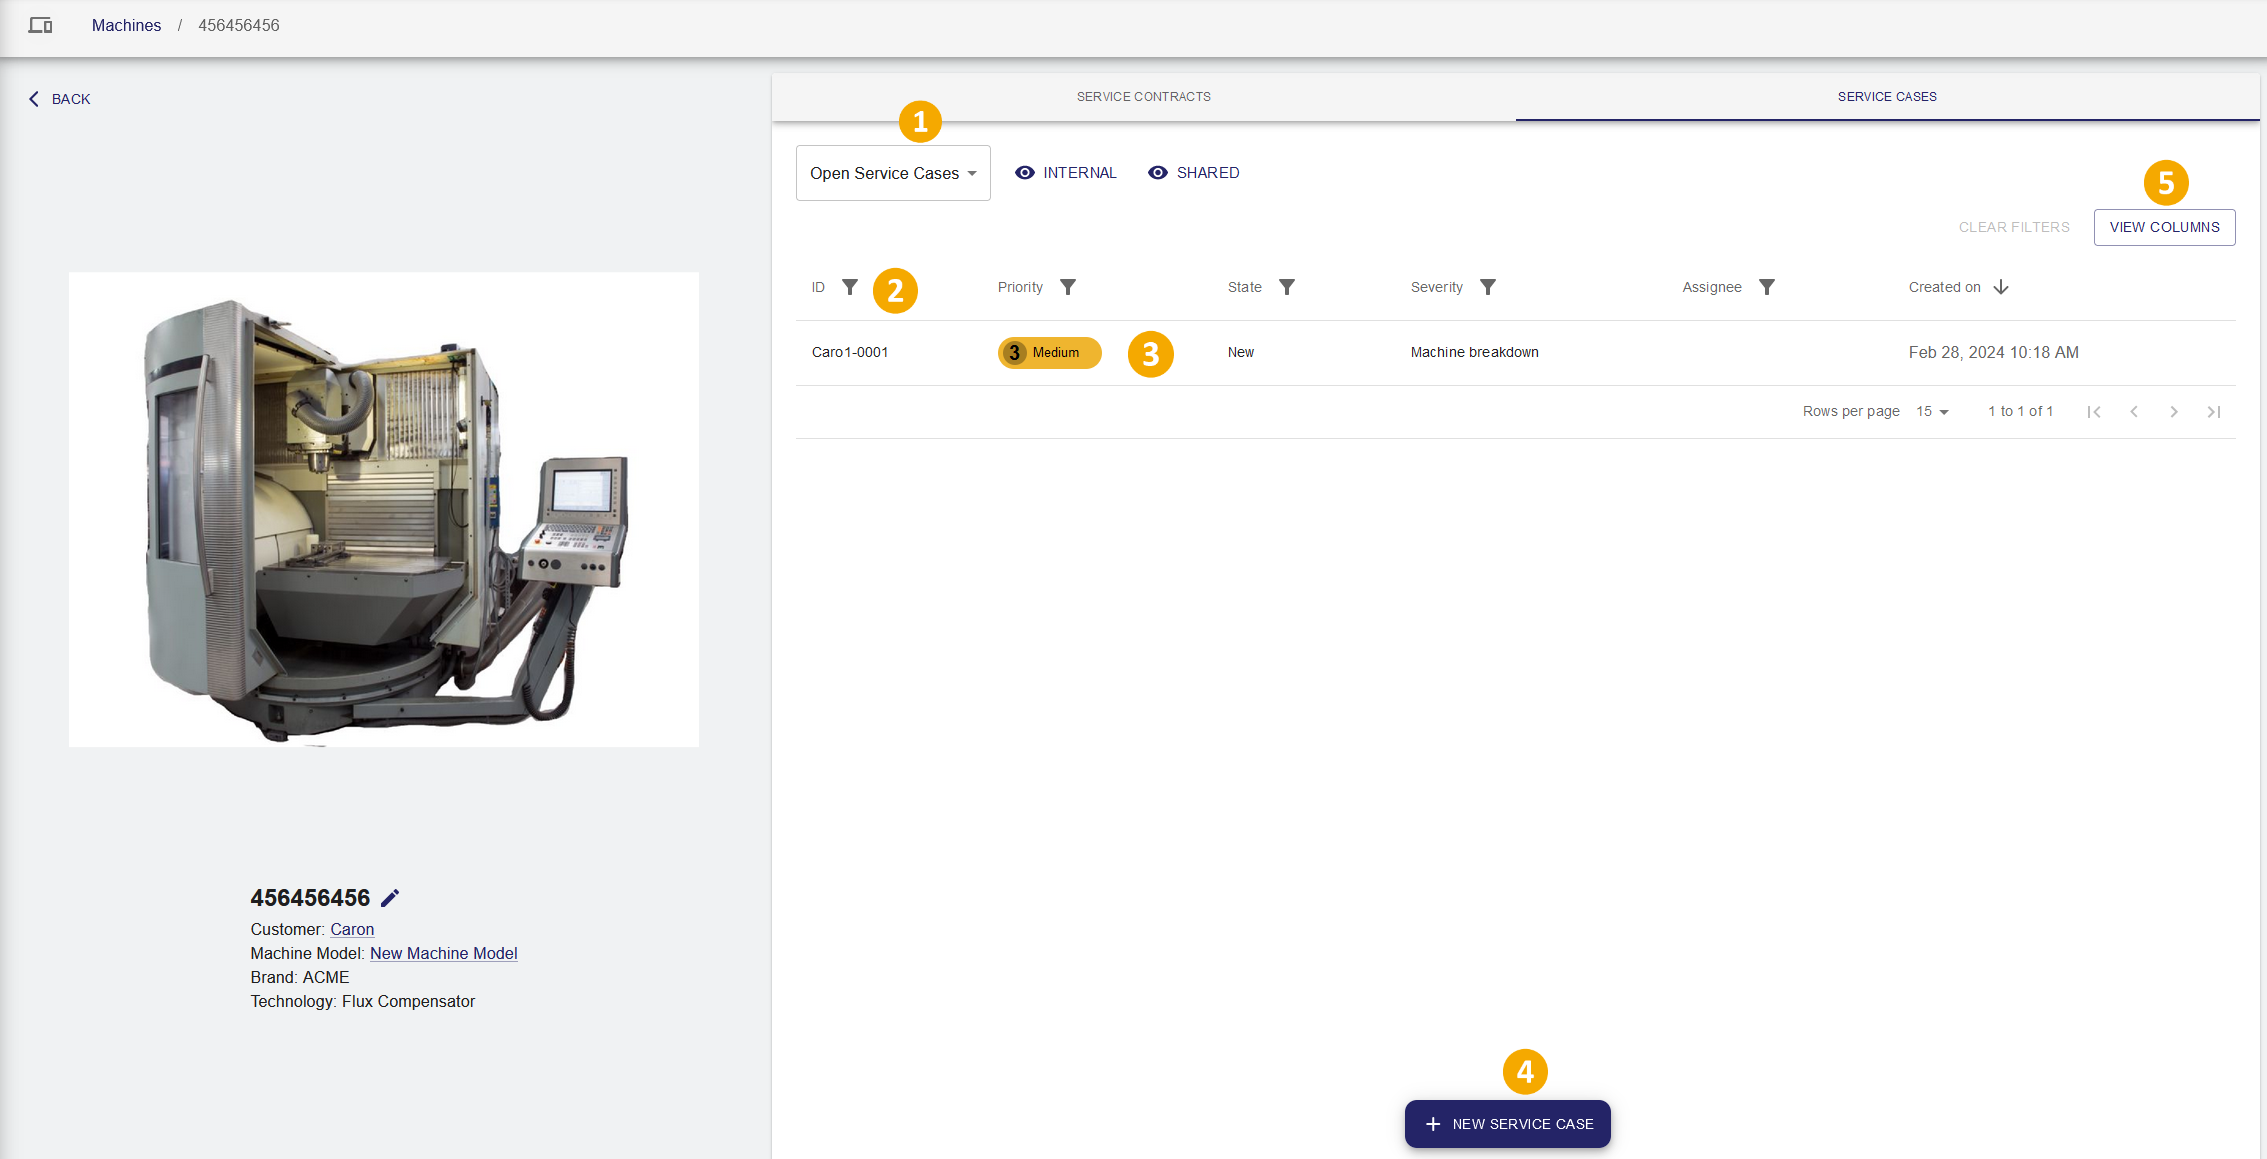
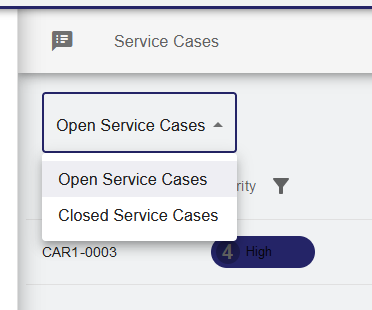
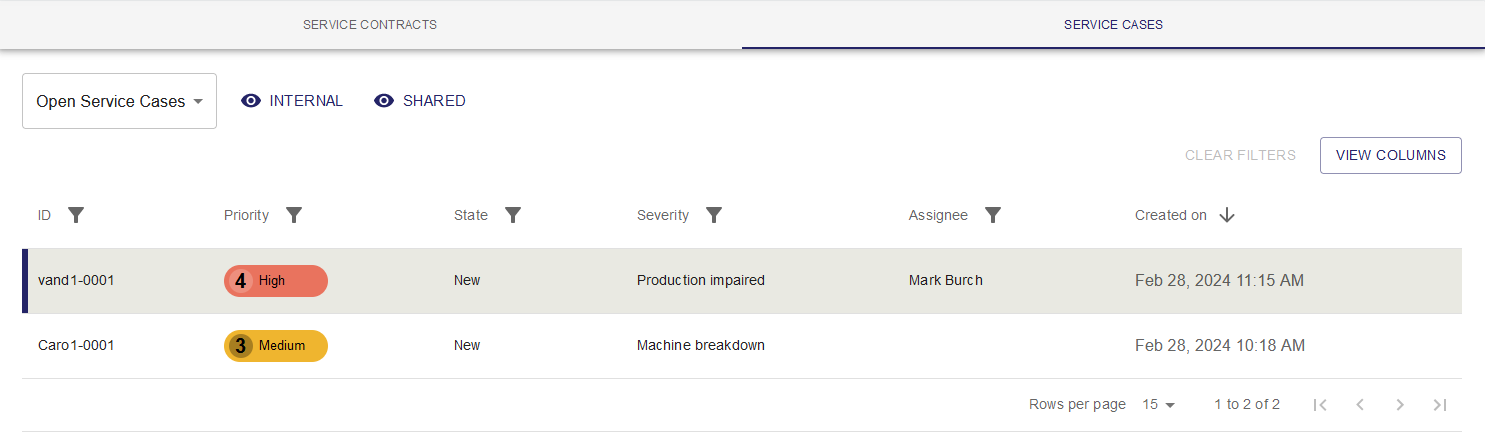
- Click on the dropdown box to display open / closed service cases.
List of available service cases.
- Sort the list by using the

 buttons in the top row.
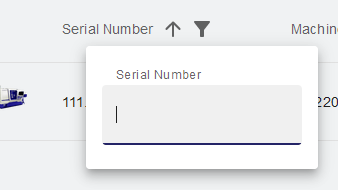
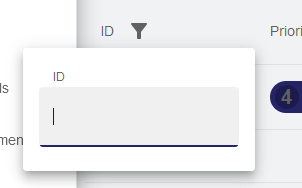
 - Search for a certain term within a respective column using the filter button
 and typing something into the search field.
- Click into a row to open the service case detail view and correspondence.
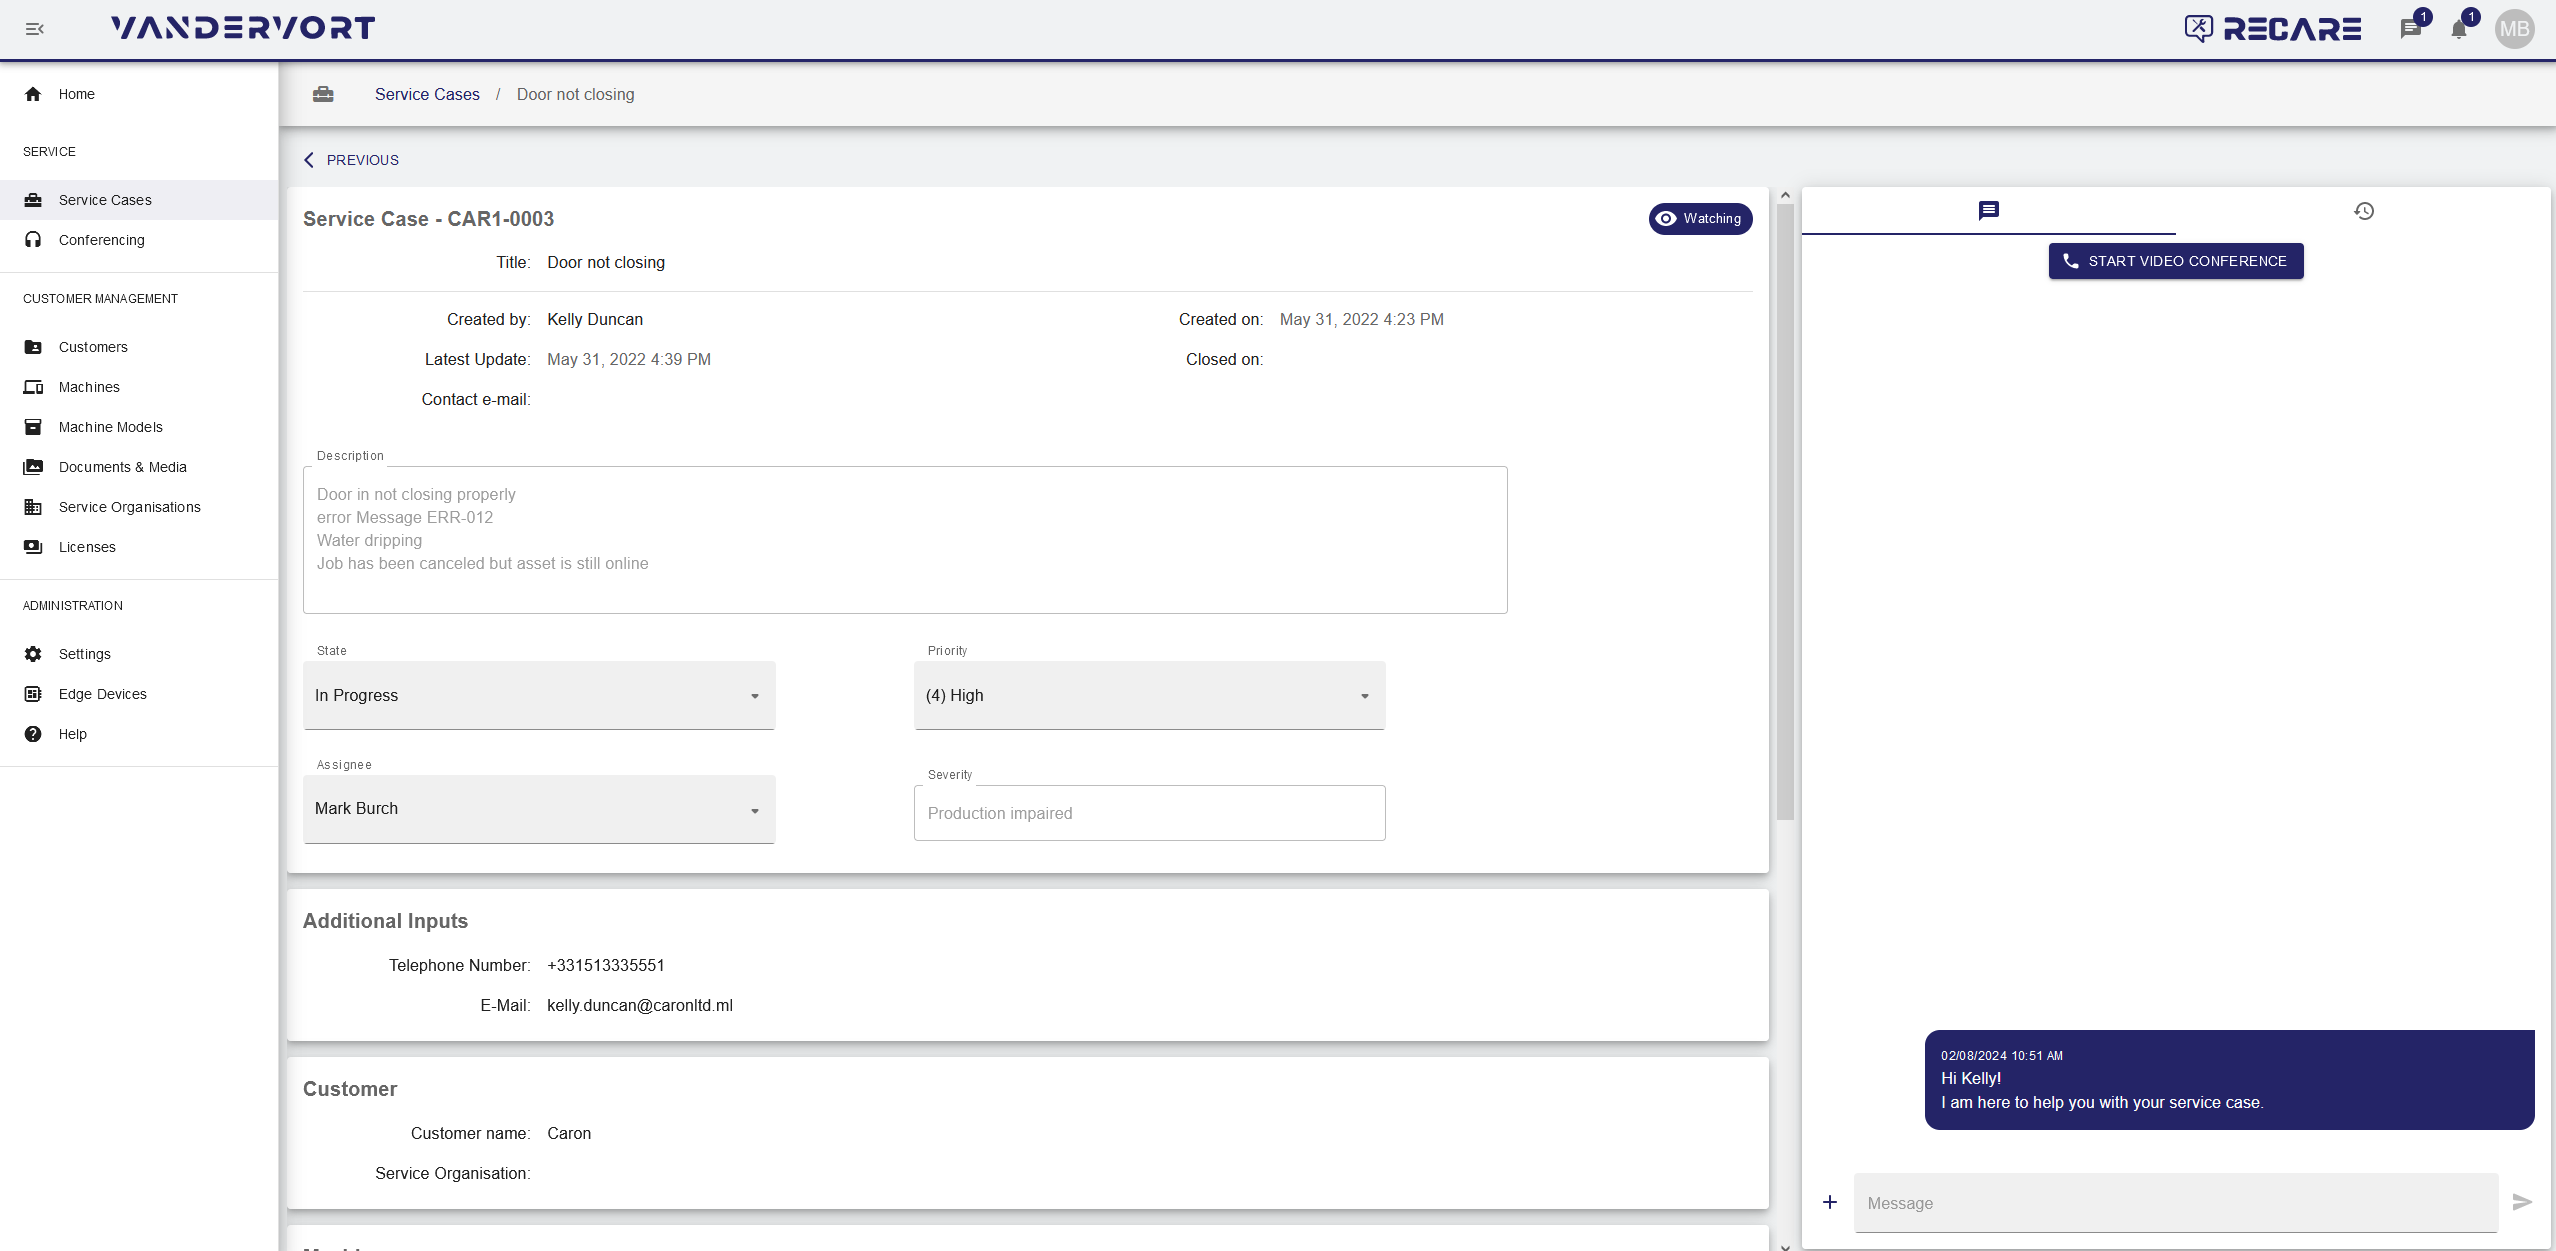
- Click on
 to open a new service case as a Service Provider.
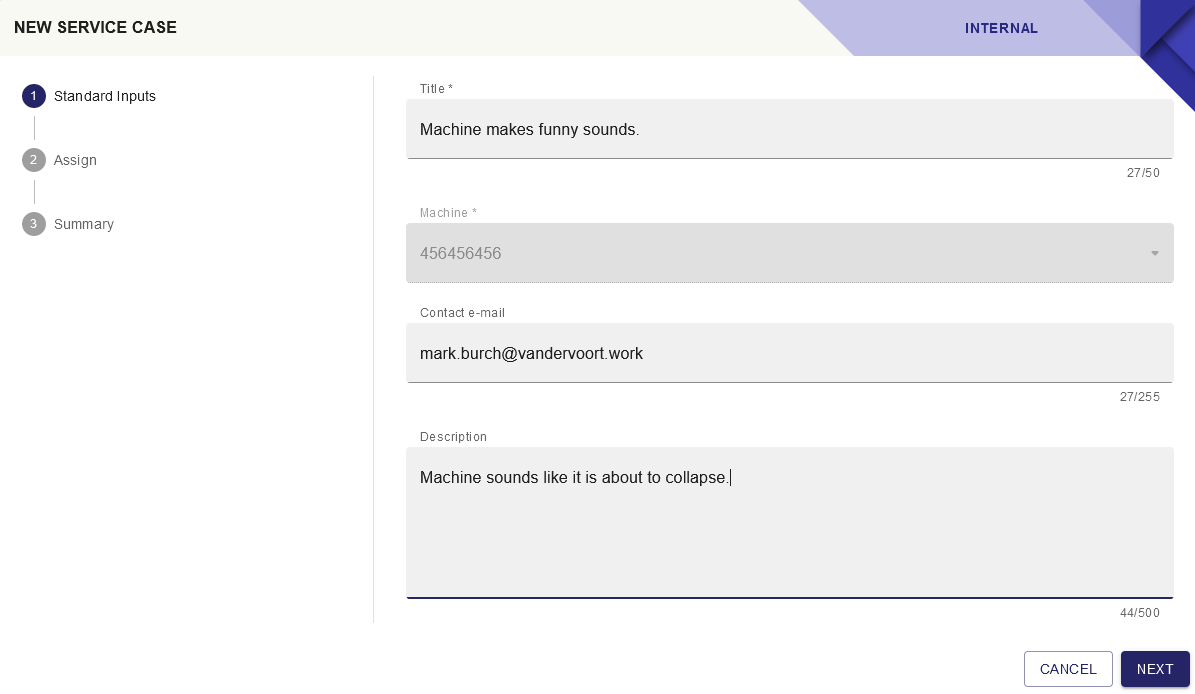
Standard Inputs.
- Type a title for the service case into the Title field (mandatory).
- Type a contact email address for the service case into the field Contact e-Mail.
- Add a description for the service case in the field Description.
- Proceed by clicking
 .
.
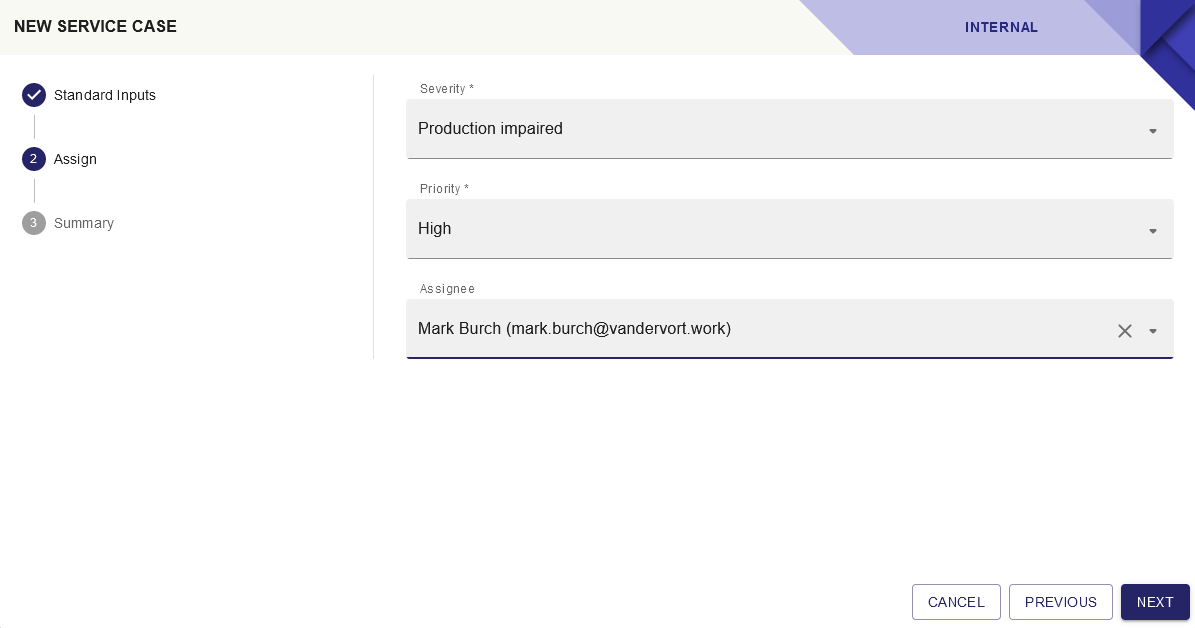
Assignee.
- Choose a severity for the impairment of the machine from the Severity dropdown list.
- Choose a priority (trivial, low, high, blocker) from the Priority dropdown list.
- Choose an assignee for this service case from the Assignee dropdown list.
- Proceed by clicking .
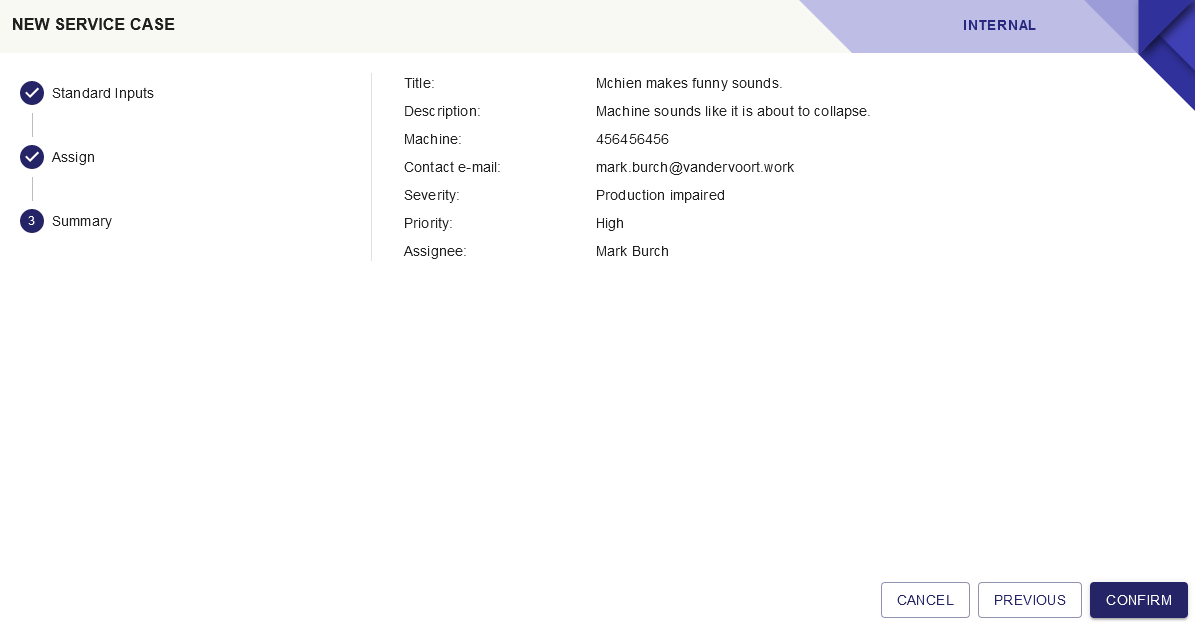
Summary.
A summary of your input is displayed.
- If all input is correct, create the new service case by clicking
 .
.
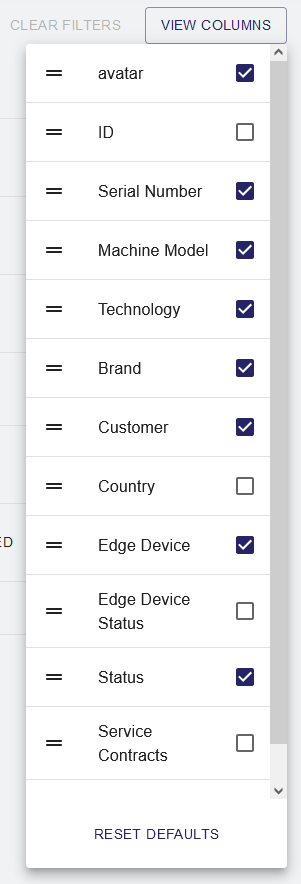
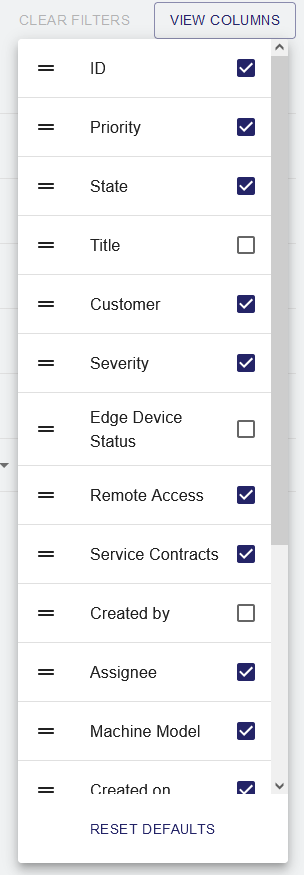
- Customize the displayed columns by clicking on
 .
.- Check the entries from the list of columns to be displayed in the overview.
- Align the sequence of the entries by dragging & dropping the entries in your desired order.
The selections will be permanently stored for your user and can be reset to factory setting by clicking  .
.
View Service Cases page for details.
| Page Properties | ||||||||||||||||||||||||||||||||||||||||||||||||||||||||||||||
|---|---|---|---|---|---|---|---|---|---|---|---|---|---|---|---|---|---|---|---|---|---|---|---|---|---|---|---|---|---|---|---|---|---|---|---|---|---|---|---|---|---|---|---|---|---|---|---|---|---|---|---|---|---|---|---|---|---|---|---|---|---|---|
| ||||||||||||||||||||||||||||||||||||||||||||||||||||||||||||||
|