Customers
- Thorsten Boedeker
The Customers module lists all customers with their respective information. This includes general information, the connected assets and the current status of the job. New customers can be invited and new machines can be registered to the platform here.
Main View

Display of the customer lifecycle. Status:
You can filter the list by the status by clicking on the respective status panel. | |||
List of stored customers.
|
| ||
Registered Machines This entry shows the number of customer machines added to the list and how many of them are linked to assets on the customer side. → 3/8 means: three customer machines connected to customer assets out of 8 totally added machines in the list. | |||
| In the Machines list, new machines can be added and existing machine information can be edited. This is explained in detail in the Machines help. |
| |
|
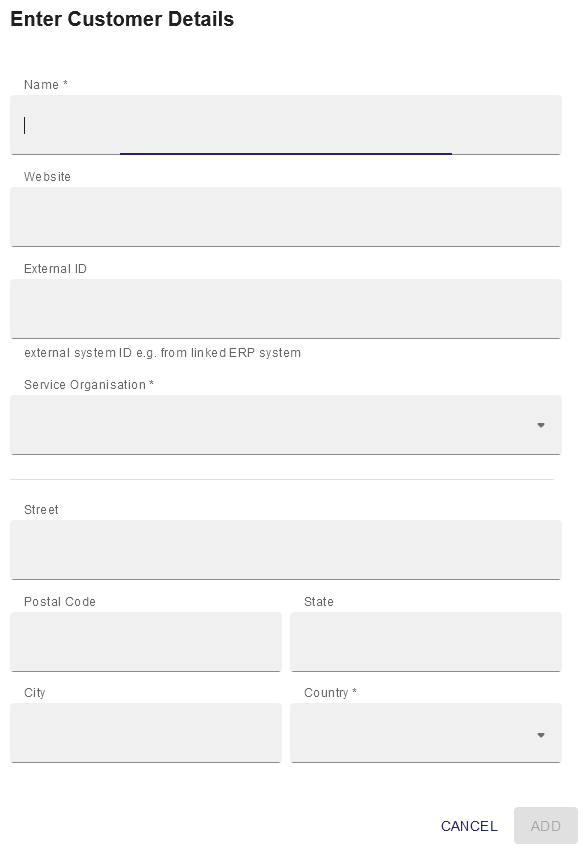
After a new customer was added, he appears in the list of customers in the main view. |
| |
|
A CSV file will be generated and saved to your downloads folder:
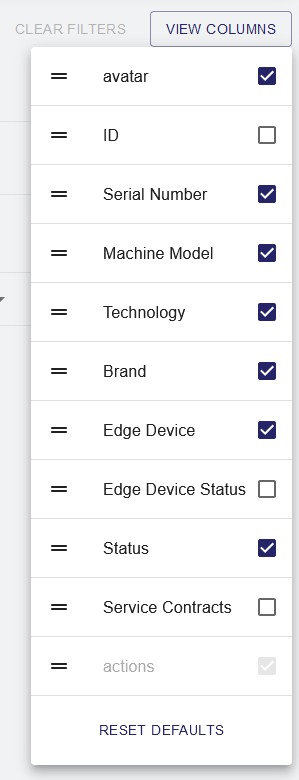
It is only possible to select and export the columns that are currently visible in the table. If want to export further columns they need to be added to the table as described under |  | |
|
|
The selections will be permanently stored for your user and can be reset to factory setting by clicking |
|


Customer Detail View
- Choose an entry from the list of customers in the main view to display the customer detail view.
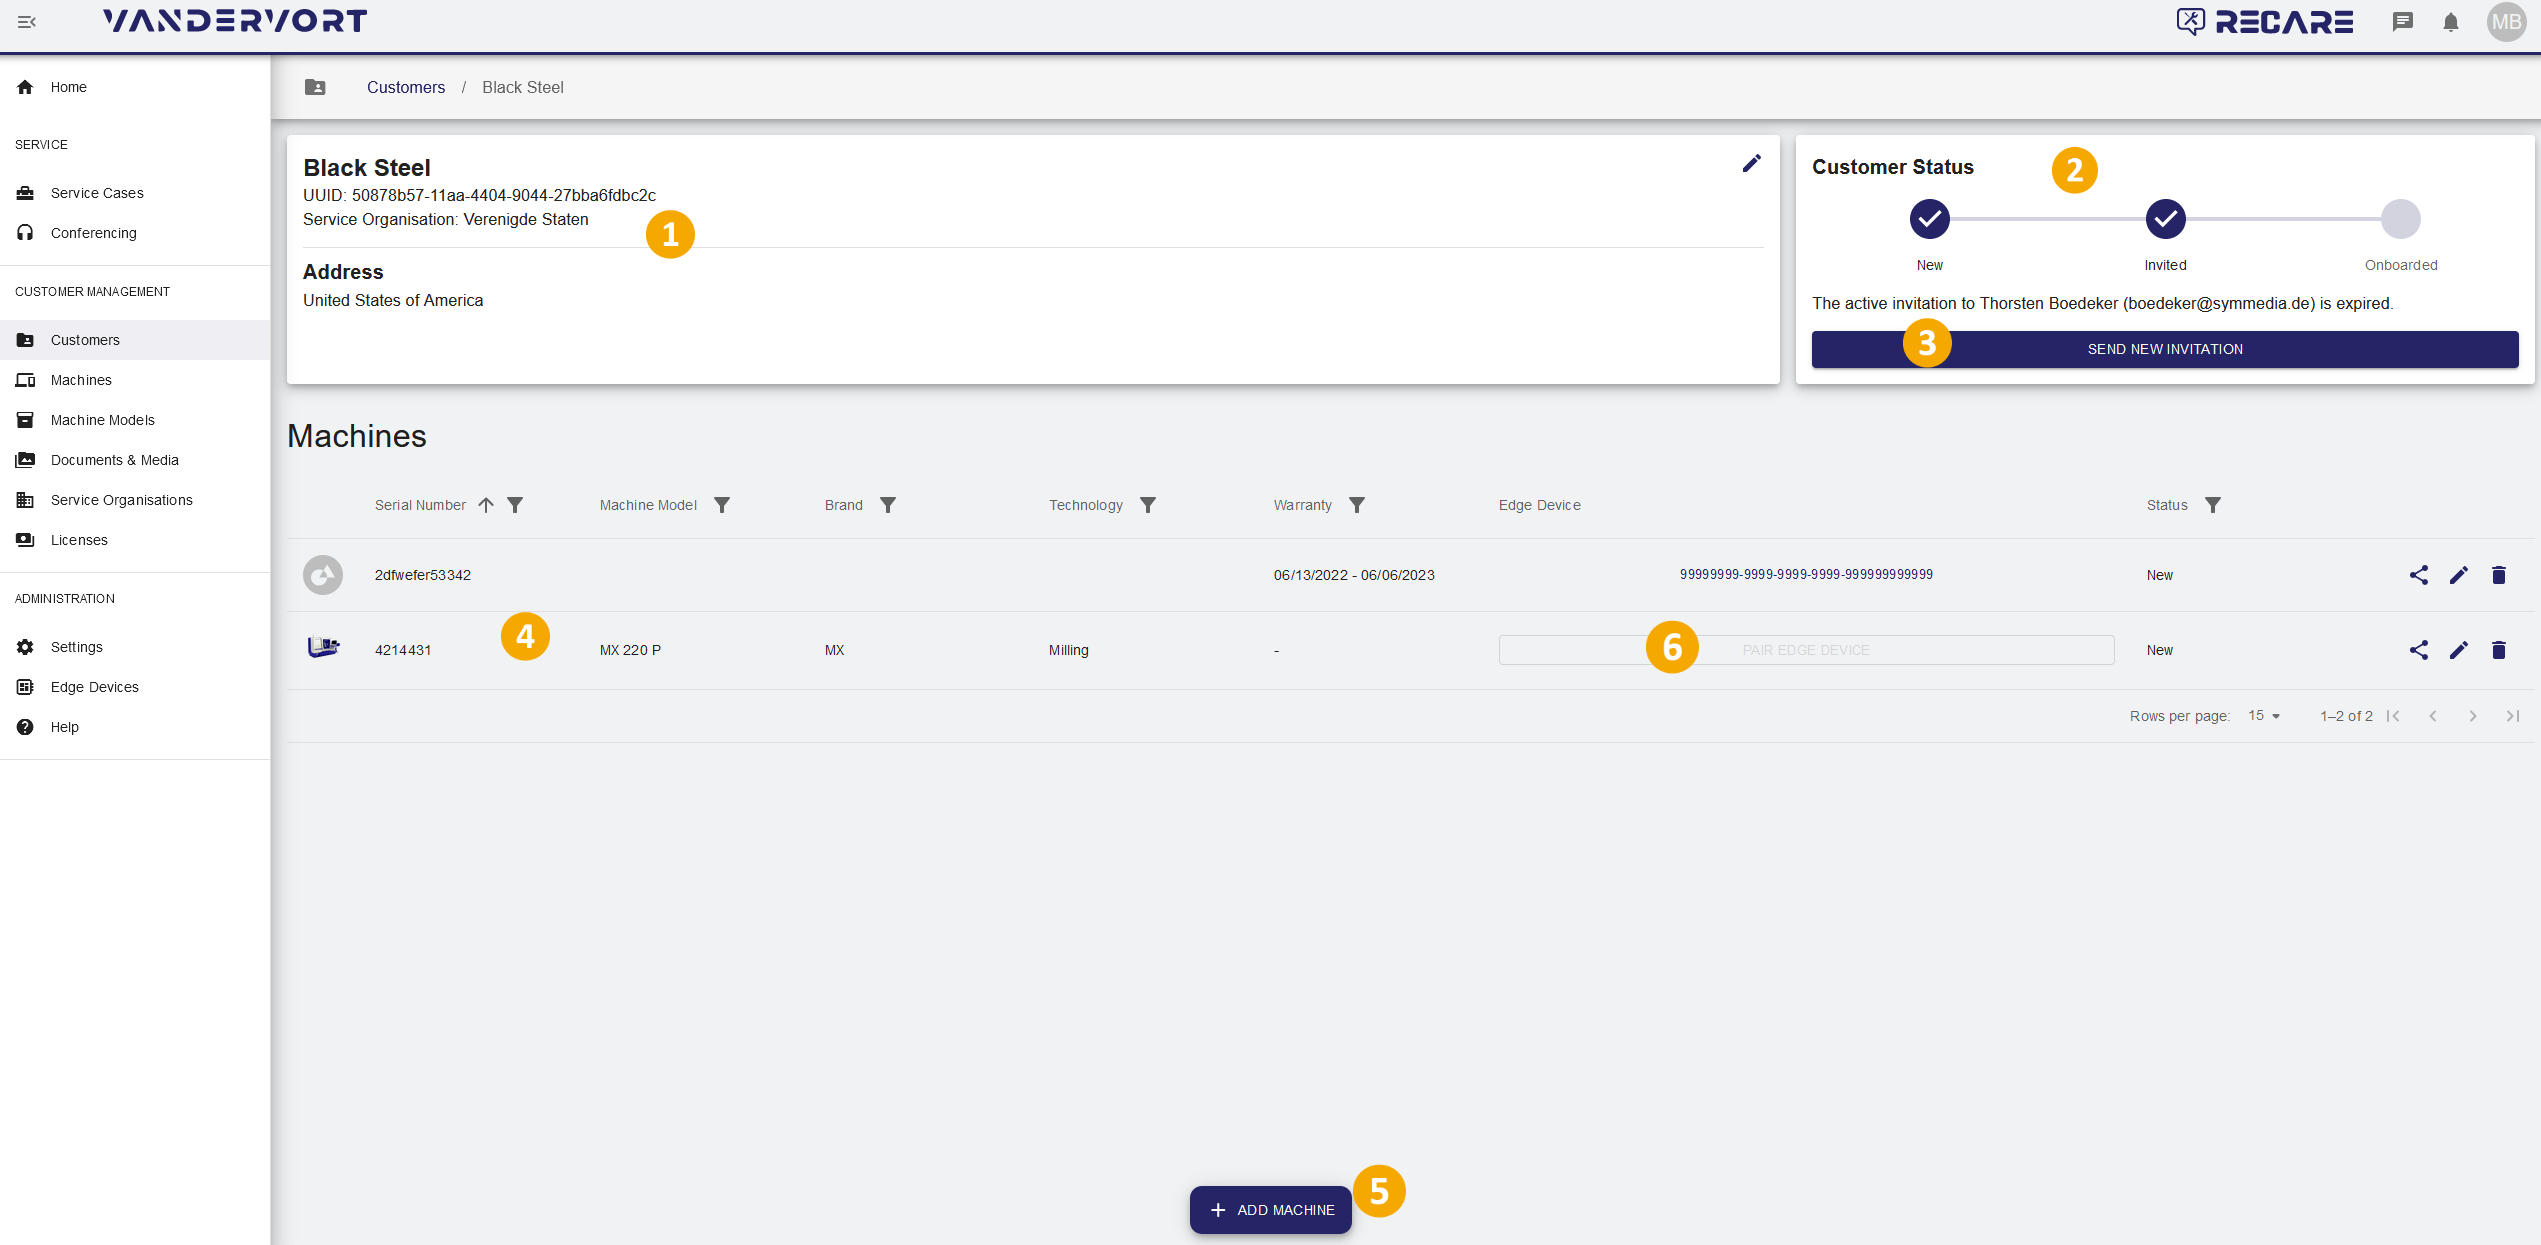
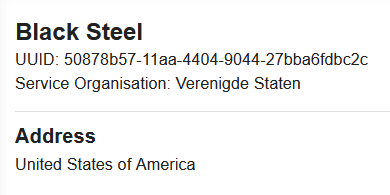
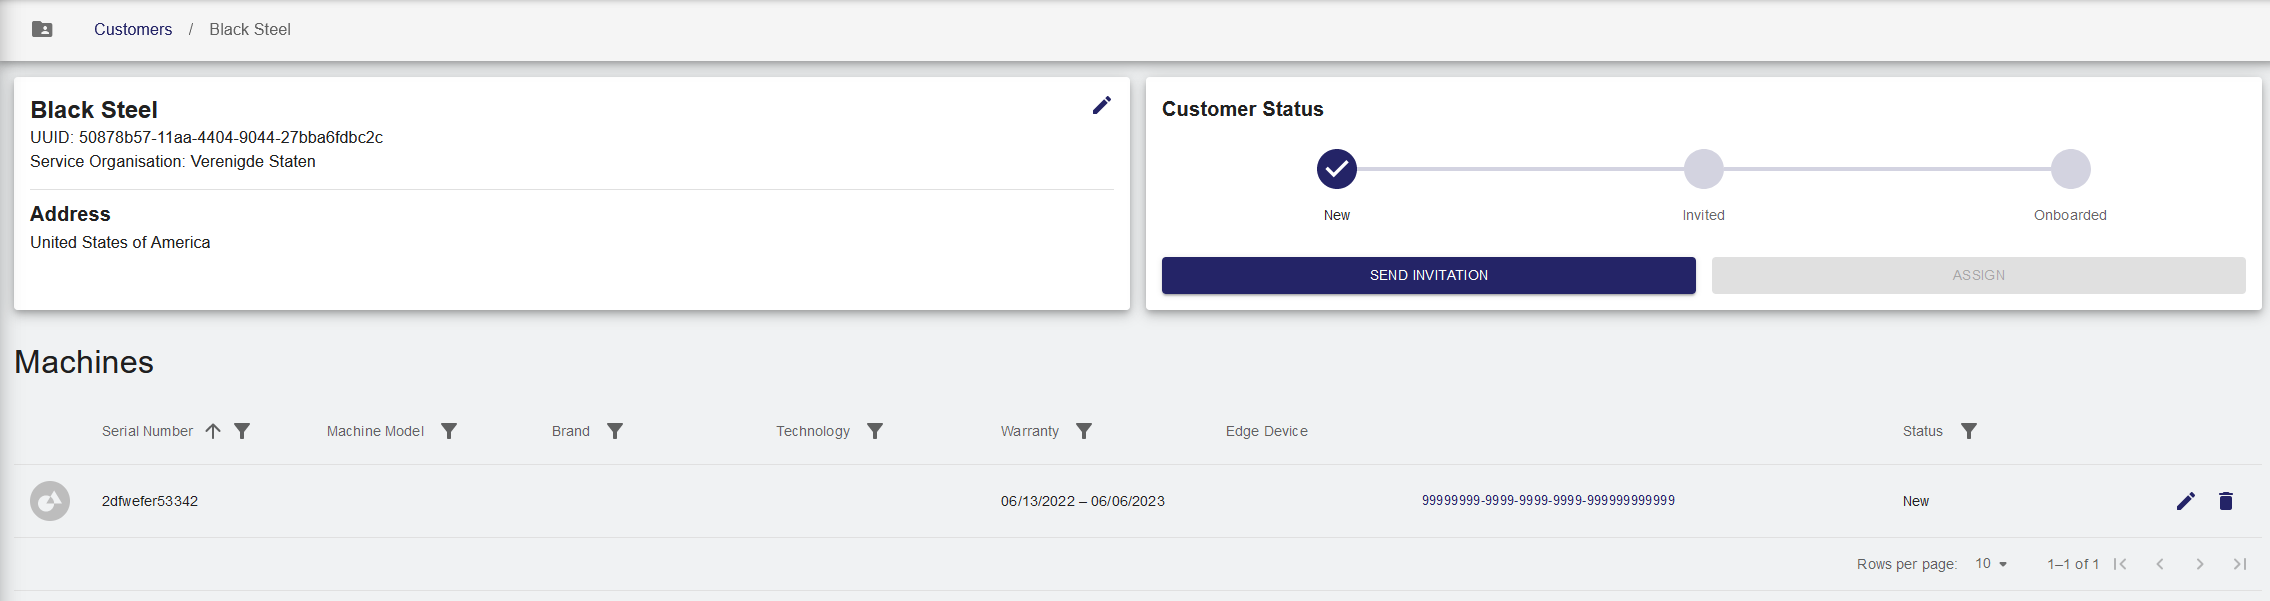
Customer information panel. This panel displays information stored about the customer:
|
| ||
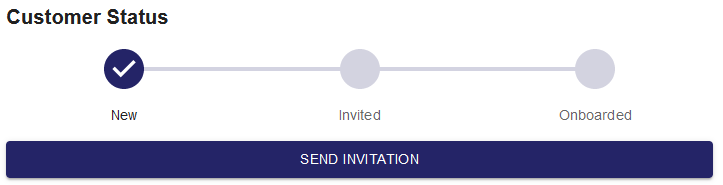
Customer status.
|
| ||
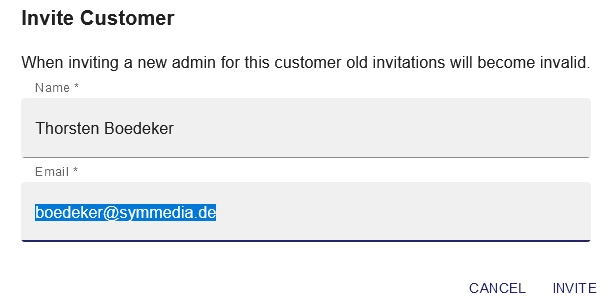
Send invitation.
|
An invitation email is now sent out to the customer. |
| |
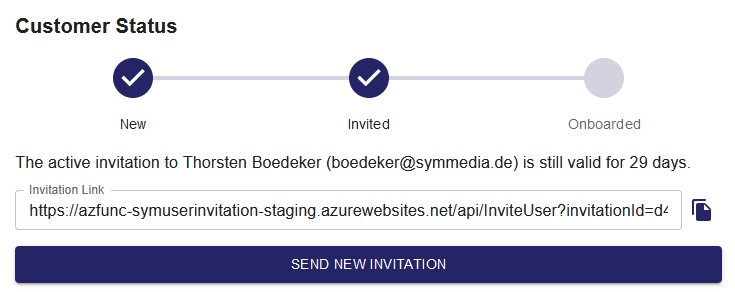
After the invitation was sent out to the customer, his status changes from New to Invited. The invitation link is valid for 30 days and can also be copied to the clipboard via  . The old invitation and link then becomes invalid. . The old invitation and link then becomes invalid. |
| ||
| List of stored machines.
|  | |
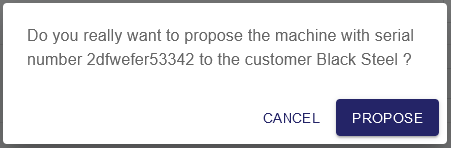
| A dialog opens to confirm the proposal of providing service for the respective machine to the customer:
| ||
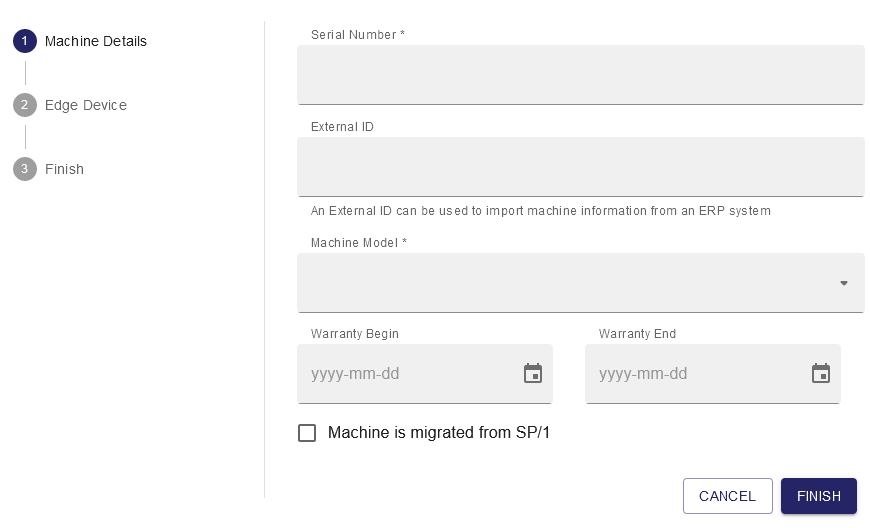
| Add a new machine by clicking the  button. button. | A dialog for entering the machine details opens.
or
|
|
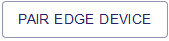
| Pair edge device. |
Currently it is only possible to link one customer machine to one edge device. It is foreseen that multiple machines per edge device will be possible in future. | 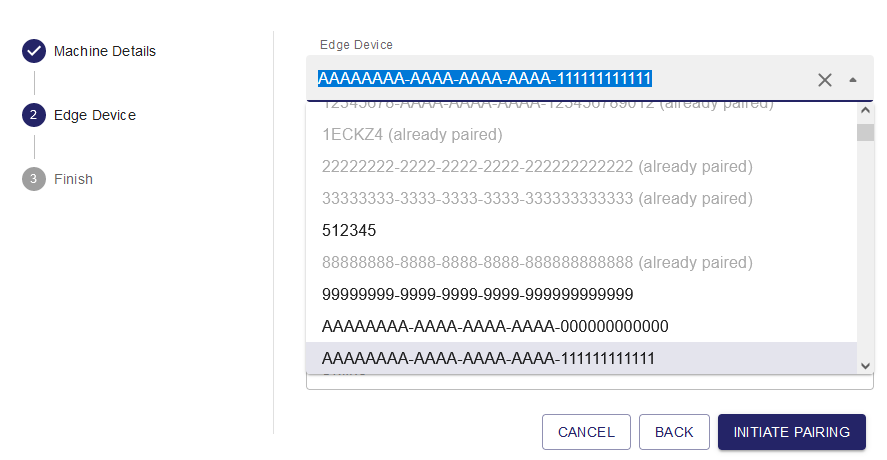 | |
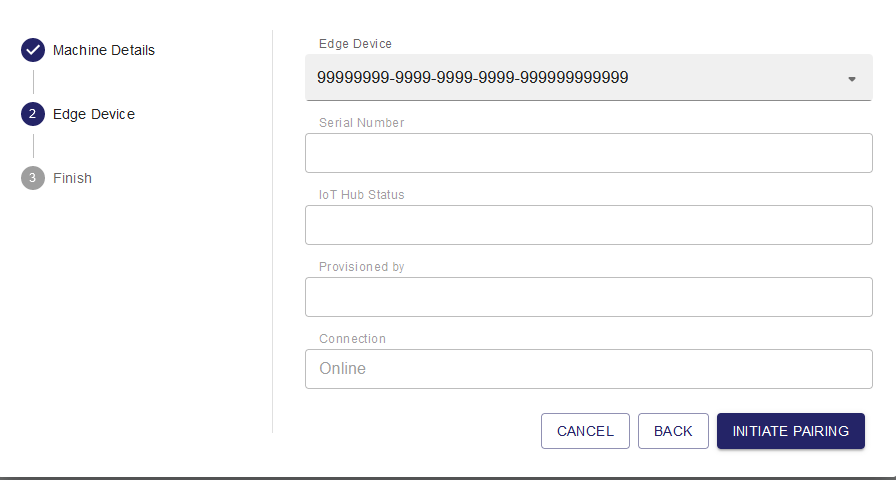 | |||
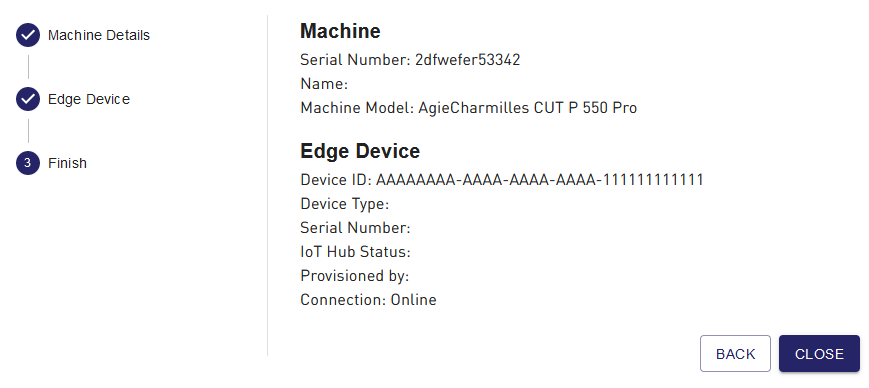
The machine is now paired with an edge device and all info is displayed at a glance.
|  | ||