Service Cases
In symmedia Hub, Operators and Service Providers can collaborate via Service Cases to support optimal machine operation. Aside from just reporting incidents, Service Cases offer dedicated tools such as Conferencing and Whiteboard, connected machines additionally offer Remote Access via symmedias Secure Service Connect tunnel. Both Operators and Service Providers are able to create Service Cases for their Assets or Customer machines respectively with all relevant users being notified via email and push about each step of Service Case processing.
Service cases can be created by users with the roles 1st Level Support or Service Technician in Service Provider tenants.
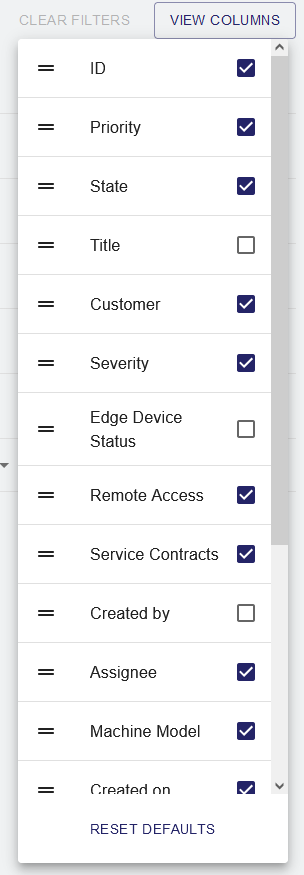
The Service Cases module shows all service cases that the service company is responsible for, along with the following infos:
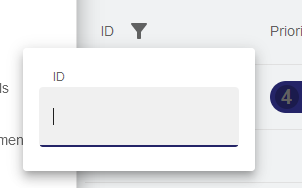
- Service case ID
- Priority
- State
- Title
- Customer
- Severity
- Edge Device Status
- Remote Access
- Service Contracts
- Created by
- Assignee
- Machine Model
- Created on (date)
- Serial Number
- Technology
- Brand
- Service Organisation
- External ID (if set, inactive by default)
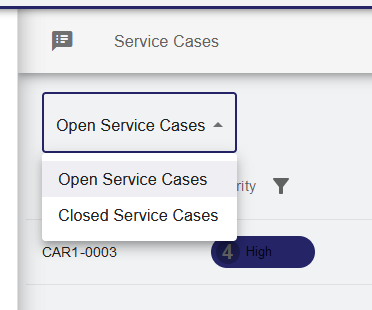
Open service cases as well as closed service cases can be displayed.
The list of service cases can also be filtered for Internal Service Cases and shared Service Cases. The user interface has been designed to clearly distinguish between both types.
- Internal service cases that were created by 1st Level Support or a Service Technician for a customer machine and are not shared with anyone outside the organization. Table rows containing internal service cases have a different colour that shared Service Cases. The creation of internal service cases is enabled for all customer machines, irrespective of the onboarding status of the customer.
As the Operator tenant is no part of the internal service case workflow, remote access cannot be activated and is not available for internal Service Cases. Every internal Service Case comes together with an internal chat room for communication, video conferencing etc.
- Shared service cases that were created by the Operator (customer) or by the Service Provider with permission by the Operator. All information (except the priority) is shared with the issuing tenant to ease collaboration.
Service Cases can also be accessed via the Machine Detail View.

|
| ||
By default, all service cases are displayed in the overview.
|
| ||
List of available service cases.
|
| ||
|
| ||
The selections will be permanently stored for your user and can be reset to factory setting by clicking |
| ||


Create Service Cases
| Type of Service Case.
Shared Service Cases can only be created if the Operator gave his permission, else the Shared option is greyed out and only Internal Service Cases can be created for this machine. An infobox with the notice "The Operator of this machine does not consent to the creation of shared Service Cases by Service Providers." appears.
If a Shared Service Case was created, the Operator is notified (via mail, push notification and the bell symbol in his portal). |
| |
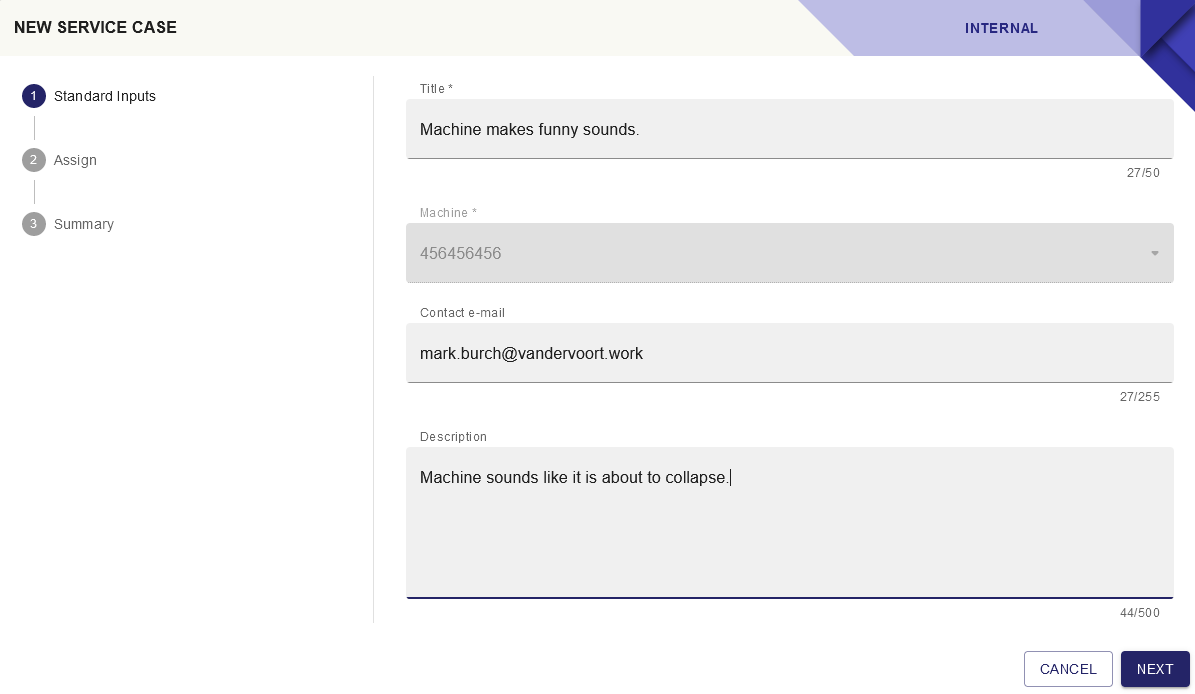
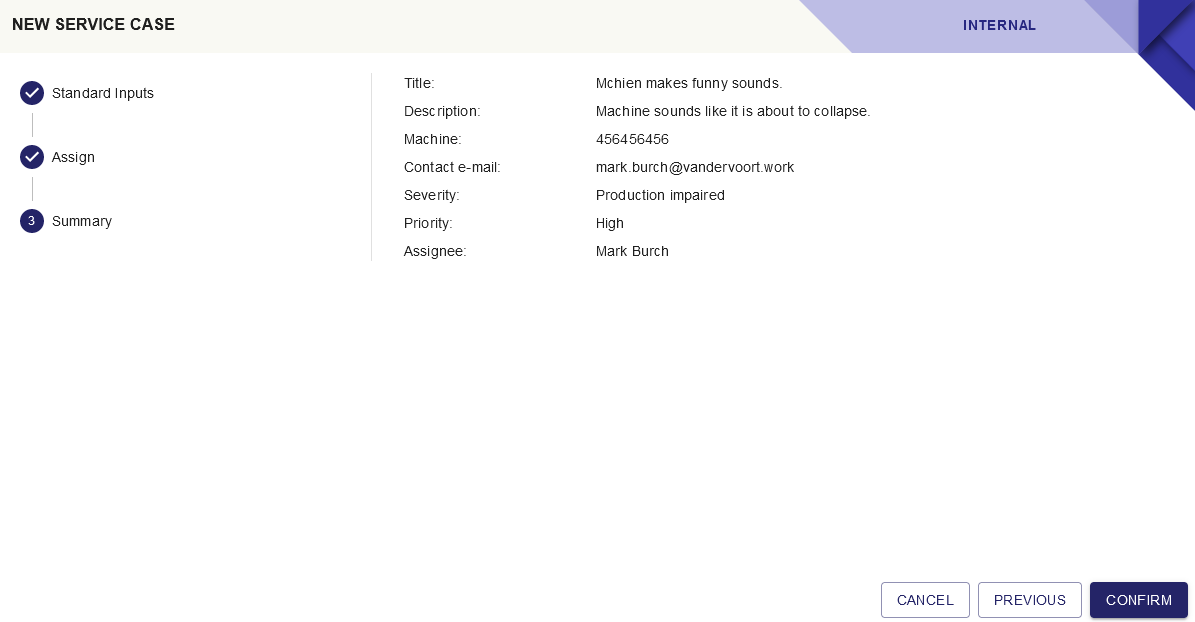
Standard Inputs.
|  | ||
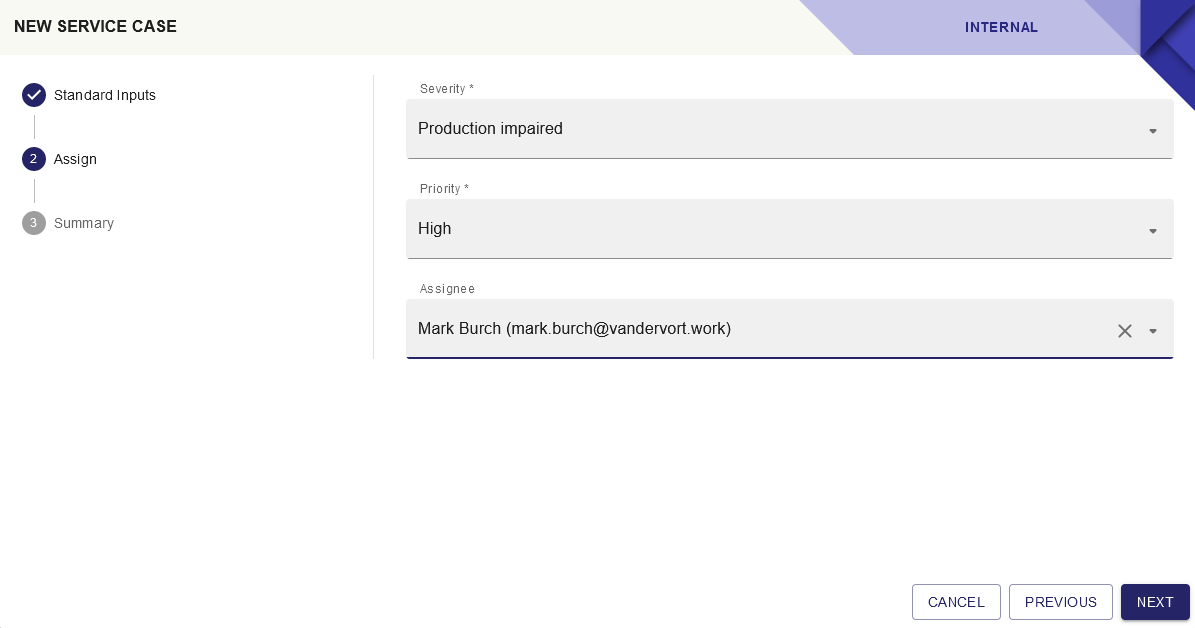
Assignee.
|  | ||
Summary. A summary of your input is displayed.
|  | ||
Your new internal Service Case was added to the list of Service Cases. | 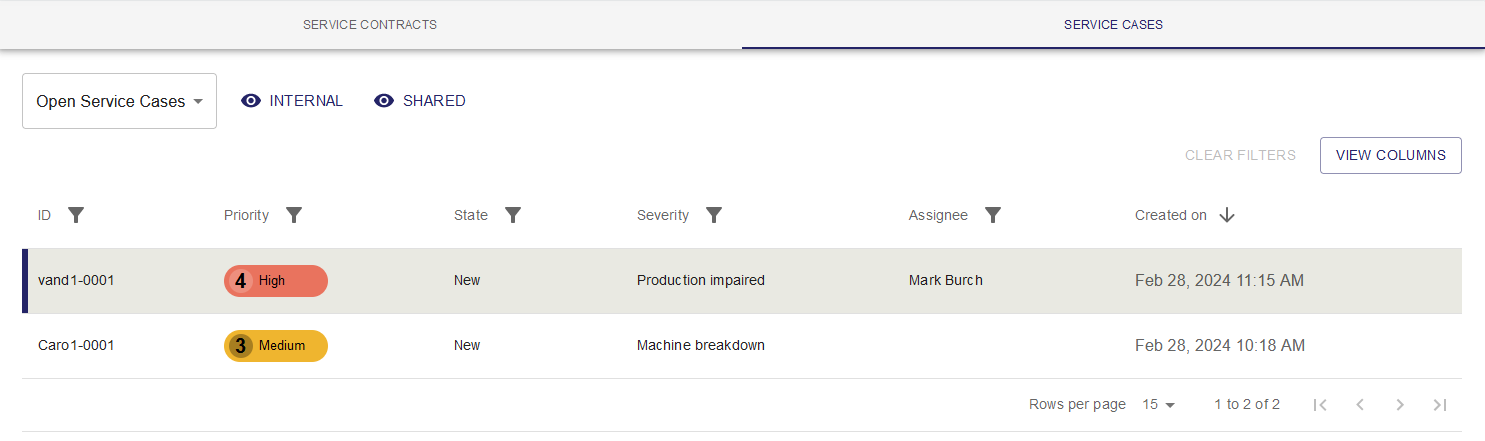 | ||


Service Case Detail View
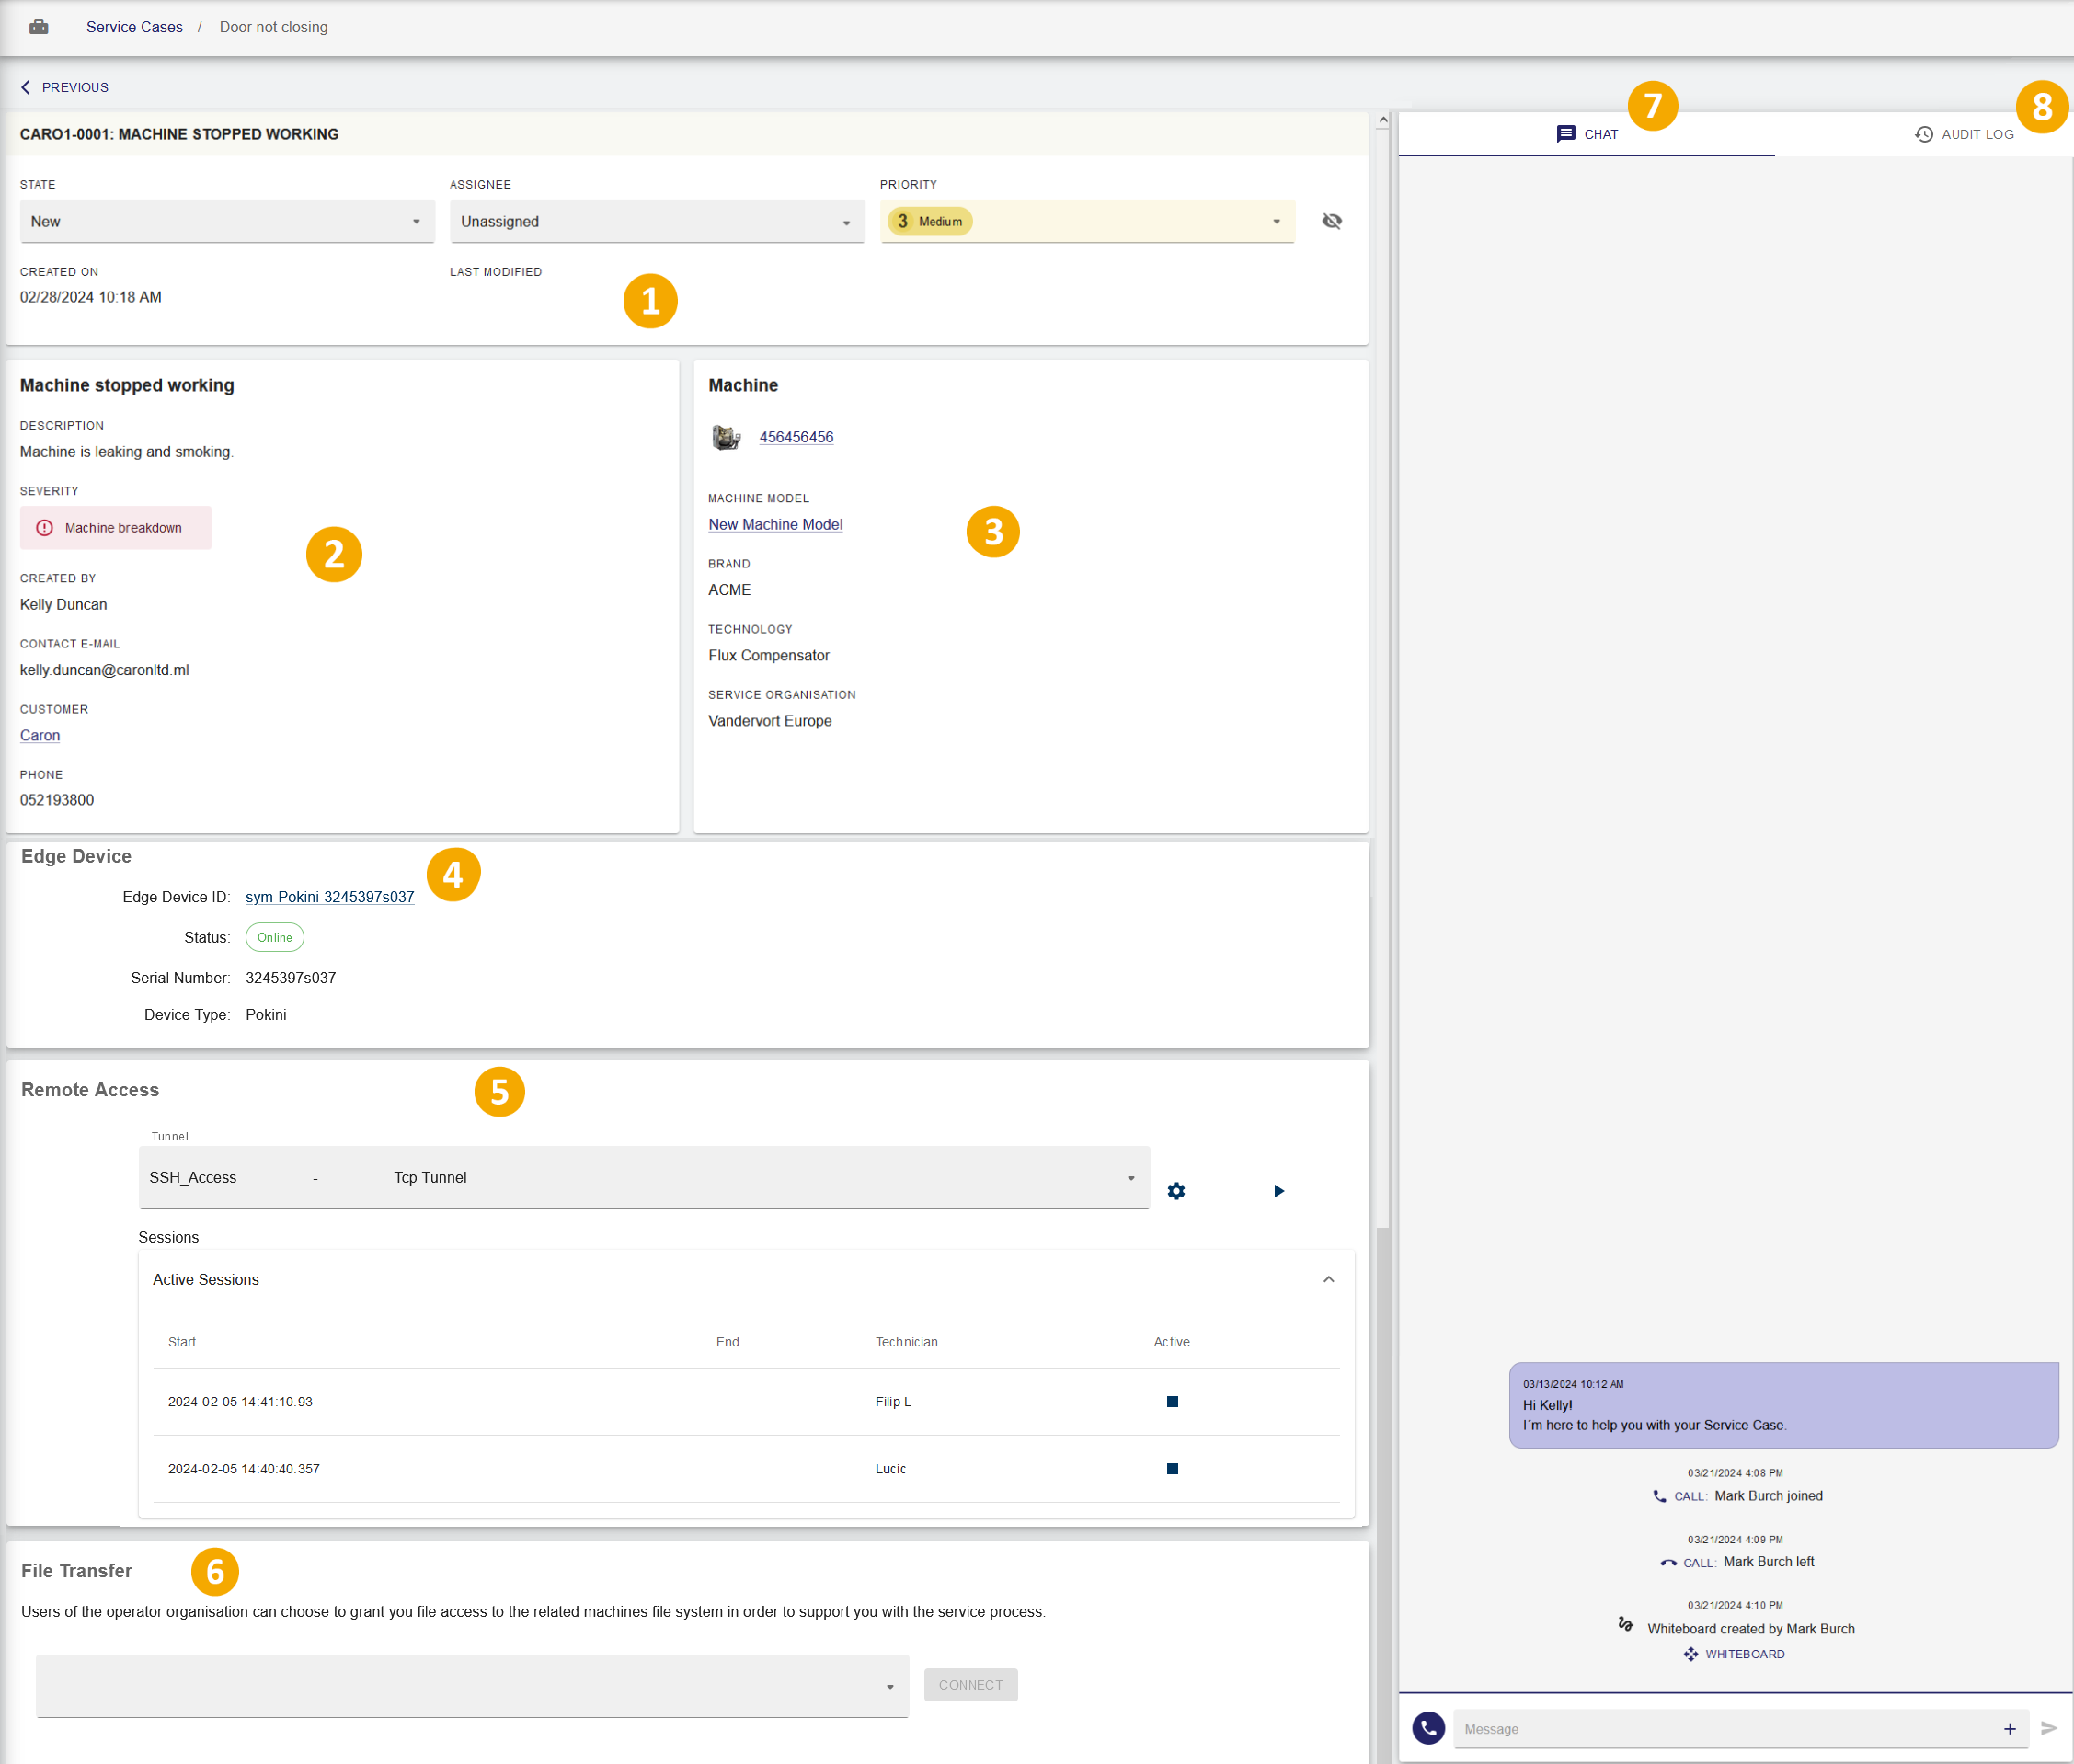
Service Case Panel Shows the following infos about the selected service case:
|
| |
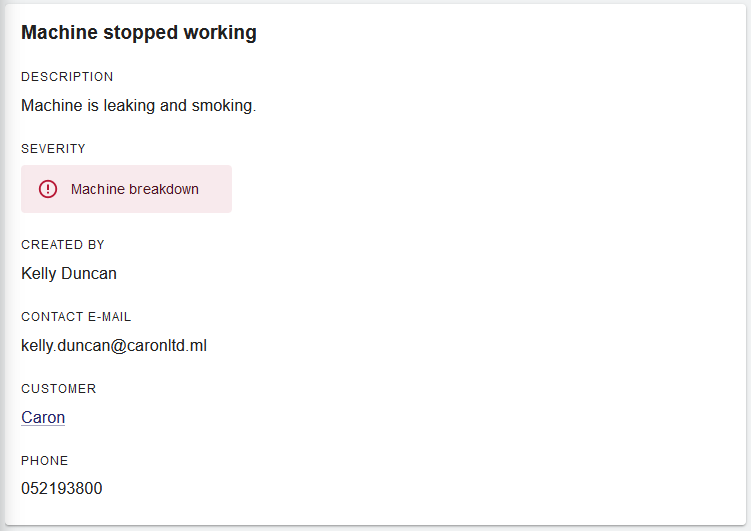
Service Case Details
|
| |
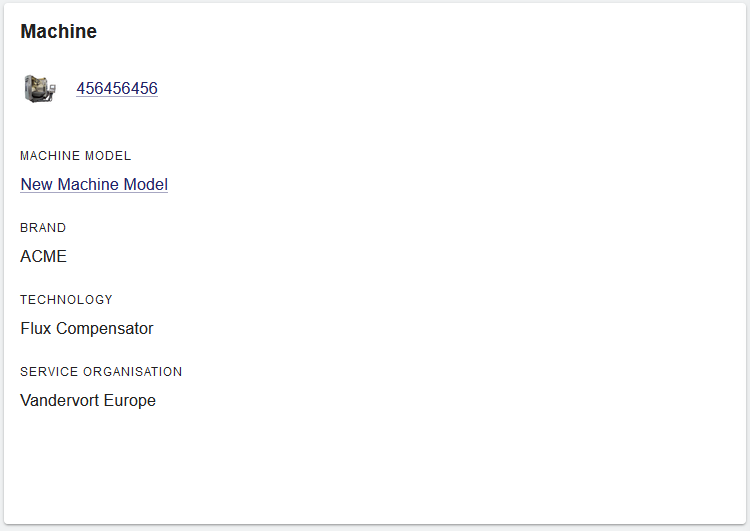
Machine
|
| |
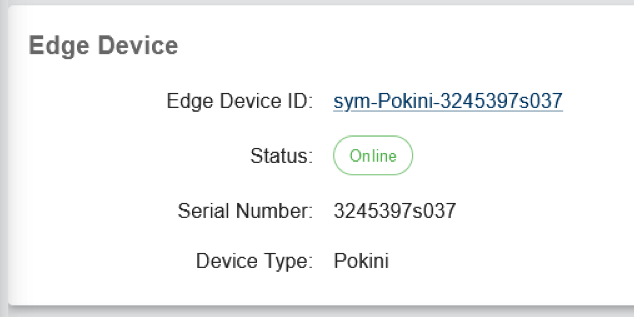
Edge Device
|
| |
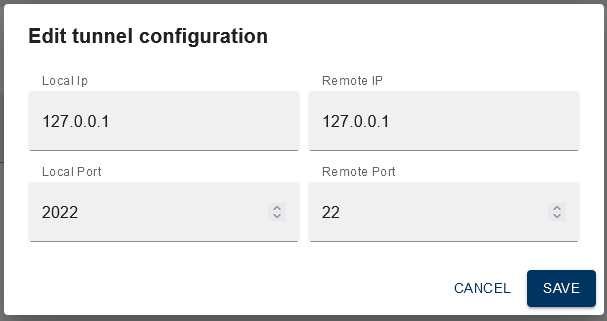
| 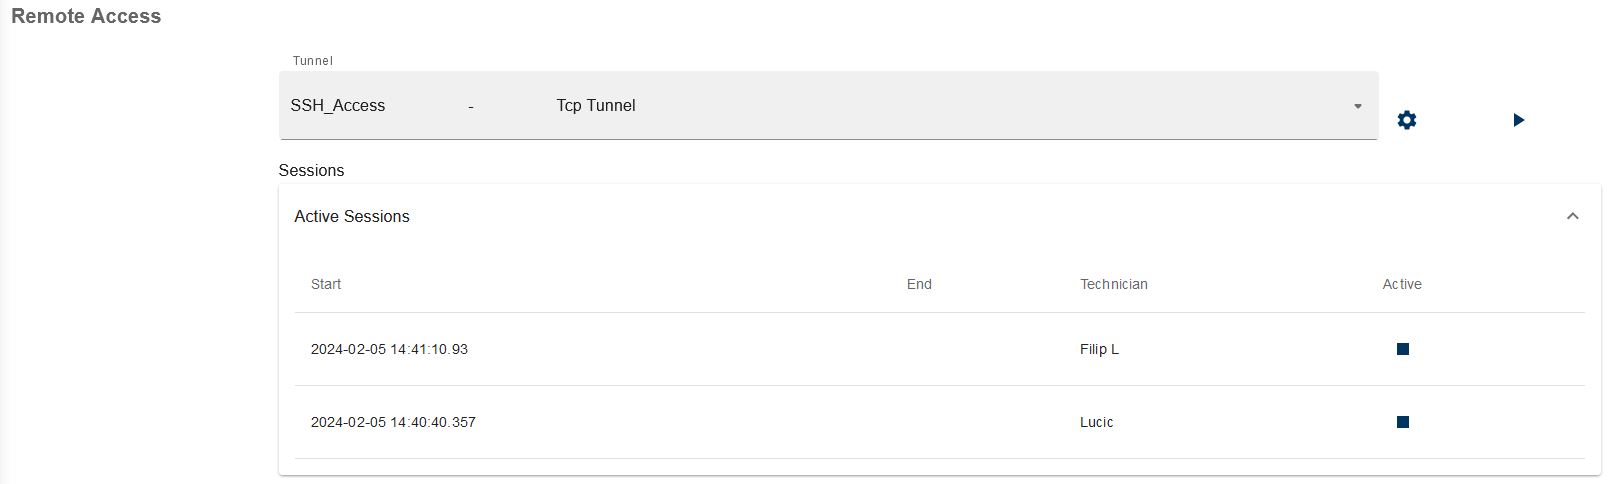 | |
Adjust the tunnel configuration for the current session by clicking
|
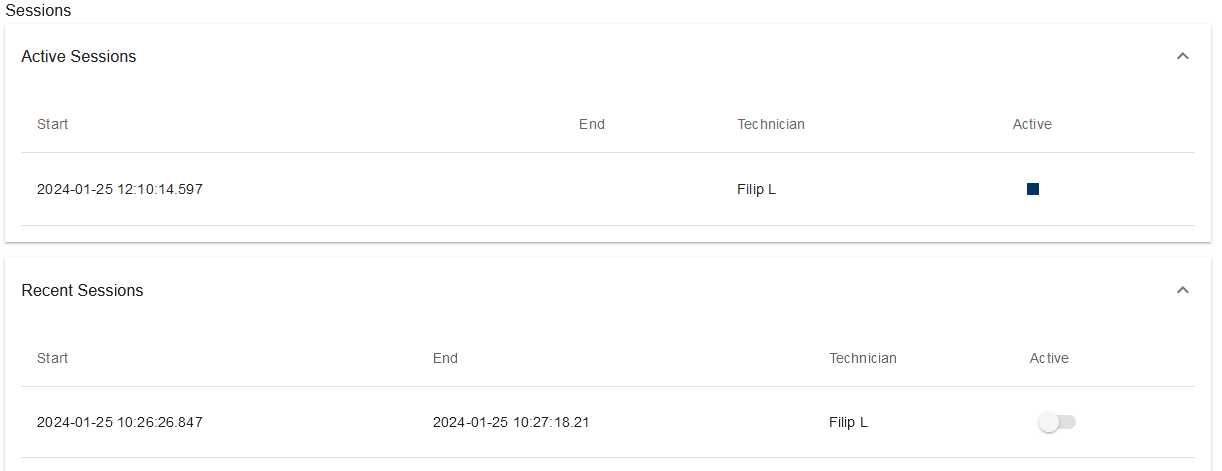
| |
Your active session appears in the Sessions panel.
|
| |
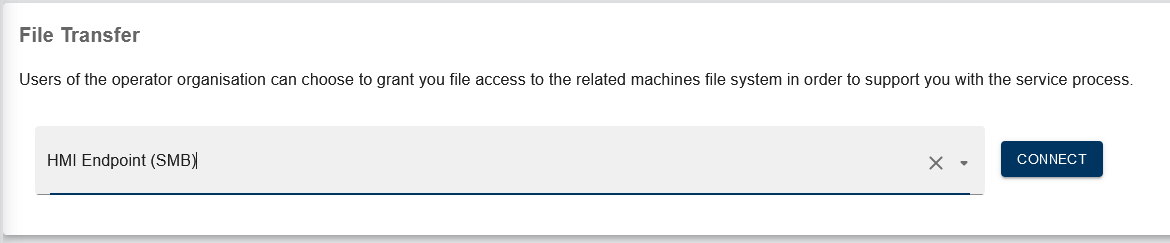
File Transfer Get access to the machine of the operator with this option by connecting to an endpoint where you can send files to the operators local machine.
You are now able to download files from the respective file transfer endpoint. |
| |
Chat Two types of chat functionality are available in Service Cases:
Inititalize service chat with operator.
You can also start a video conference with the operator by clicking on For more details about hosting a video conference, view the Conferencing documentation. |
| |
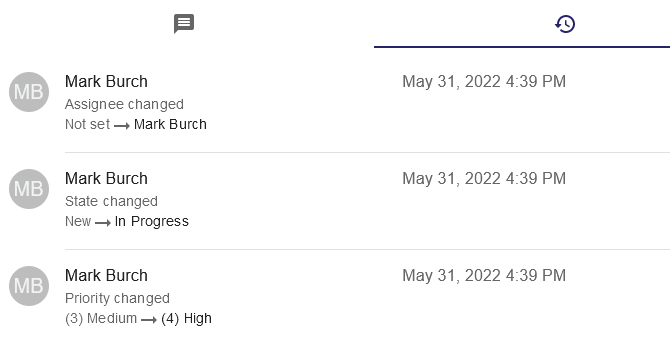
| Audit Log, shows all actions and changes that occured on this service case. |
|