Operator - Service Cases
In symmedia Hub, Operators and Service Providers can collaborate via Service Cases to support optimal machine operation. Aside from just reporting incidents, Service Cases offer dedicated tools such as Conferencing and Whiteboard, connected machines additionally offer Remote Access via symmedias Secure Service Connect tunnel. Both Operators and Service Providers are able to create Service Cases for their Assets or Customer machines respectively with all relevant users being notified via email and push about each step of Service Case processing.
The Service Cases module shows all Service Cases along with the following infos:
- Service Case ID
- State
- Severity
- Title (short description of Service Case)
- Remote Access
- Created by
- Assignee
- Machine (affected machine)
- Created on (date)
- Closed on (date)
Open Service Cases as well as closed Service Cases can be displayed.

| Asset
|
| |
Details
|
| ||
Contact Data
|
| ||
Summary This panel shows a summary about the entries made in the previous screens. If all entries are correct
else
or
|
| ||
| The new Service Case is now added to the service case list and the Service Provider is notified. | |||
|
| ||
List of available Service Cases.
|
| ||
|
| ||


Detail View

Service Case panel Displays the information that the manufacturer additionally requests in the Service Case creation dialog. (May vary from manufacturer/service provider to manufacturer).
These values are read only. Some values can be changed by the service provider, like Assignee and State, others change automatically, like Last modified and Closed at. Others are fixed for the entire lifecycle of the Service Case at the value at creation, like Title, Description and Severity. |
| |
Additional Inputs
|
| |
Asset Panel
|
| |
Service Contract Panel Shows name, validity and validity period of assigned service contract. |
| |
Remote Access
|
| |
After clicking
|  | |
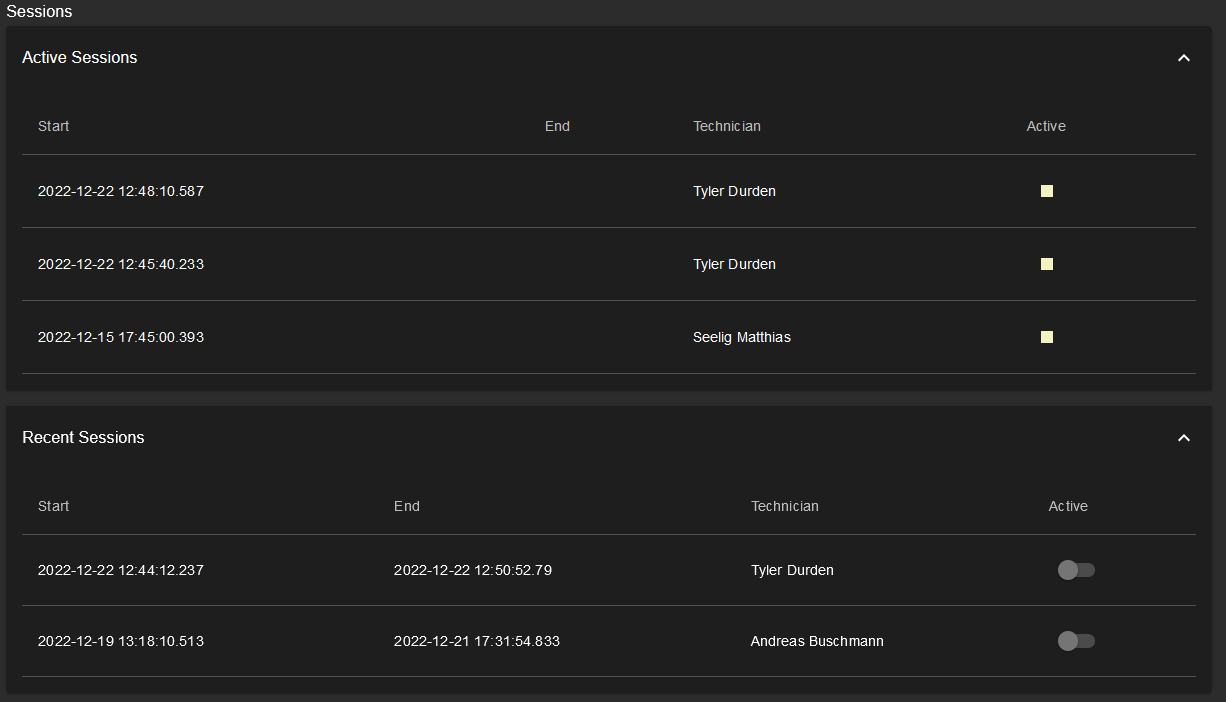
After launching a WebVNC session your active session appears in the Sessions panel.
|
| |
If the remote access is disabled in a Service Case and existing tunnel connections are still open, these may get terminated, possibly leading to technical problems on the machine if critical data is being transferred or important settings are being made remotely. symmedia Hub will ask you for confirmation before terminating existing tunnel connections. |   | |
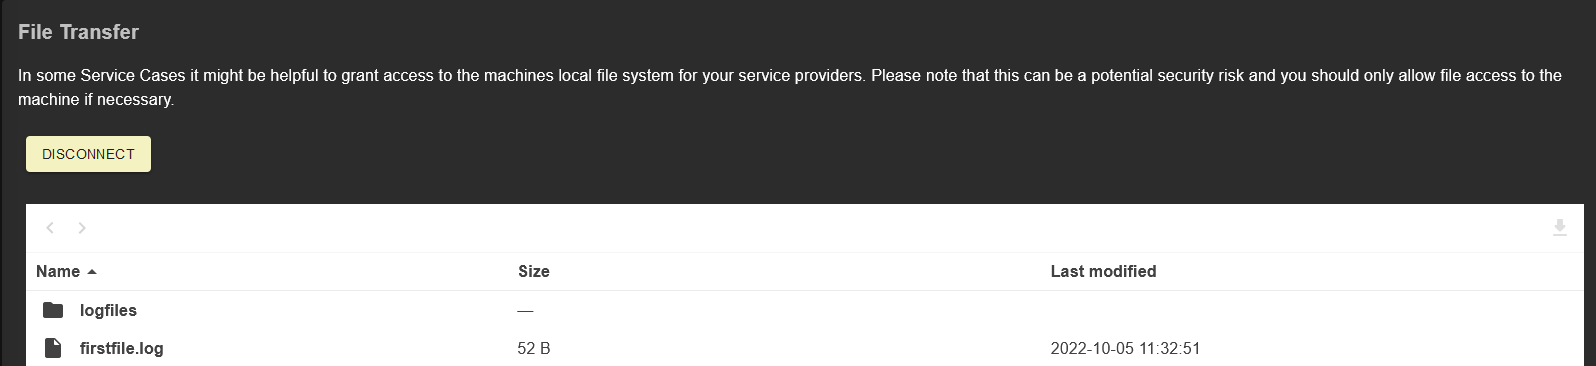
File Transfer Grant access to your machine to the service provider with this option by providing an endpoint where he can send files to your local machine.
You can now view and access the repository where the service provider deposited files for you. |
| |
| Chat Two types of chat functionality are available in Service Cases:
For more details about hosting a video conference, view the Conferencing documentation. |
|
| Audit Log Shows all actions and changes that occurred on this Service Case to provide full transparency along the lifecycle of the Service Case. |
|