Service Organisations
- Thorsten Boedeker
The Service Organisations tab can be used to create, delete and edit service organisations for a company.
Service Organisations allow to set up the organisational structure of the manufacturer / service provider if the company is divided into different sales and/or service locations. An example would be to set up a Service Organisation for every country with a service location. Service Organisations allow to grant users access to the different locations and the respective customers.
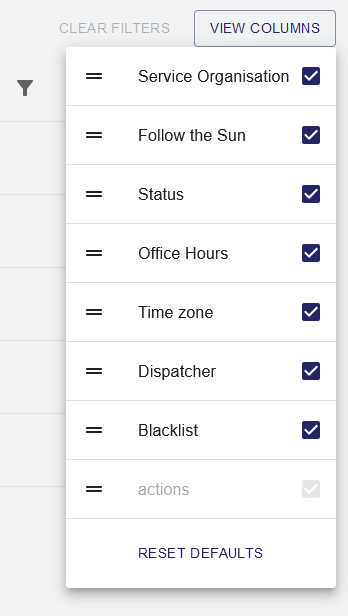
The Service Organisations overview displays information such as:
- Service Organisation
- Name of the Service Organisation.
- Follow the Sun
- Follow the Sun is a feature that allows different service organizations to provide support during their office hours for all other organisations. This can ensure 24/7 support availability for service recipients, regardless of the original organisation's office hours.
- Status
- Calculated availability information, based on office hours.
- Office Hours
- Time this Service Organisation is available (Holidays are currently not configurable).
- Time Zone
- Time zone for the Follow the Sun configuration.
- Dispatcher
- The dispatcher is a user belonging to the Service Organisation that gets an alert when a Service Case gets delegated to his Service Organisation via the Follow the Sun feature.
- Blacklist
- The Service Organisation blacklist is used to exclude specific other Service Organisations from being available to handle Service Cases when this organisation is out of office.
Main View
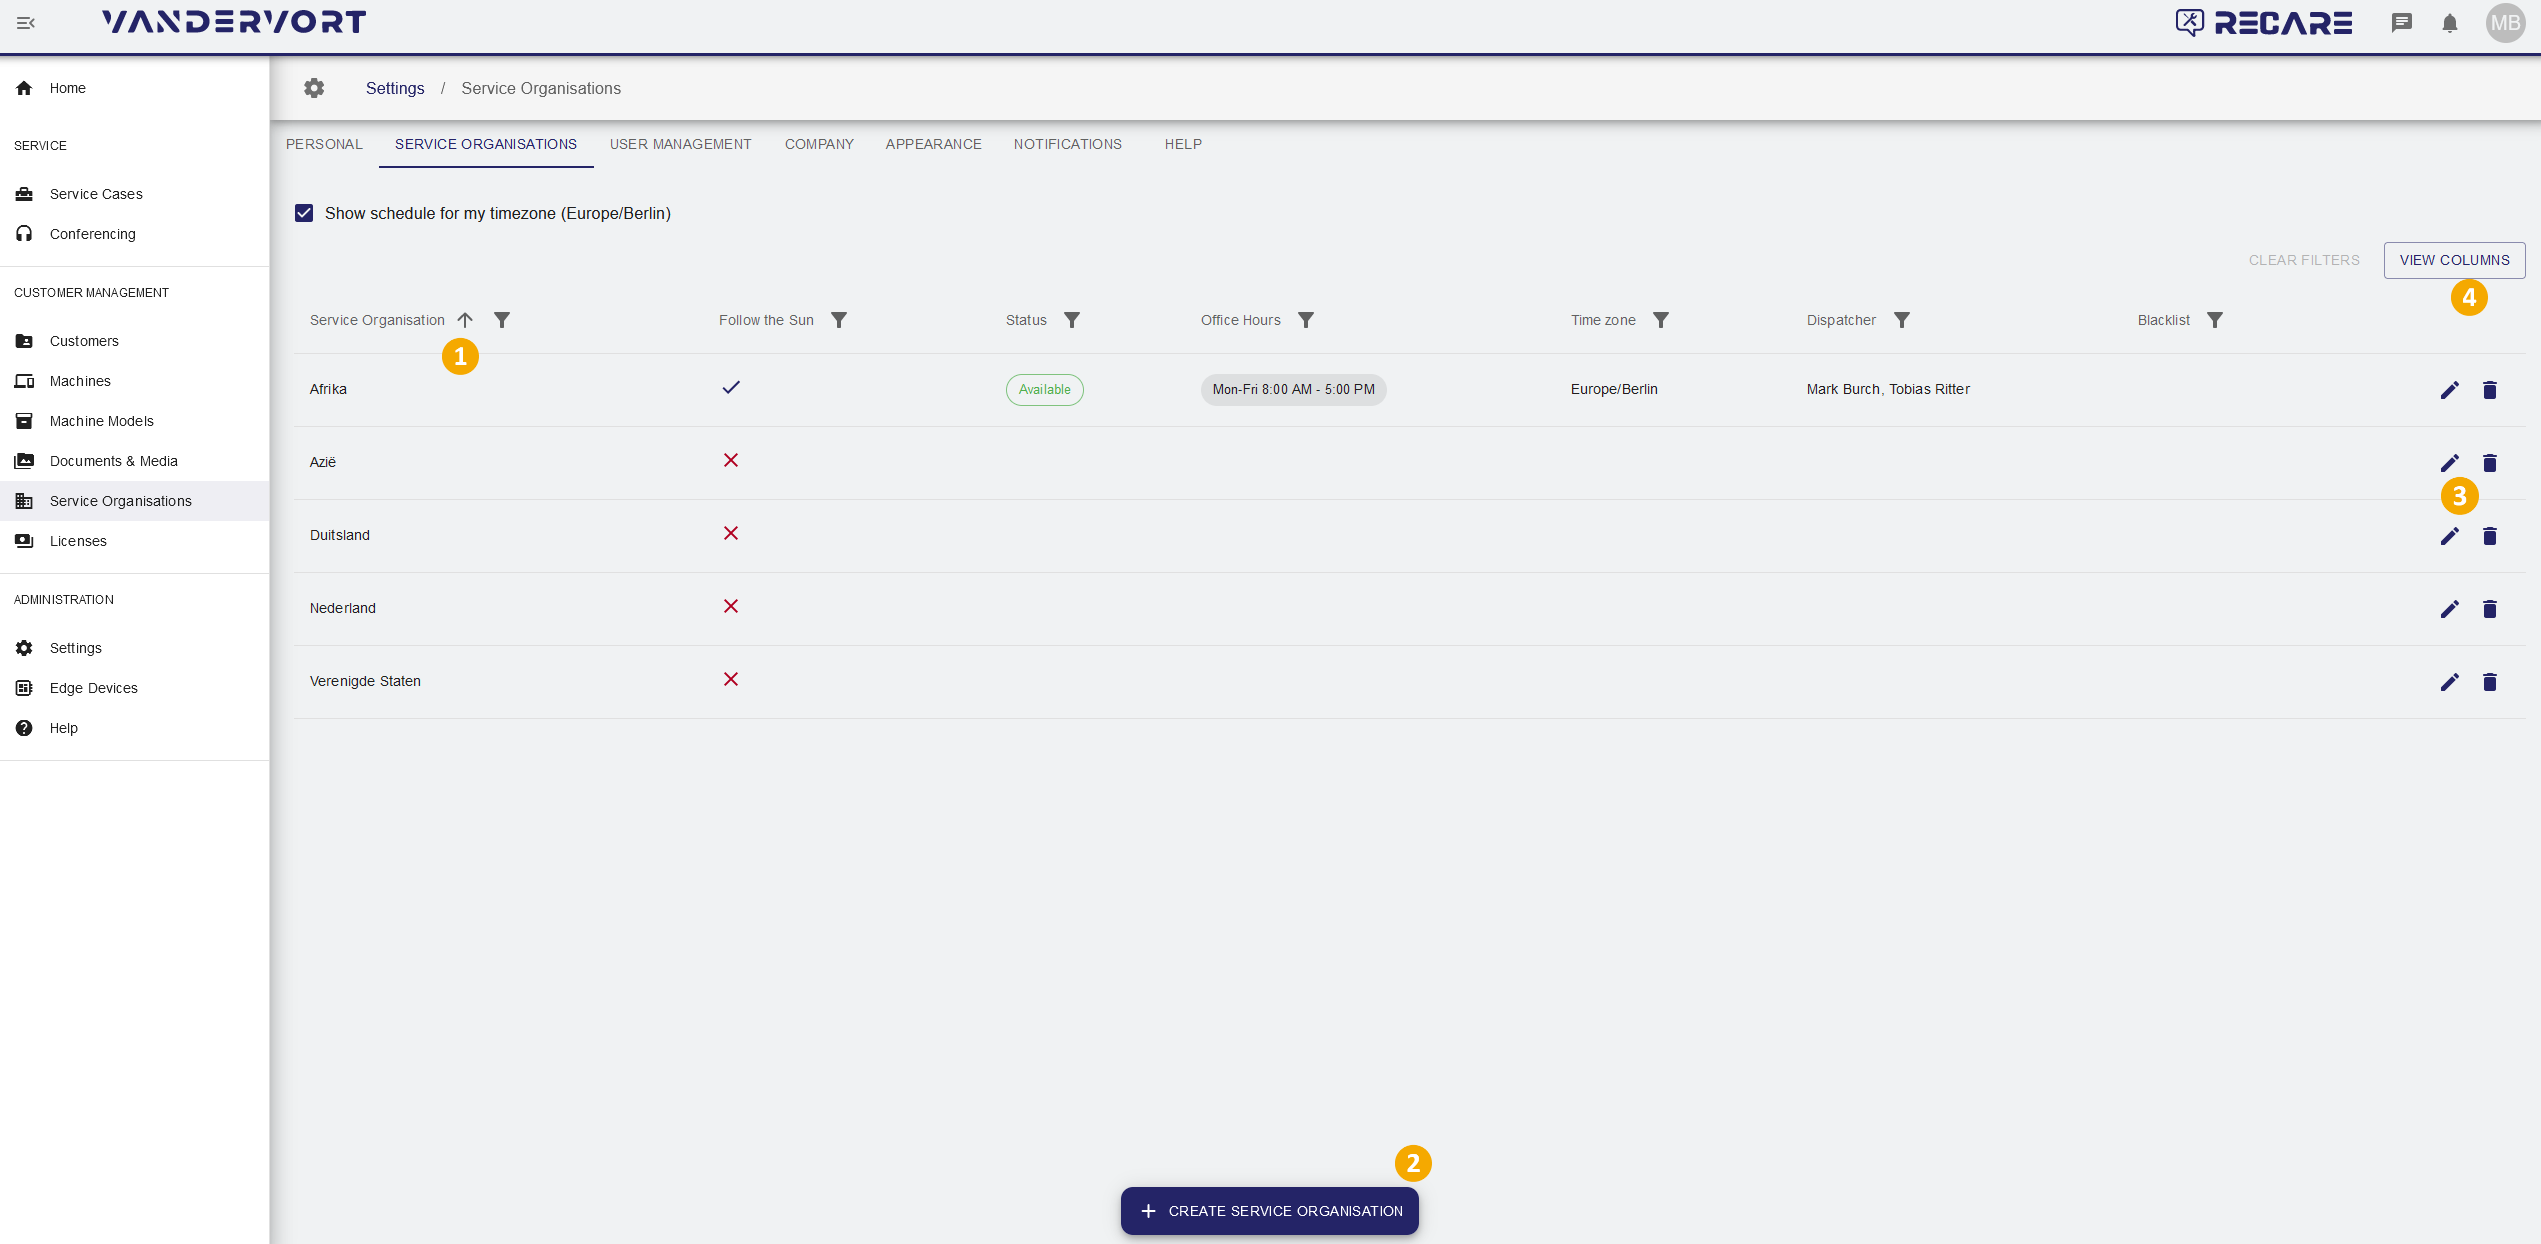
List of Service Organisations.
|
| |||
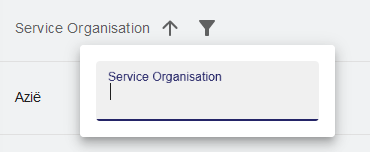
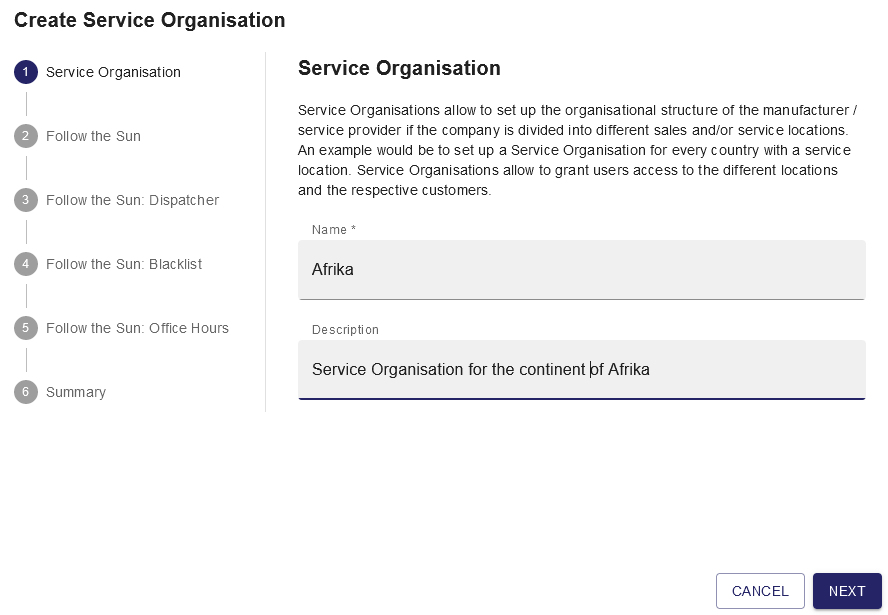
Create new Service Organisation
| A dialog for entering the Service Organisation details opens.
|  | ||
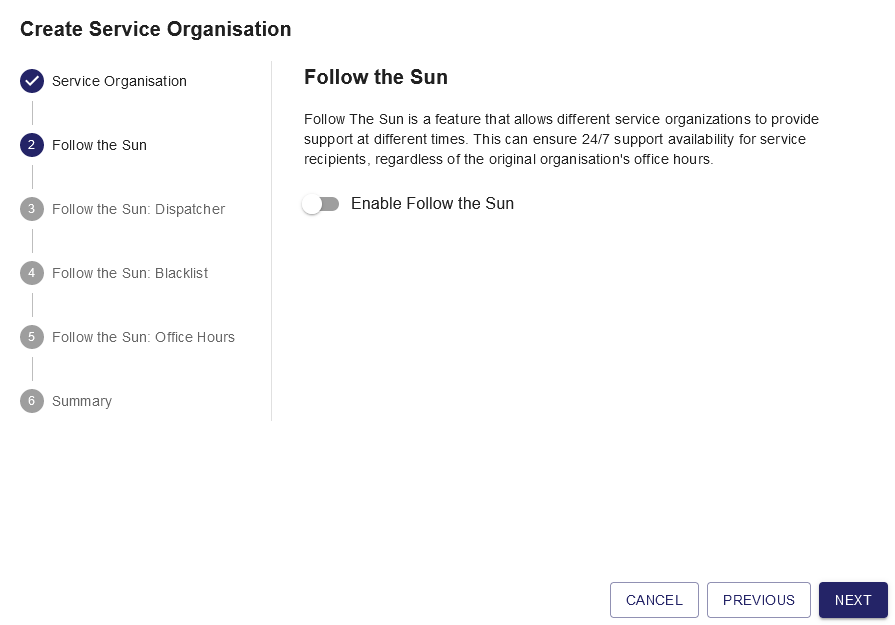
Follow the Sun Follow The Sun is a feature that allows different service organizations to provide support at their office hours for all other organisations. This can ensure 24/7 support availability for service recipients, regardless of the original organisation's office hours. |
|
| ||
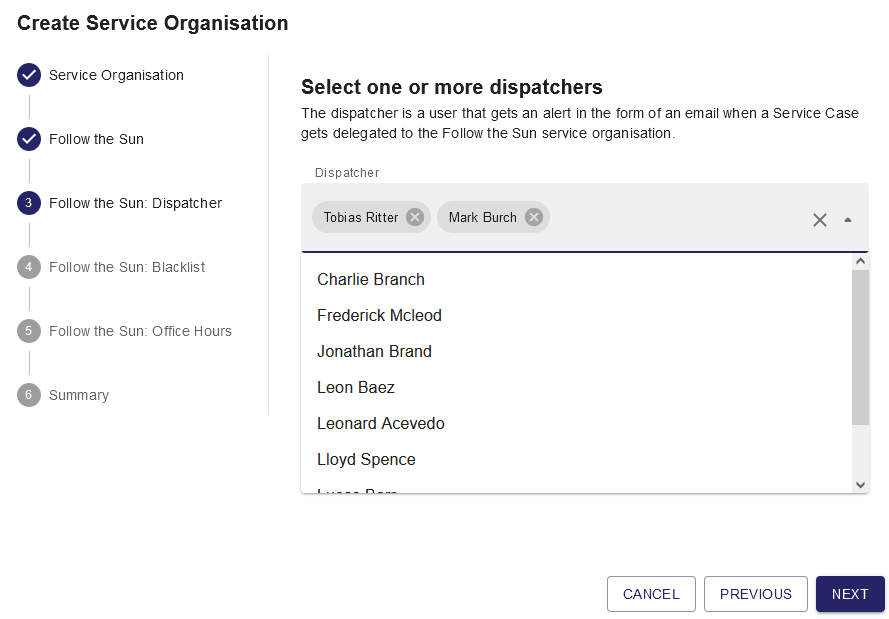
Select one or more dispatchers The dispatcher is a user that gets an alert in the form of an email when a Service Case gets delegated to the Follow the Sun Service Organisation.
|
| |||
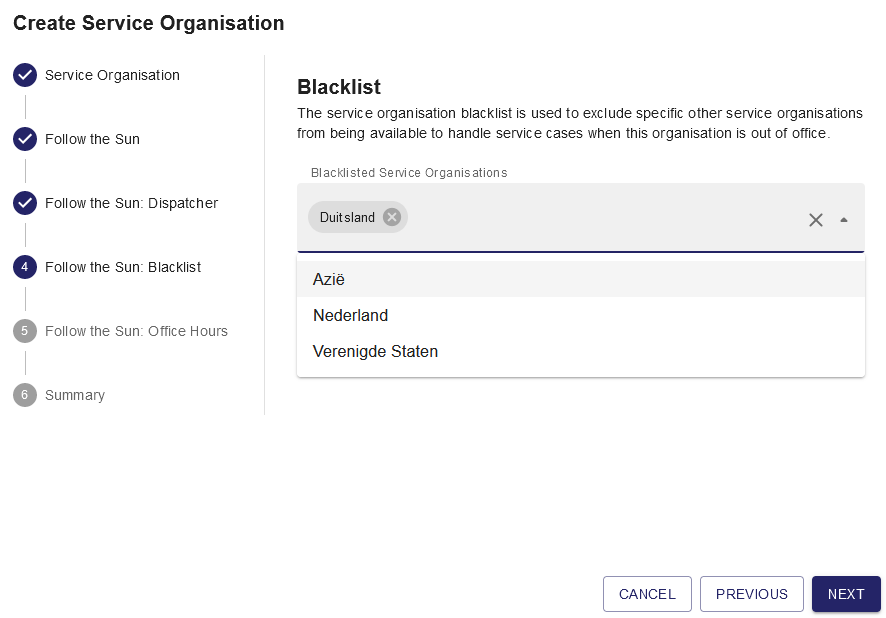
Blacklist The Service Organisation blacklist is used to exclude specific other Service Organisations from being available to handle Service Cases when this organisation is out of office.
|
| |||
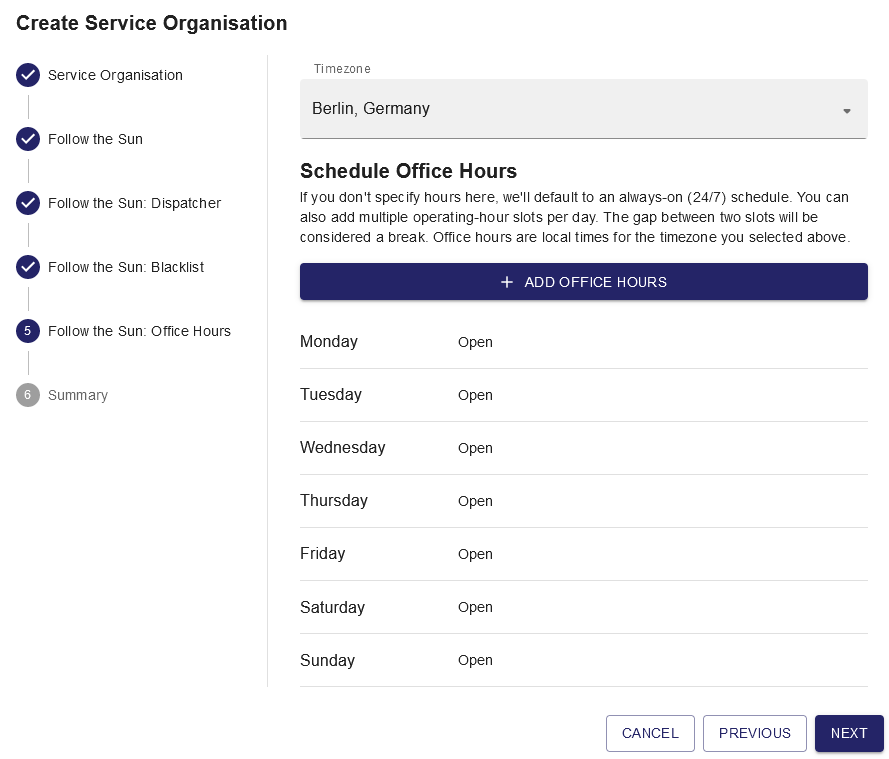
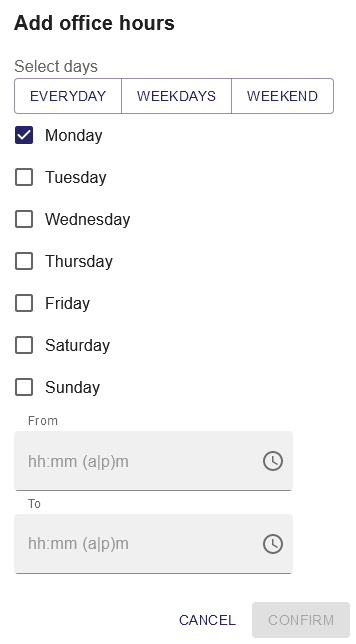
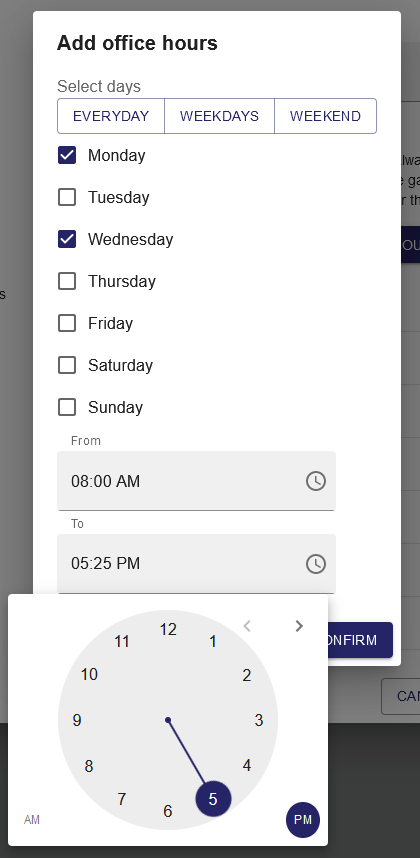
Schedule Office Hours If you don't specify hours here, we'll default to an always-on (24/7) schedule. You can also add multiple operating-hour slots per day. The gap between two slots will be considered a break. Office hours are local times for the timezone you selected above.
|
| |||
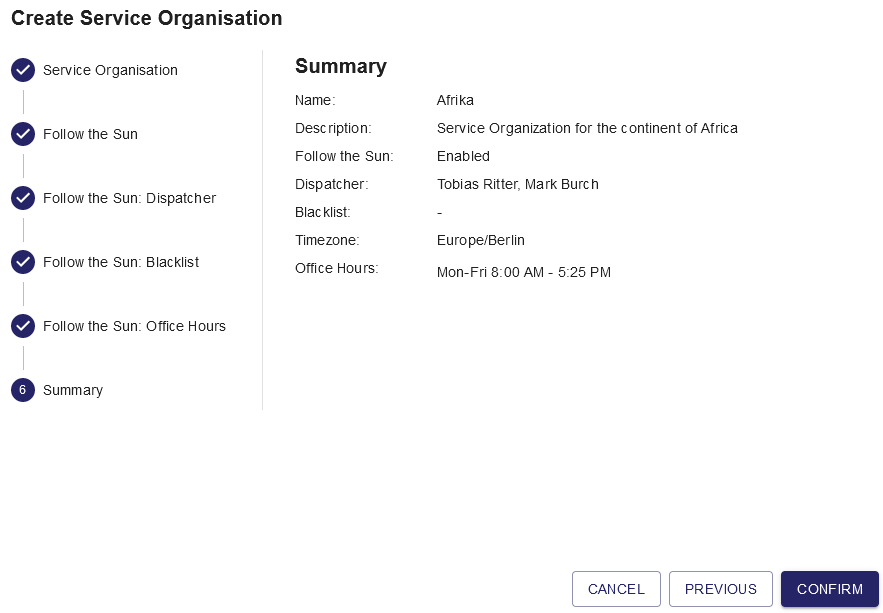
A summary of the created Service Organisation is displayed.
or
|
| |||
Edit existing Service Organisation
| After clicking the A dialog for entering the Service Organisation details opens.
| | ||
Follow the Sun Follow The Sun is a feature that allows different service organizations to provide support at different times. This can ensure 24/7 support availability for service recipients, regardless of the original organisation's office hours. |
|  | ||
Select one or more dispatchers The dispatcher is a user that gets an alert in the form of an email when a Service Case gets delegated to the Follow the Sun Service Organisation.
|  | |||
Blacklist The Service Organisation blacklist is used to exclude specific other Service Organisations from being available to handle Service Cases when this organisation is out of office.
|  | |||
Schedule Office Hours If you don't specify hours here, we'll default to an always-on (24/7) schedule. You can also add multiple operating-hour slots per day. The gap between two slots will be considered a break. Office hours are local times for the timezone you selected above.
|
| |||
A summary of the created Service Organisation is displayed.
or
|  | |||
|
The selections will be permanently stored for your user and can be reset to factory setting by clicking |
| ||