Machine Models
- Thorsten Boedeker
The Machine Models module shows all stored machines models that can be selected in the Machines module along with the following infos:
- Machine model
- ID of machine
- Brand
- Technology
- Compatible applications
- External ID of machine
New machine models can be added and existing machine models can be edited in this module.
Main View
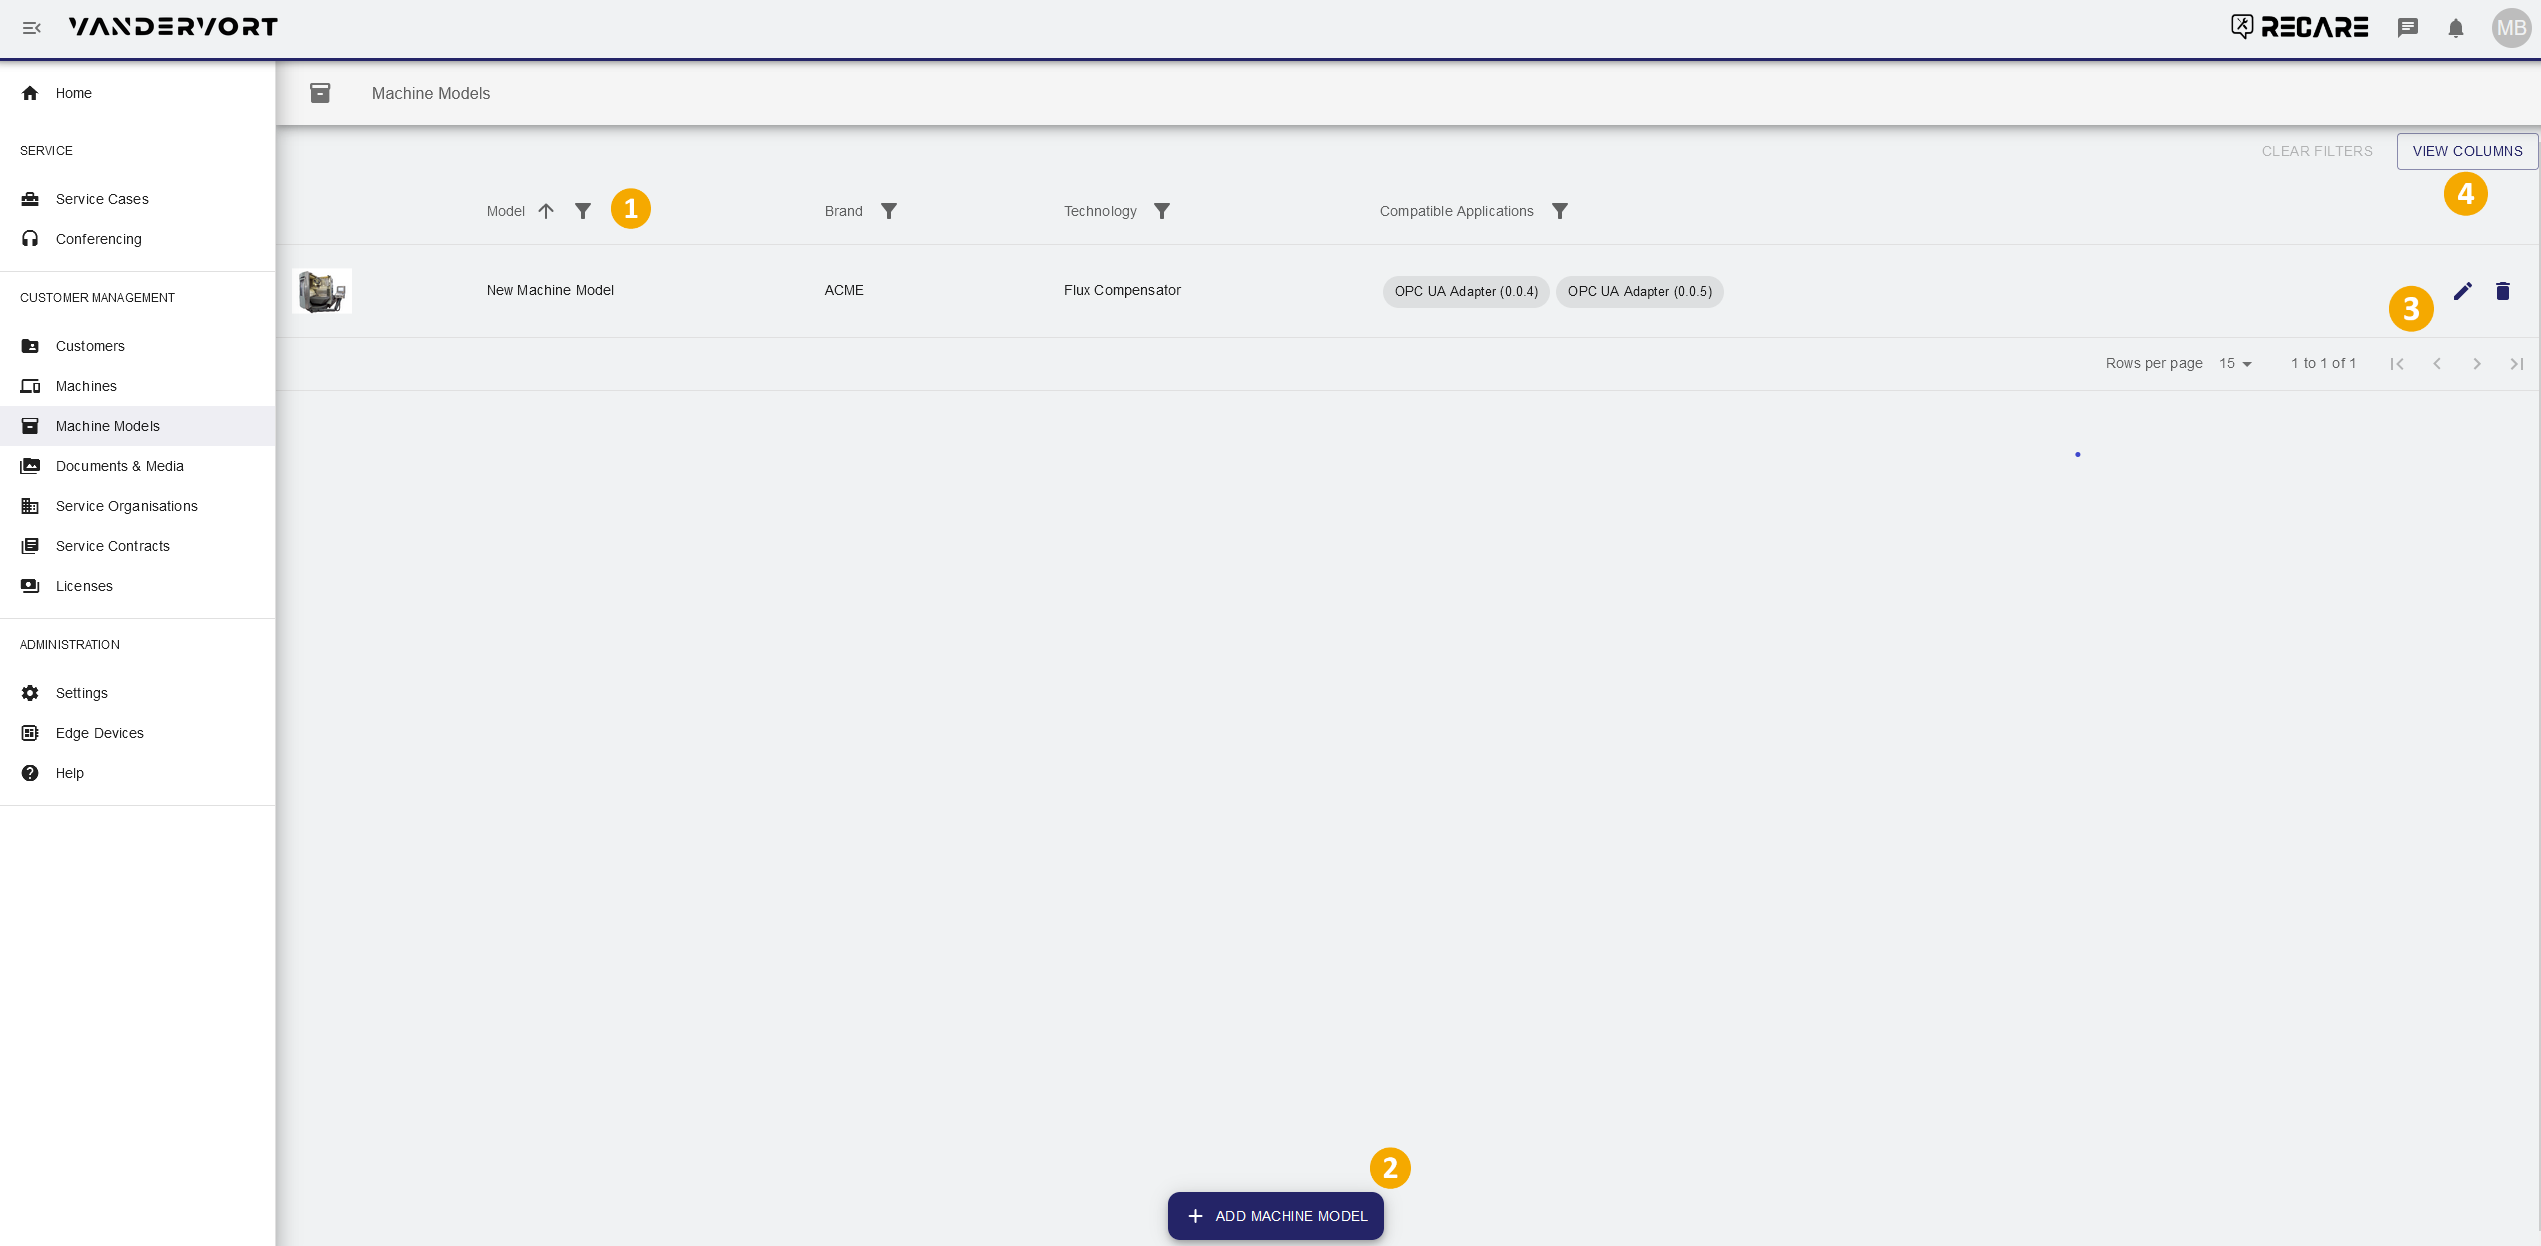
List of available machine models.
|
| ||
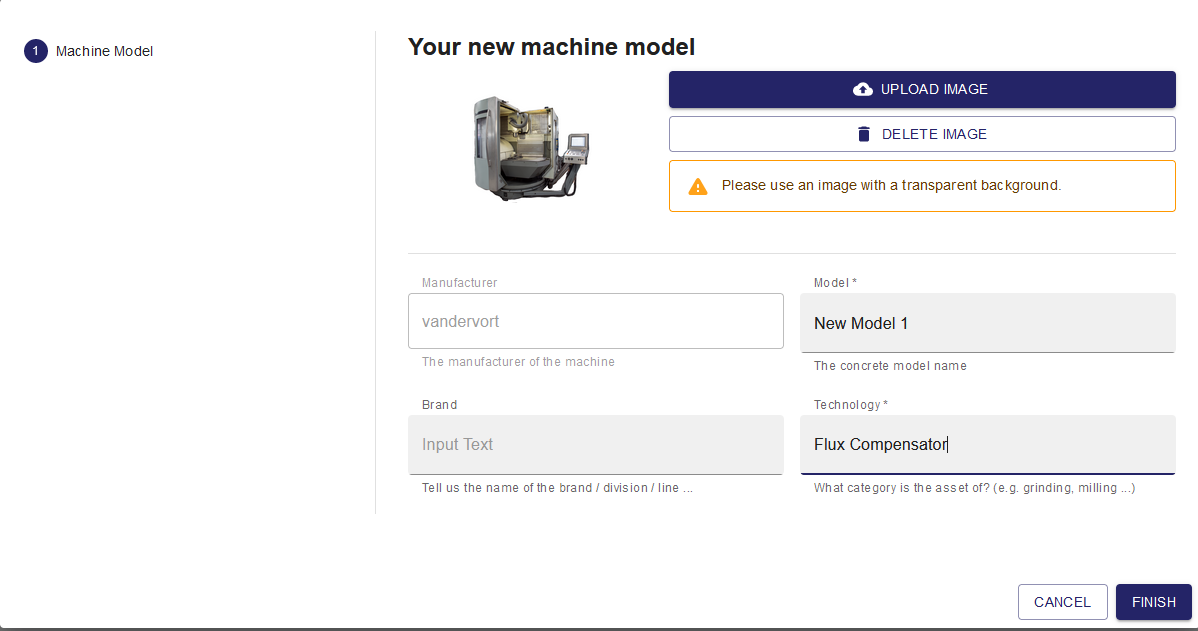
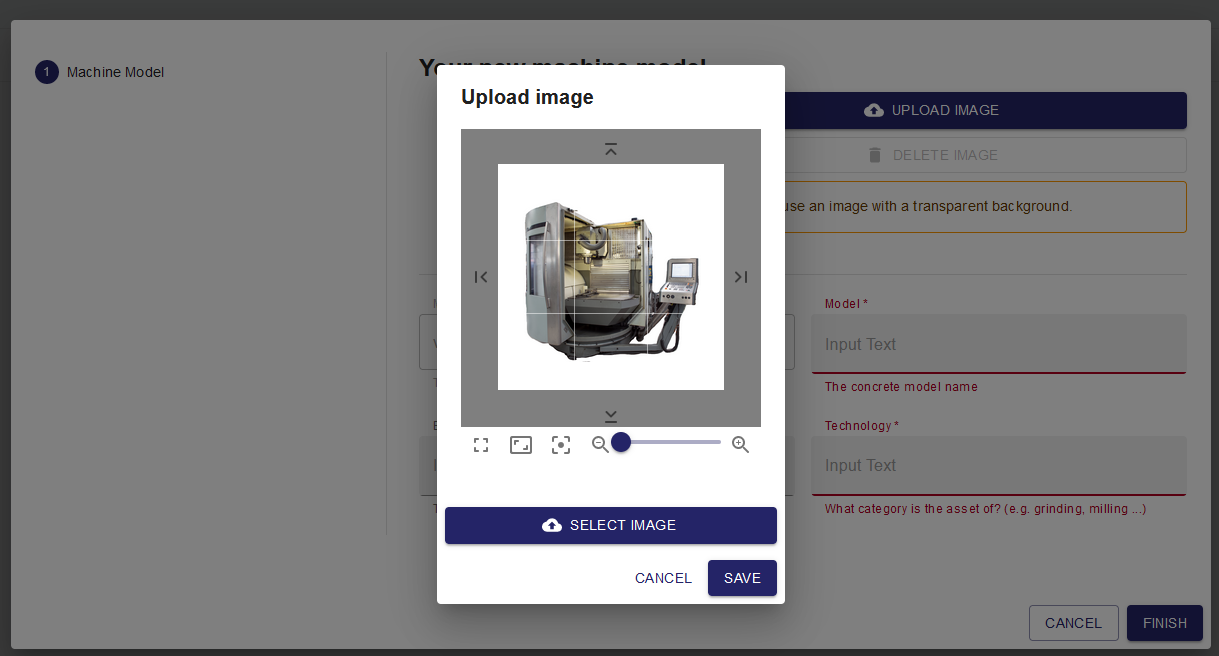
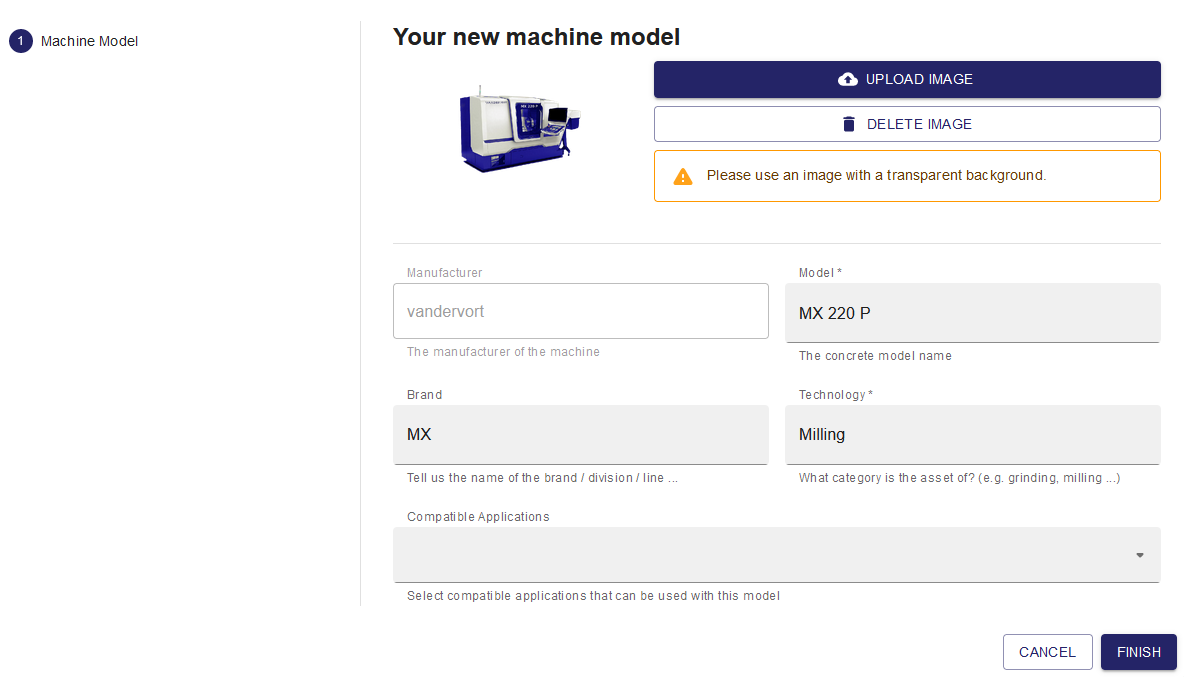
| A dialog for entering the machine model details opens.
|  | |
|  | ||
| The new machine model is now available in the overview. | 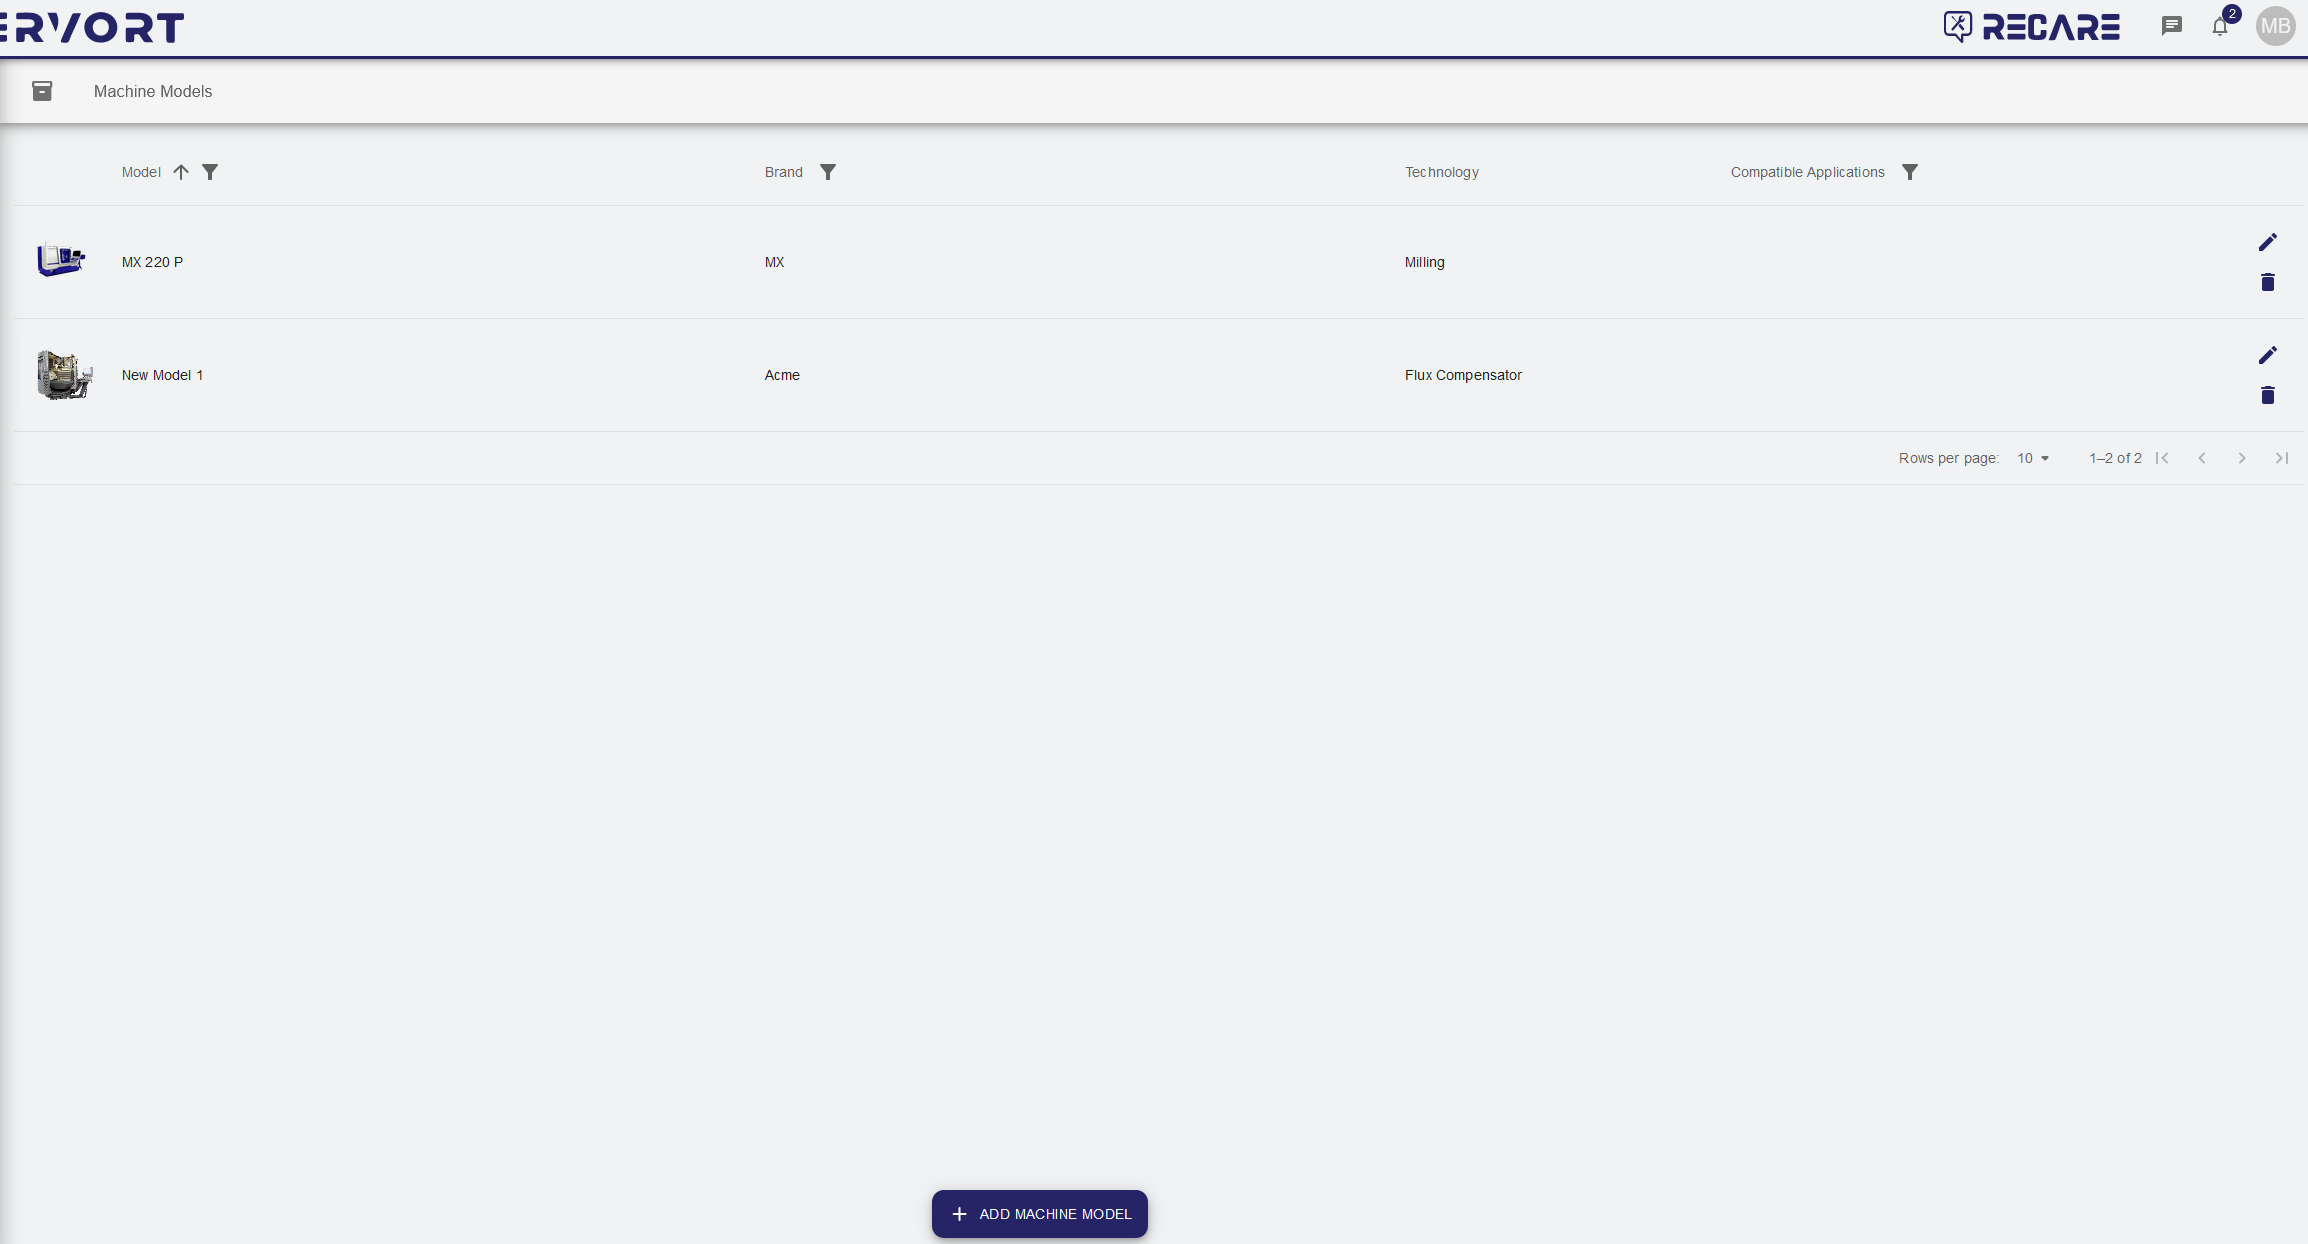 | ||
| After clicking the
|  | |
| | ||
|
The selections will be permanently stored for your user and can be reset to factory setting by clicking |
| |


Machine Model Detail View
- Click on a row to open the machine models detail view:
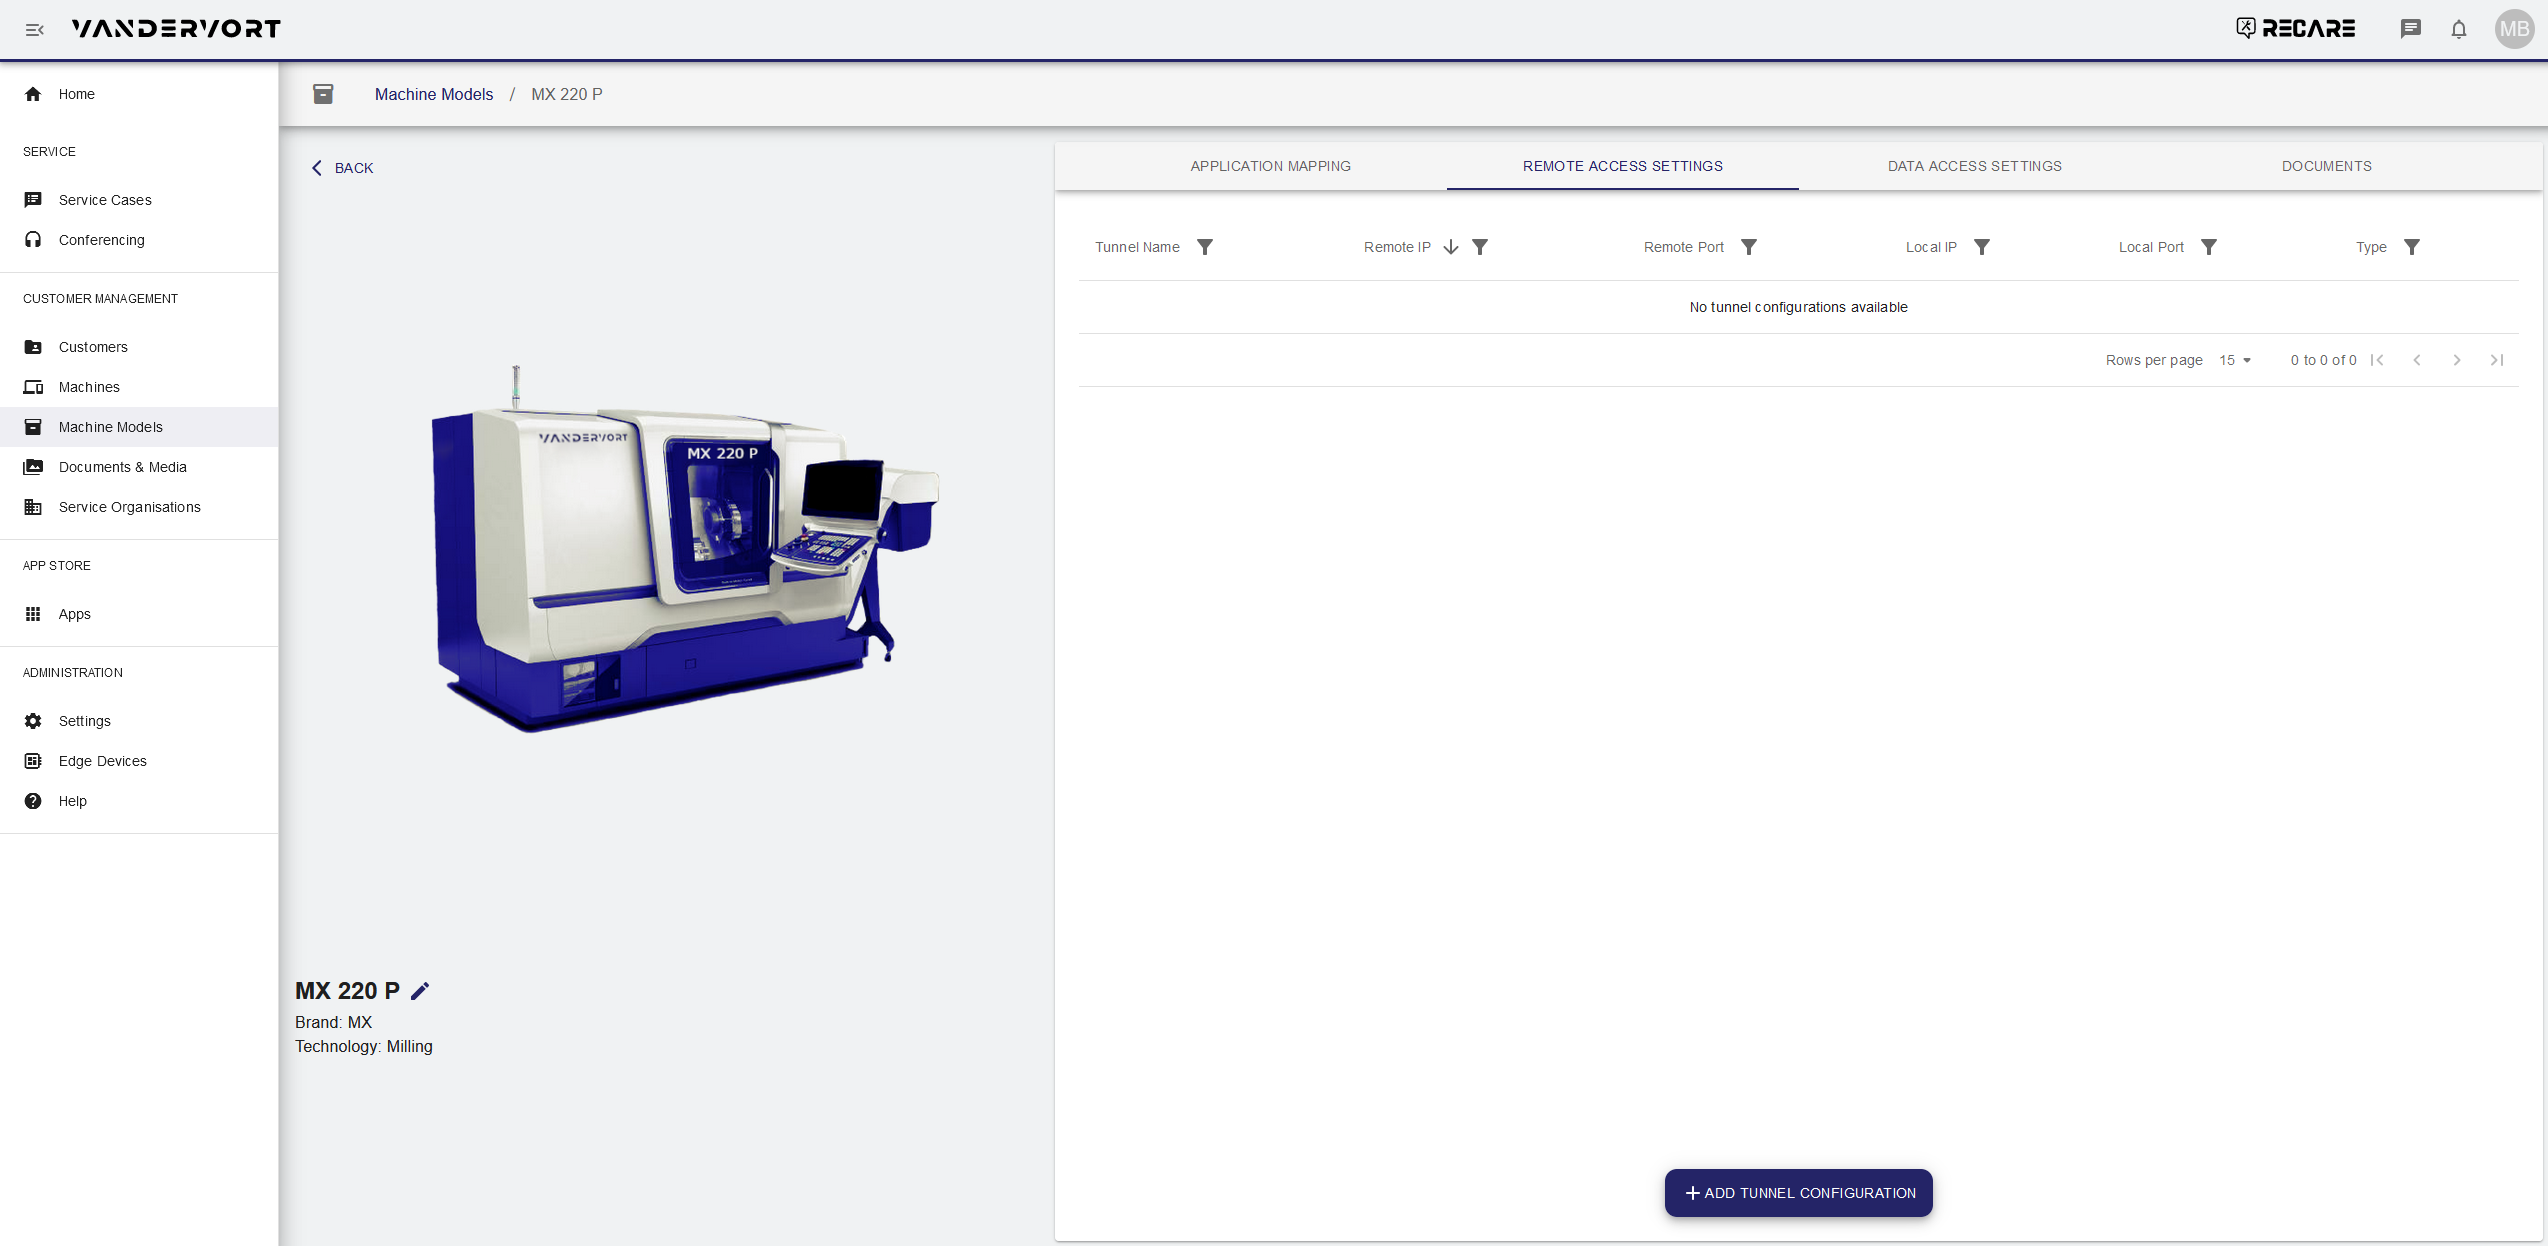
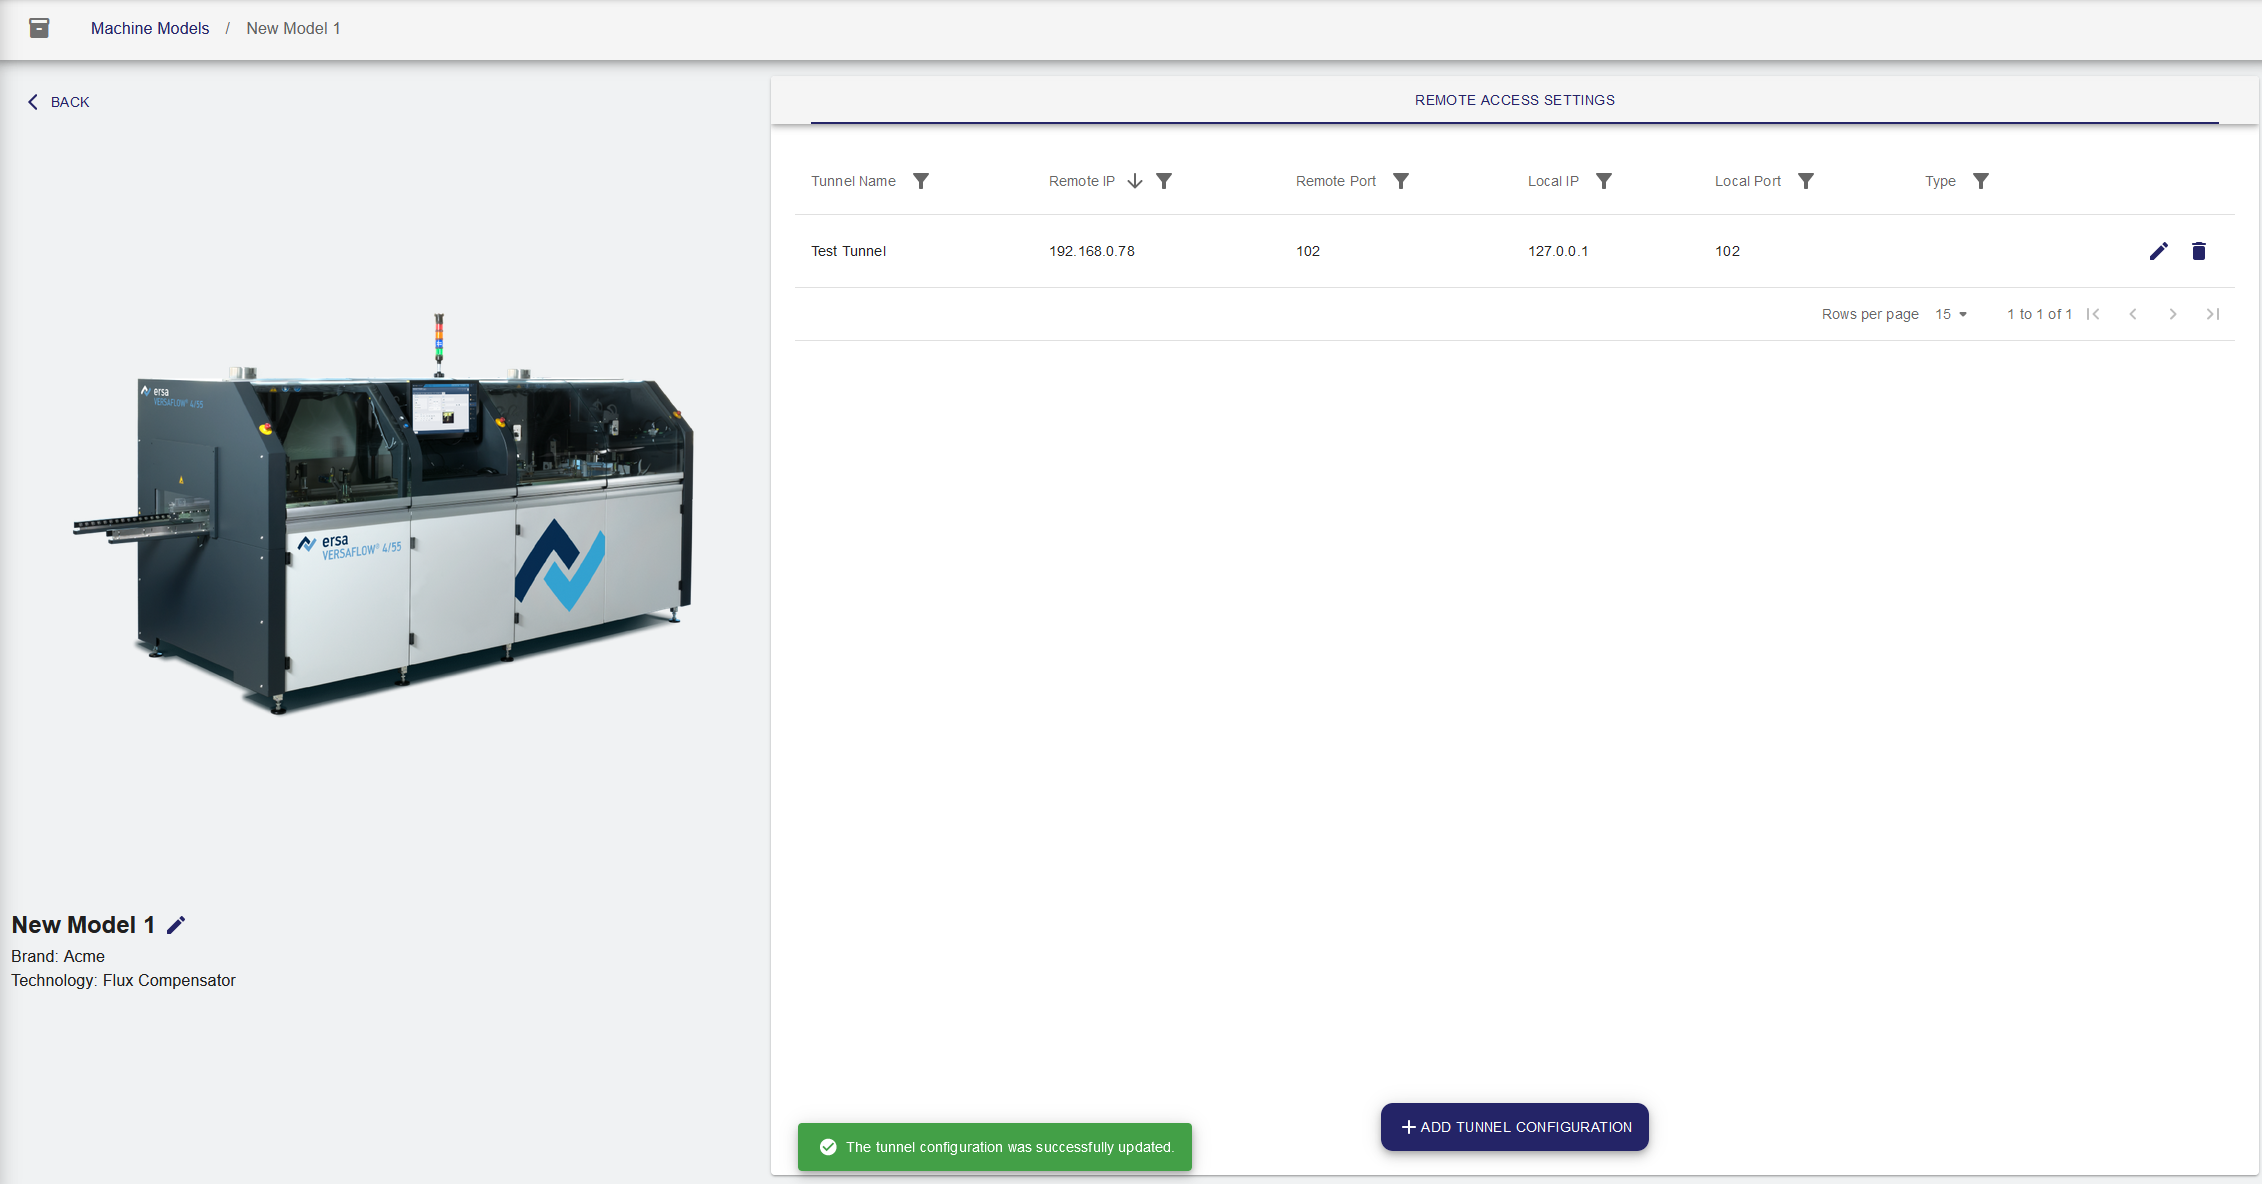
Remote Tunnel
Remote connections are set as defaults for connecting endpoints in the customer network (e.g. HMI, PLCs etc).
- To add a remote connection to your machine model, click on
 .
.
This opens a dialogue where you can configure this remote tunnel:

- Choose a Connection Type from the dropdown list. WebVNC, Tcp Tunnel or Data Link Tunnel are the available options.
- Add a name to the new connection (optional).
- Click
 .
.
The tunnel configuration dialogue opens:
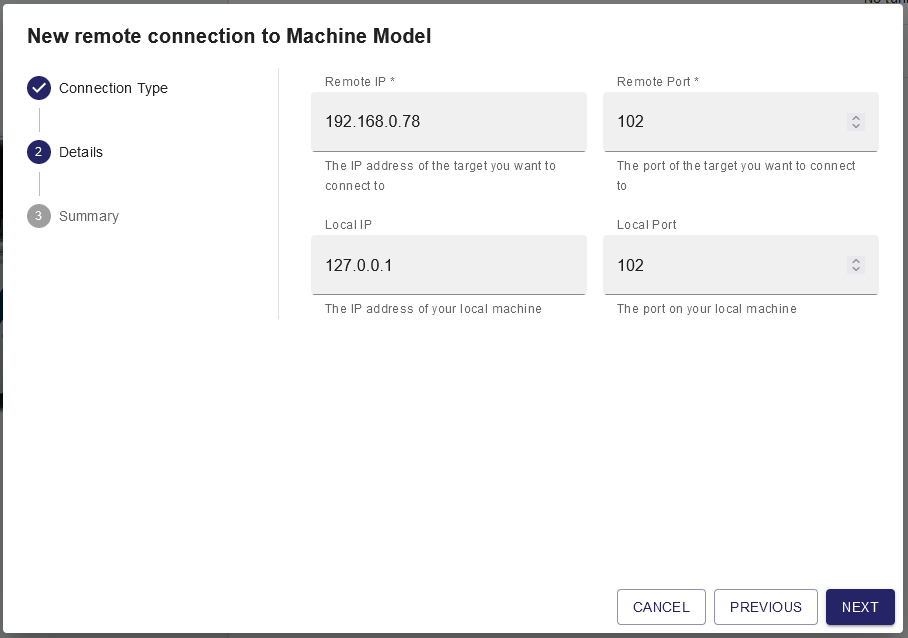
- Enter the IP address of the target you want to connect to in the field Remote IP.
- Enter the IP port of the target you want to connect to in the field Remote Port.
- Enter the IP address of your local machine in the field Local IP (optional).
- Enter the port of your local machine in the field Local Port (optional).
- Click .
A summary of your new configuration is displayed before creation:
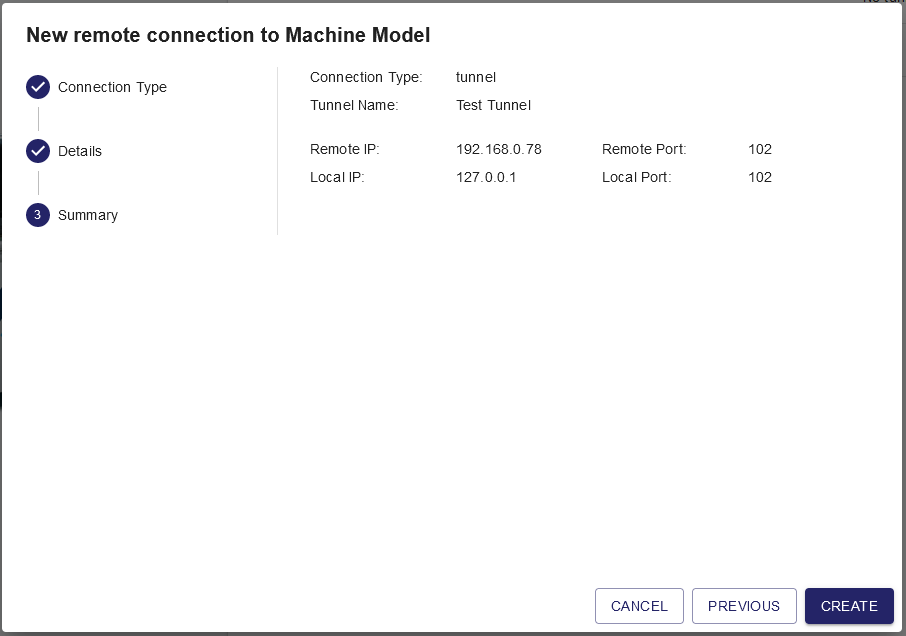
If all inputs are correct,
- create the remote connection by clicking on

or
- return to the previous step and edit your inputs via
 .
.
Your new remote tunnel connection is now successfully established: