Operator - Applications

The Applications module lists all apps that are already installed or that are available for the Operator’s Assets.

The app tiles show a short description of the application. A click on a tile takes you to the respective application detail page.

The following steps are exemplarily shown for the OPC UA Adapter Application. The required information within the installation wizard may differ for other applications.


Detail View / Installations


  • Click on the respective app panel to view the app specifics or install the app.

The app detail view opens:

If different versions of an application are available,

  • click on the hyperlink behind Version to display the specific version and its details

Depending on the version, the System Requirements panel shows the system requirements necessary to install the app on the Edge Device.

The Compatible Machine Models panel lists all Machine Models of an Operator's assets that have been marked as compatible with the respective version of the application by the Service Provider.
  • Click on to install the selected app on the Edge Device for the respective asset.


  • Select the Asset where you want to install the application from the Asset dropdown menu.

In this menu, it is only possible to select Connected Assets (with a paired Edge Device) as an Edge Device and a connection are mandatory. 

  • Proceed by clicking .

  • Configure the application (here is the configuration for the OPC UA Adapter application):

      • Buffer time: default 300s (leave at default if uncertain)
      • Device TimeZone override (leave empty if uncertain)
      • OPC UA Endpoint: The endpoint of the assets OPC UA server. If configured by your Service Provider, a default configuration will be displayed here. Please check your machine documentation or contact your Service Provider.
      • OPC UA Username & Password: (leave empty for anonymous authentication): If the OPC UA server is secured with username / password please, enter the values here. The default credentials are often found in the machines' manual.
      • SignAndEncrypt: Type in true if your login credentials should be encrypted and false if not.
      • Data Source Config Id*: The Data Source Configuration contains of the data points where data will be collected from and further configurations like sampling and pushing intervals. Usually this configuration should be preselected based on the configuration of your Service Provider. Please contact your Service Provide if this field is empty.
  • Proceed by clicking .


A summary of your input is displayed.

  • Return to your input by clicking  if you want to correct the entries.
  • Click on  to install the selected app on the Edge Device for the respective asset.

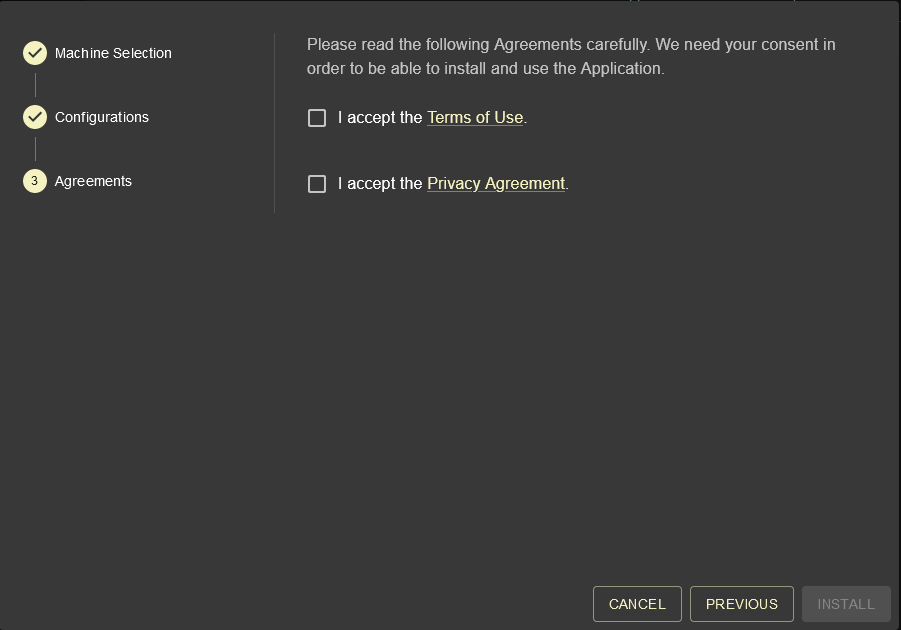
You may have to accept the respective Terms of Use and the Privacy Agreement before installing, depending on the application company's policies.

  • Mark the respective checkboxes.

A new entry appears in the Installations tab, with a new Installation Status: Installing. A green box at the bottom shows that the installation process was triggered successfully.

The installation is finished as soon as the Installation Status says Installed. The Application is now ready to use

  • Click on the button at the end of the row to edit the installation settings.


Edit an existing Installation


  • Click on the respective app to choose an application.
  • Click on the  button on the right hand side of the app installation to edit the application configuration entries.

You can now edit the entries you previously configured.

  • Edit the entry you want to change (here Buffer time KPI data (seconds) from 300 to 500.
  • Confirm your input by clicking .


Upgrade / Downgrade


  • Click on the hyperlink behind Version to check if an upgrade / older version for the application (here: OPC UA Adapter Version 0.0.8) is available.
  • Click on the  button on the right hand side of the app installation to upgrade / downgrade the application in this example: upgrade).

You can now edit the entries you previously configured before upgrading the application.

  • Click on to upgrade the application.

The application was now successfully upgraded (here from version 0.0.7 to version 0.0.8).


Uninstallation


  • Click on the respective app to choose an application.

  • Click on the  button on the right hand side of the app installation to proceed with the uninstallation of the application.

You are asked if you really want to delete the application from your app collection.

If the uninstallation of the application fails, you can also force the uninstallation by clicking on and checking the  option.

  • Confirm the uninstallation by clicking .


The application was successfully uninstalled.